Configure integrations
The Integrations tab is where you connect your Commerce development environment so the Commerce Developer Agent can generate, validate, deploy, and test your project. Configure integrations after you generate code on the Develop stage and before you deploy your app.
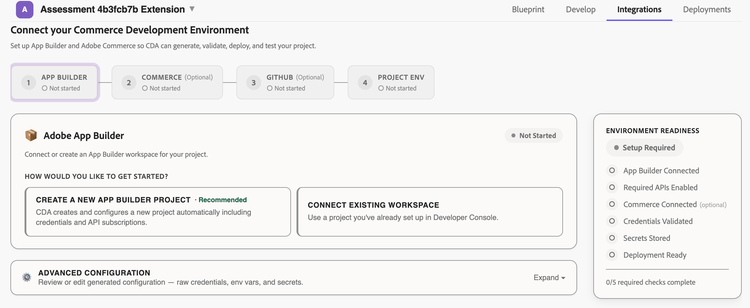
The tab guides you through four steps:
- App Builder — Connect or create the App Builder workspace your app deploys to.
- Commerce (optional) — Connect the Adobe Commerce as a Cloud Service instance your app integrates with.
- GitHub (optional) — Connect a GitHub repository so you can push generated code for continued development.
- Project env — Set the environment variables your project requires.
The agent shows only the integrations your generated project uses.
The Environment readiness panel on the right tracks your progress against the required checks and indicates when your environment is ready to deploy.
Connect or create an App Builder workspace
Under How would you like to get started?, choose one of the following options:
Create a new App Builder project (recommended)
Select Create a new App Builder project to have the agent create and configure a Developer Console project for you, including credentials and API subscriptions. This is the recommended option when you do not already have a project set up.
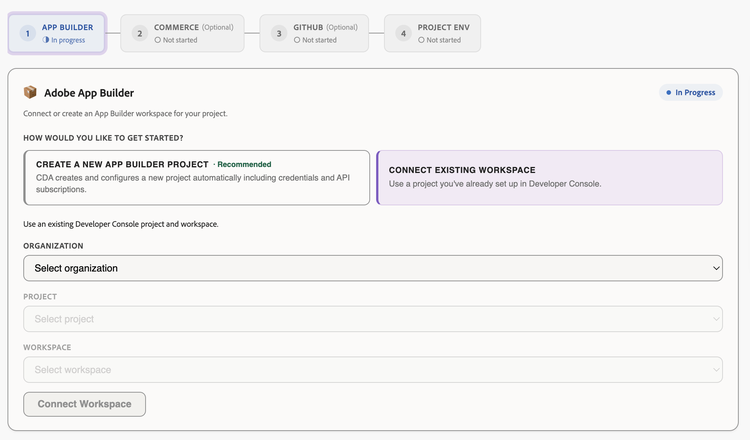
- Select your Organization and enter a new Project name.
- Click Connect Workspace.
- Select if you want to use the Production or Stage workspace or if you want to Create a new workspace.
- Click Set up workspace.
After the agent creates the project, manually add the Adobe Commerce as a Cloud Service API.
Connect an existing workspace
Select Connect existing workspace to use a project and workspace you already set up in the Adobe Developer Console.
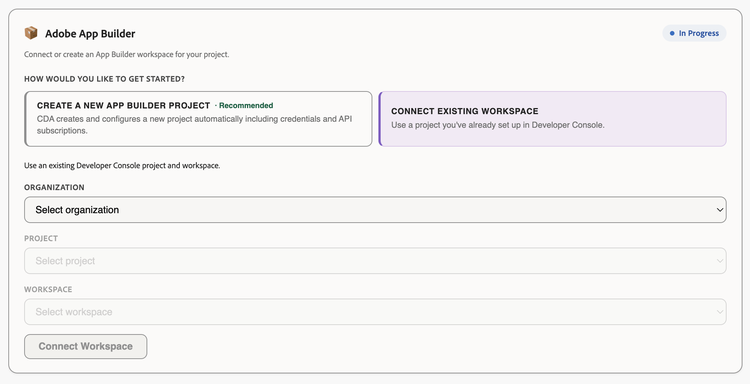
- Select your Organization, Project, and Workspace from the lists.
- Click Connect Workspace.
Make sure the workspace has the Runtime service added, along with the following APIs:
- Adobe Commerce as a Cloud Service
- I/O Management API
- App Builder Data Services
- I/O Events
- Adobe I/O Events for Adobe Commerce
The Required APIs section displays any missing APIs. After you add the missing APIs in the Developer Console, you can click Re-check status to update the list.
Import the App Builder workspace
Use the Import App Builder Workspace section to populate your workspace credentials from your workspace JSON file. To download your workspace JSON:
- Navigate to
https://developer.adobe.com/console/and log in. - Open your project and workspace.
- Click Download all in the top-right to download the workspace JSON file.
Then import the file with one of the following methods:
- Drag and drop — Drag your
workspace.jsonfile into the designated area or click Browse File to select the file. - Paste JSON — Click Paste JSON instead, paste the contents of your JSON file. Then click Apply Workspace JSON.
The agent populates all managed credentials from the imported workspace, so you do not enter them manually.
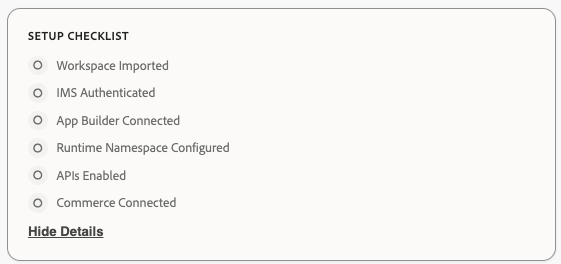
After you import the workspace, the Setup Checklist section indicates which credentials have been successfully imported. If any credentials are missing, you can enter them manually in the Advanced Diagnostics section.
Review advanced diagnostics
Expand Advanced Diagnostics to review or edit the raw credentials the agent captured from your imported workspace:
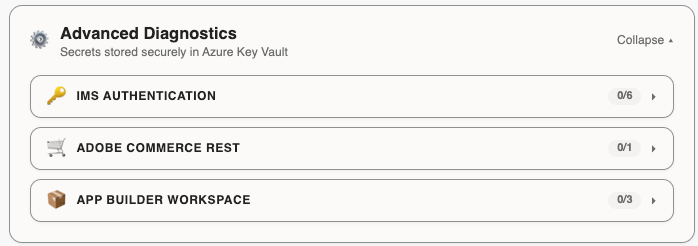
You can review or edit each group of values individually. The Advanced Diagnostics section includes the following groups.
IMS authentication
These credentials allow the agent to authenticate with Adobe Identity Management Services:
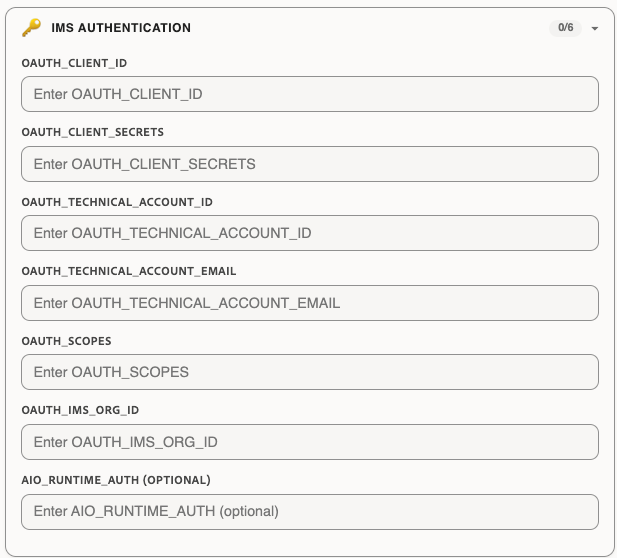
OAUTH_CLIENT_IDOAUTH_CLIENT_SECRETSOAUTH_TECHNICAL_ACCOUNT_IDOAUTH_TECHNICAL_ACCOUNT_EMAILOAUTH_SCOPESOAUTH_IMS_ORG_IDAIO_RUNTIME_AUTH
data-variant=info
data-slots=text
Adobe Commerce REST
These credentials allow you to connect to the Adobe Commerce REST API.
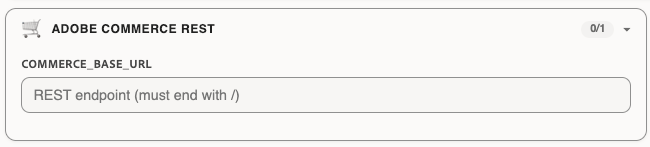
COMMERCE_BASE_URL— The REST endpoint for your Commerce instance. The URL must end with a slash (/).
App Builder workspace
These values are auto-populated from the workspace after you connect. Edit them only if necessary:
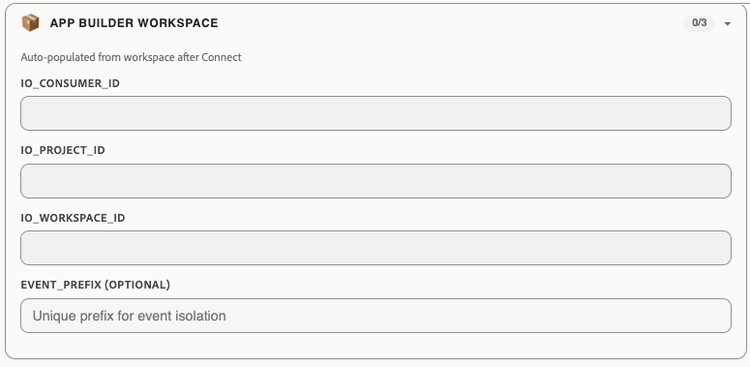
IO_CONSUMER_IDIO_PROJECT_IDIO_WORKSPACE_IDEVENT_PREFIX— A unique prefix for event isolation.
After you review the advanced diagnostics, click Next to continue.
Connect to Commerce
Connect an Adobe Commerce as a Cloud Service instance from your IMS organization to allow the agent to generate Commerce-aware configuration, events, and deployment settings.
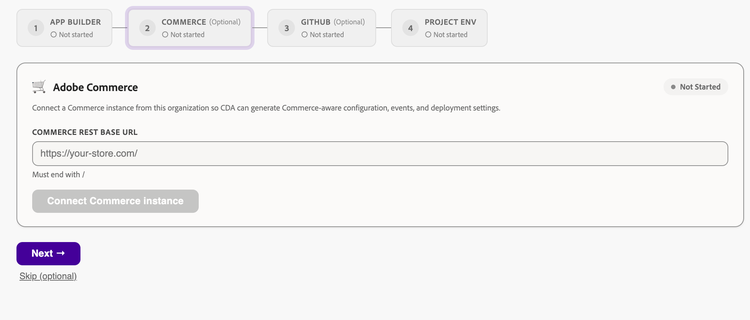
If you connect to IMS and select Create a new App Builder project on the App Builder tab, the agent automatically lists all available Commerce instances in the selected organization.
Alternatively, enter the URL for your Adobe Commerce as a Cloud Service instance in the Commerce REST base URL, field. The URL must end with a slash (/).
data-variant=info
data-slots=text
https://experience.adobe.com/#/@<your-org-name>/commerce/cloud-service/instancesClick Validate URL to verify the connection and then click Connect.
Click Next to continue, or click Skip (optional) to skip this step.
Connect to GitHub
Connect a repository to allow the agent to push code directly to GitHub and create pull requests.
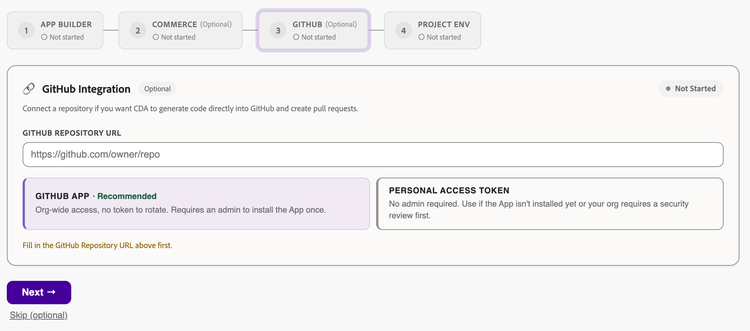
In GitHub repository URL, enter the repository address, such as https://github.com/owner/repo. Then authenticate with one of the following methods:
- GitHub App (recommended) — Provides org-wide access with no token to rotate. Requires an administrator to install the app once by clicking the link to the install page and installing the app to the desired repository.
- Personal access token — Requires no administrator. Use this method if the app is not installed yet or your organization requires a security review first.
- Paste your GitHub token in the Personal Access token field and click Connect. The token must have access to the
Contents (read/write)andPull requests (read/write)scopes.
- Paste your GitHub token in the Personal Access token field and click Connect. The token must have access to the
Connecting a repository here also enables pushing generated code to GitHub for continued development outside the agent.
Click Next to continue, or click Skip (optional) to skip this step.
Review project environment variables
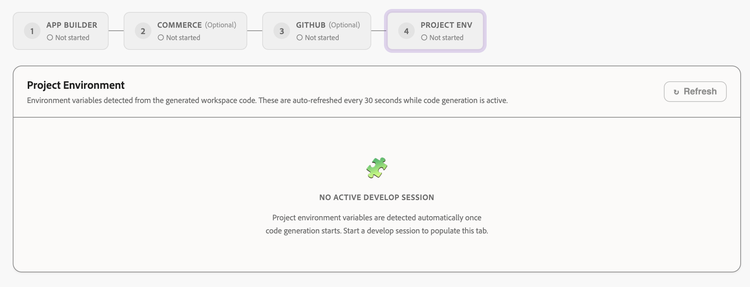
On the Project env step, the agent lists the environment variables it detects from the generated workspace code. These variables are separate from the managed credentials captured during the workspace import, so you do not re-enter those values here. While code generation is active, this list auto-refreshes regularly. You can also click Refresh to update it manually.
If no develop session is active, the tab is empty. Start a develop session to populate it.
Environment variables security
The environment variables you configure in the Project env section are stored securely in an encrypted, per-project secret store. The agent injects them into your app's environment at deploy time, so they reach the deployed workspace .env file.
data-variant=info
data-slots=text
Your stored values are encrypted at rest and isolated to your project.
Set and manage variables
When you set variables in the Project env section, consider the following:
- Stored values are masked when you reload the step. Use the reveal or hide control on each key to view or conceal its value.
- Submitting an empty value does not overwrite a value that is already stored.
- Reserved, agent-managed keys cannot be set here, including:
OAUTH_*,AIO_RUNTIME_*,AIO_COMMERCE_AUTH_IMS_*, andGITHUB_*. The Commerce Developer Agent manages these credentials for you.
Troubleshoot missing variables
If an environment variable is empty in your deployed app:
- Confirm a develop session ran and the variable appears in the Project env section.
- Confirm the variable is not a reserved, agent-managed key.
- Re-deploy your app so that the stored values are rebuilt into the app's
.envfile.
Track environment readiness
As you complete each step, the Environment readiness panel updates its status. The panel tracks the following checks:
- App Builder connected
- Required APIs enabled
- Commerce connected (optional)
- Credentials validated
- Secrets stored
- Deployment ready
When all required checks are complete, your environment is ready and you can deploy your app.
Next step
After you configure integrations, deploy and install your app.