Smart Object Workflow
For authentication, API key, and storage setup, see Using these guides.
Example 1: Adding a linked smart object
Add a linked smart object layer, then call generate-manifest to confirm it appears as linked in the manifest.
Placeholders for Step 1
Replace these placeholders in the request payload below:
<SIGNED_INPUT_ASSET_GET_URL><SIGNED_SMART_OBJECT_ASSET_GET_URL><SIGNED_OUTPUT_POST_URL>Step 1 — Create composite (add linked smart object)
Endpoint: POST /v2/create-composite
Request payload:
{
    "image": {
        "source": {
            "url": "<SIGNED_INPUT_ASSET_GET_URL>"
        }
    },
    "edits": {
        "layers": [
            {
                "type": "smart_object_layer",
                "name": "Linked Added Smart Object",
                "operation": {
                    "type": "add",
                    "placement": {
                        "type": "top"
                    }
                },
                "smartObject": {
                    "isLinked": true,
                    "smartObjectFile": {
                        "source": {
                            "url": "<SIGNED_SMART_OBJECT_ASSET_GET_URL>"
                        }
                    }
                }
            }
        ]
    },
    "outputs": [
        {
            "destination": {
                "url": "<SIGNED_OUTPUT_POST_URL>"
            },
            "mediaType": "image/vnd.adobe.photoshop"
        }
    ]
}
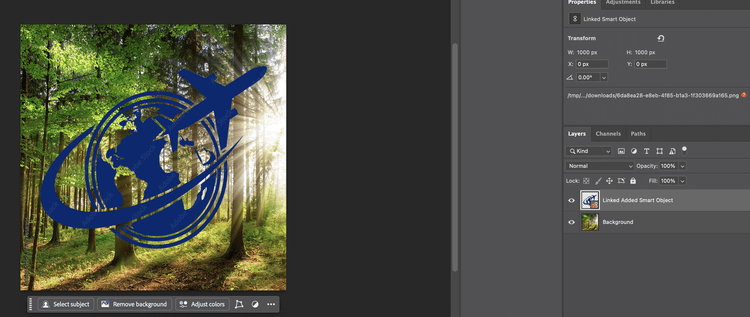
The generated output is a PSD with a linked smart object layer added on top, as shown in the image below.
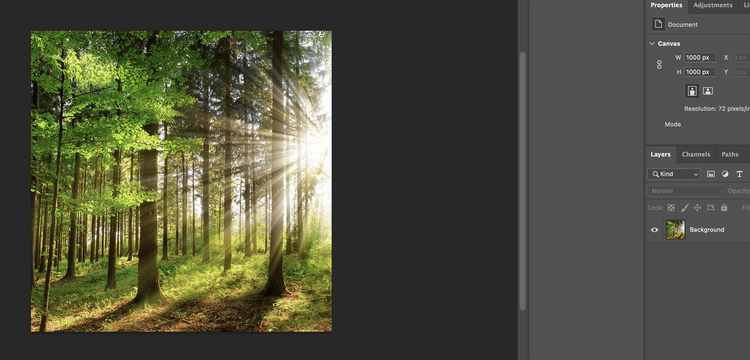
Before: Original PSD.
Step 2 — Generate manifest
Use the presigned GET URL of the output PSD from Step 1 as image.source.url below. That URL points to the PSD you just created.
Placeholders for Step 2
Replace these placeholders in the request payload below:
<SIGNED_OUTPUT_PSD_GET_URL>Endpoint: POST /v2/generate-manifest
Request payload:
{
    "image": {
        "source": {
            "url": "<SIGNED_OUTPUT_PSD_GET_URL>"
        }
    },
    "outputs": [
        {
            "destination": {
                "embedded": "json"
            },
            "mediaType": "application/json"
        }
    ]
}
Use the generated PSD's from above URL from Step 1 as image.source.url. A call to this API initiates an asynchronous job and returns a response containing a URL. Use the value in the href field to poll for the status of the job and the same response will also contain the JSON manifest.
Step 3 — Result: linked smart object in manifest Relevant layer snippet from the manifest JSON:
"smartObject": {
    "isSmartObject": true,
    "isLinked": true,
    "isValid": true,
    "smartObjectData": {
        "type": "smartObject",
        "transform": [
            0,
            0,
            1000,
            0,
            1000,
            1000,
            0,
            1000
        ],
        "fileInfo": {
            "relative": "../../df06670e-467a-4880-a697-cfc162f313c3/downloads/c89b3884-3df6-444e-9540-a0c26af33ddc.png",
            "name": "c89b3884-3df6-444e-9540-a0c26af33ddc.png",
            "path": "/tmp/df06670e-467a-4880-a697-cfc162f313c3/downloads/c89b3884-3df6-444e-9540-a0c26af33ddc.png",
            "fileType": "png",
            "linked": true
        }
    }
}
As seen from above manifest snippet - for linked smart objects, linked property is true along with the path information to the linked file.
Example 2: Replacing a smart object with a linked file
Edit an existing smart object layer and replace its content with a different linked file. The input PSD must already contain the smart object layer you want to replace. In this example, we use the output PSD from Example 1 and replace its linked smart object with another one.
Placeholders for Example 2
Replace these placeholders in the request payload below:
<SIGNED_INPUT_ASSET_GET_URL><EXISTING_SMART_OBJECT_LAYER_NAME><SIGNED_NEW_SMART_OBJECT_GET_URL><SIGNED_OUTPUT_POST_URL>Step 1 — Create composite (replace with a linked smart object)
Endpoint: POST /v2/create-composite
Request payload:
{
    "image": {
        "source": {
            "url": "<SIGNED_INPUT_ASSET_GET_URL>"
        }
    },
    "edits": {
        "layers": [
            {
                "type": "smart_object_layer",
                "name": "<EXISTING_SMART_OBJECT_LAYER_NAME>",
                "operation": {
                    "type": "edit"
                },
                "smartObject": {
                    "isLinked": true,
                    "smartObjectFile": {
                        "source": {
                            "url": "<SIGNED_NEW_SMART_OBJECT_GET_URL>"
                        }
                    }
                }
            }
        ]
    },
    "outputs": [
        {
            "destination": {
                "url": "<SIGNED_OUTPUT_POST_URL>"
            },
            "mediaType": "image/vnd.adobe.photoshop"
        }
    ]
}
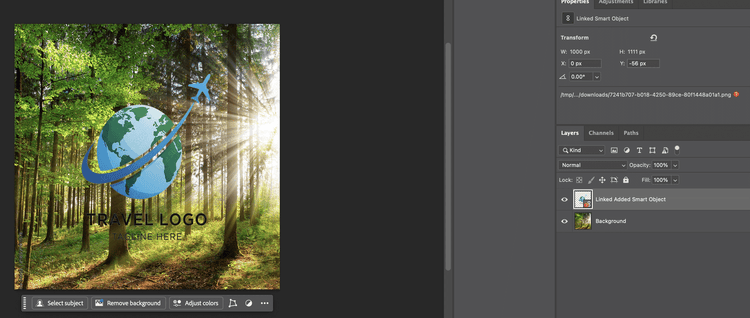
The generated output is a PSD with a linked smart object layer added on top, as shown in the image below.
Before: PSD with linked smart object (from Example 1).
Example 3: Replacing smart object content inside the existing frame
Edit an existing embedded smart object (for example, a photo placeholder in a template) and place a new image inside its current frame with smartObject.contentPlacement. With "mode": "fill" the image covers the whole frame and the part outside the frame is cropped; the layer keeps its original size and position. With "mode": "fit" the whole image is shown inside the frame instead.
Placeholders for Example 3
Replace these placeholders in the request payload below:
<SIGNED_INPUT_ASSET_GET_URL><EXISTING_SMART_OBJECT_LAYER_NAME><SIGNED_NEW_IMAGE_GET_URL><SIGNED_OUTPUT_POST_URL>Step 1 — Create composite (replace content inside the existing frame)
Endpoint: POST /v2/create-composite
Request payload:
{
    "image": {
        "source": {
            "url": "<SIGNED_INPUT_ASSET_GET_URL>"
        }
    },
    "edits": {
        "layers": [
            {
                "type": "smart_object_layer",
                "name": "<EXISTING_SMART_OBJECT_LAYER_NAME>",
                "operation": {
                    "type": "edit"
                },
                "smartObject": {
                    "smartObjectFile": {
                        "source": {
                            "url": "<SIGNED_NEW_IMAGE_GET_URL>"
                        }
                    },
                    "contentPlacement": {
                        "mode": "fill",
                        "horizontalAlign": "left",
                        "verticalAlign": "top"
                    }
                }
            }
        ]
    },
    "outputs": [
        {
            "destination": {
                "url": "<SIGNED_OUTPUT_POST_URL>"
            },
            "mediaType": "image/vnd.adobe.photoshop"
        }
    ]
}
horizontalAlign and verticalAlign are optional and default to left and top. With fill they choose which part of the image stays visible; for example, "horizontalAlign": "center" crops a landscape image equally on both sides. Do not include transformMode, transform, or smartObject.autoResize in the same layer edit; the request is rejected if they are combined with contentPlacement.
Opening the output PSD in Photoshop
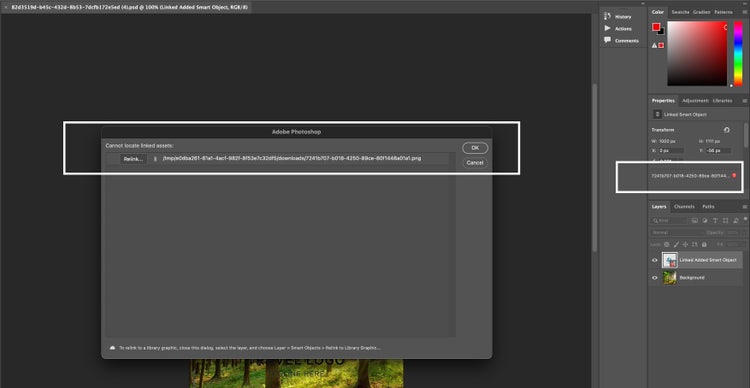
When you open the output PSD locally in Photoshop, you may see a "missing file" prompt for the linked smart object. This is expected behavior, not a bug. The path stored inside the PSD points to the server location where the file resided during processing — that path will not resolve on your local machine. Photoshop is correctly flagging the broken link.
You have two options depending on your workflow:
-
Relink locally. Keep a copy of the source asset (the file you passed as the linked smart object) somewhere accessible on your machine. In Photoshop, use the Layer panel → Smart Objects → Relink to File,

or respond to the missing-link dialog when the PSD opens. Once relinked, Photoshop will remember the new path.
-
Use embedded smart objects instead. If portability matters more than the linked-asset workflow — for example, when handing off the PSD to an end user who just wants to open and work without managing external files — embedded smart objects travel with the PSD and eliminate the relinking step. Set
"isLinked": false(or omitisLinked) in thesmartObjectblock to embed rather than link. Linked smart objects are the right choice when you manage your own asset pipeline and want explicit control over source files; embedded is generally smoother for hand-off scenarios.