Build Your First Plugin
Scaffold, load, and run a plugin inside your host application, reloading live as you edit: the same loop you'll use for every plugin after this. Examples use Photoshop, but the workflow is identical across every UXP-enabled host.
Prerequisites
Before you start, make sure you have:
- Your host application installed: Photoshop, Premiere, InDesign, or Media Encoder.
- The UXP Developer Tool (UDT), with Developer Mode enabled.
- A code editor of your choice, such as Visual Studio Code.
1. Scaffold your plugin
UDT can scaffold a ready-to-run plugin from a starter template instead of you starting from a blank folder. Open UDT and click Create Plugin.
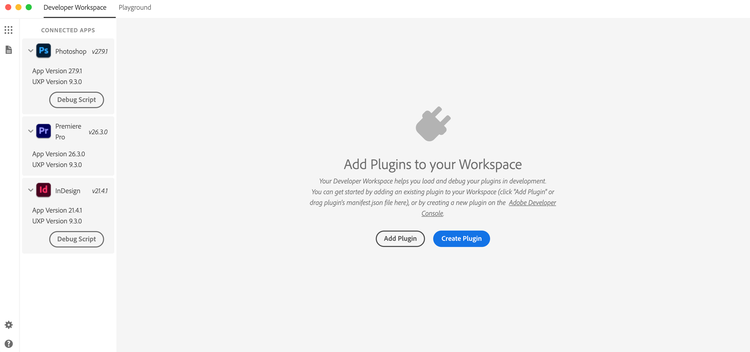
Clicking Create Plugin opens a dialog where you fill in the plugin's details. Find the column for the host you're building for and use the sample values below; they're safe to enter as-is for this first plugin. The values are nearly identical across hosts: only the Host Application and Template rows differ.
pr-quick-starterame-quick-starterquick-layers-starterquick-starterSelect a host to see how its values appear in the UXP Developer Tool.
data-orientation=horizontal
data-slots=heading, content
data-repeat=4
Premiere
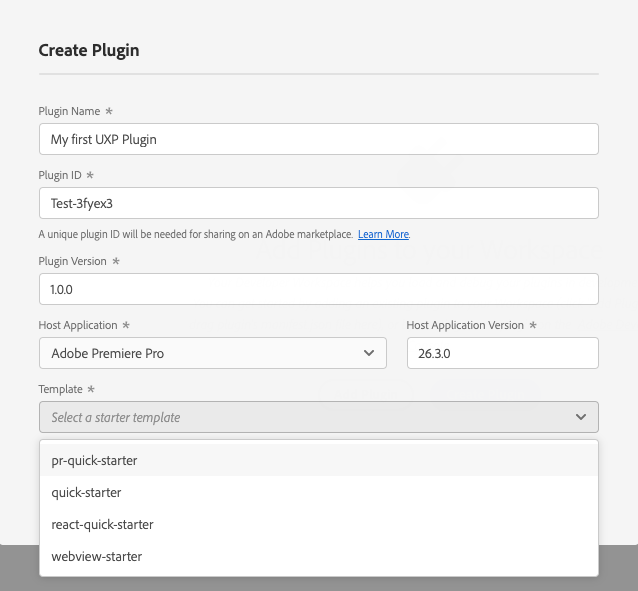
Media Encoder
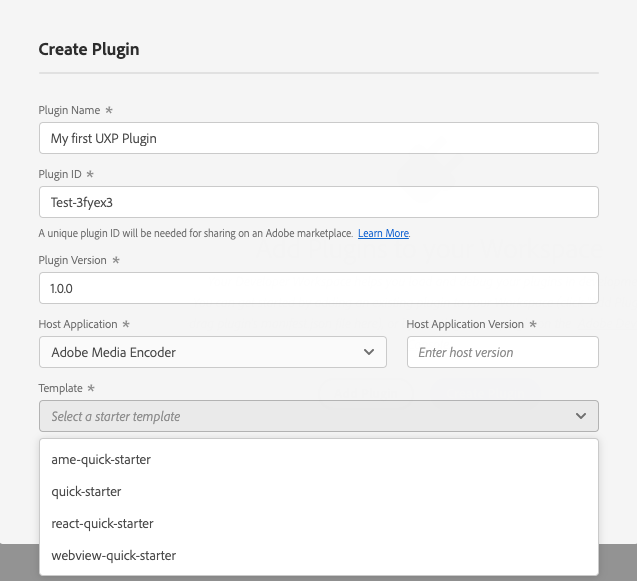
Photoshop
InDesign
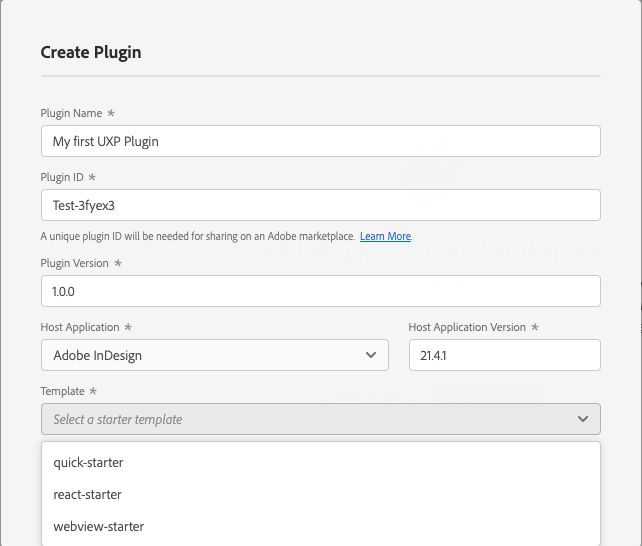
The table uses a host-specific starter, but the Template dropdown also lists general-purpose ones that work with any host. Pick whichever matches what you want to build:
quick-starter: plain HTML, CSS, and JavaScript.react-starter: a React-based panel.webview-starter: a panel that loads a web view.
Click Select Folder and choose where to save the plugin. UDT creates a folder named after the Plugin ID, holding everything the plugin needs to run:
manifest.json: the plugin's configuration.index.html: the panel's user interface.index.jsormain.js: the plugin's logic.README.md: notes on the starter.
2. Load it into your host application
Start your host application and confirm UDT can see it. It'll show up in the left pane.
In UDT, click Load & Watch in your plugin's row. This loads the plugin into the host and watches for source changes, reloading automatically. Keep the app open, and the panel appears in whichever host you loaded into.
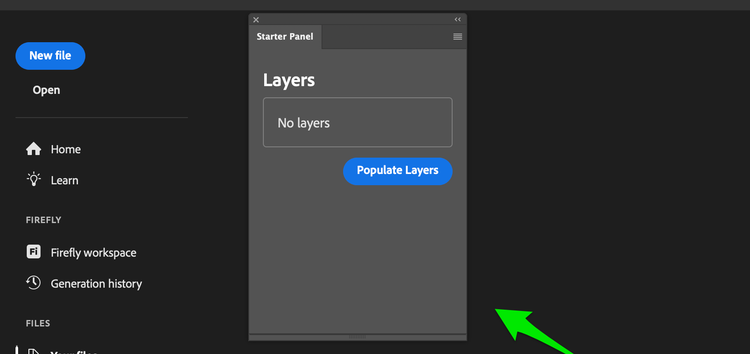
The panel appears in the host after UDT loads it. The process is the same for Photoshop, Premiere, InDesign, and Media Encoder: keep the app open, click Load & Watch, and the panel shows up in that app.
data-slots=text
3. Edit the plugin's UI
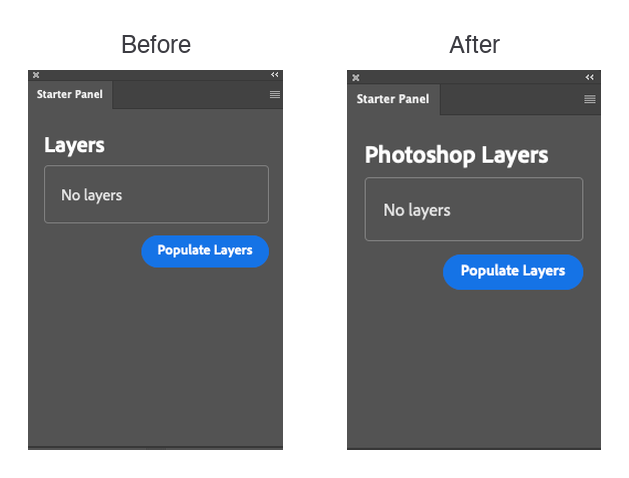
With the panel running, open index.html in your code editor. The quick-layers starter renders a Layers heading; change its text:
<sp-heading>Photoshop Layers</sp-heading>
Save the file. Load & Watch reloads the plugin automatically, and the panel heading changes from Layers to Photoshop Layers:
data-slots=heading, text
data-variant=warning
Manifest changes
manifest.json, you must manually unload and reload the plugin. In UDT, click Unload, then Load & Watch again.4. Explore what your plugin can do
The starter is small but complete: a panel with a control that calls into the host. Click the button in its panel to see it run, then open index.js (or main.js) to see how the code reads from the host and updates the panel.
That same pattern covers real work, whichever host you target. Your plugin talks to two API surfaces: the shared UXP APIs for the file system, network, storage, and more, and the host's own API for its documents, selections, and content. Check your host's reference under Host Apps in the top navigation to see what it exposes.
Next steps
You've got the loop: scaffold, load, edit, reload. Everything else you build follows the same pattern.
- Explore Concepts to understand manifests, entry points, panels, and commands in depth.
- Browse the Premiere API or Media Encoder API reference, or your host's own API reference if you're building for Photoshop or InDesign.
- Coming from CEP or ExtendScript? See Migrate from CEP and ExtendScript for what carries over.