Get your environment file
There are two ways you can get a Postman environment file:
- Download an
Environment Templatefrom our Github repository here - Utilize the environment file you downloaded directly from your Developer Project covered in this guide
If you do not have an environment file proceed with option #1 listed above.
Copy the Environment Template
Navigate to the Experience Platform Postman Samples Github repository and copy the Postman Environment Template

You can skip this step you already have your environment file from following the Developer Console Guide
Import the Postman Environment
Open the Postman application and in the sidebar click on the
Importbutton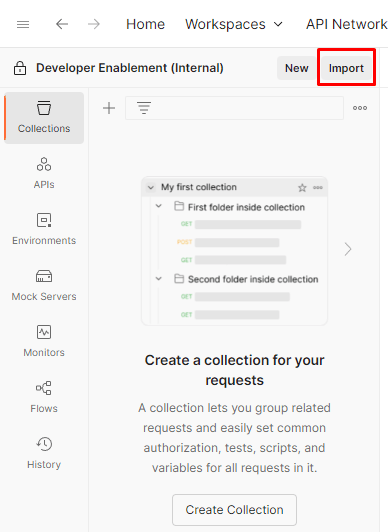
A new window should open. Be sure to select the 'Raw text' option and then paste in the raw text you copied in the previous step. When done click
Continueto load the Postman Environment.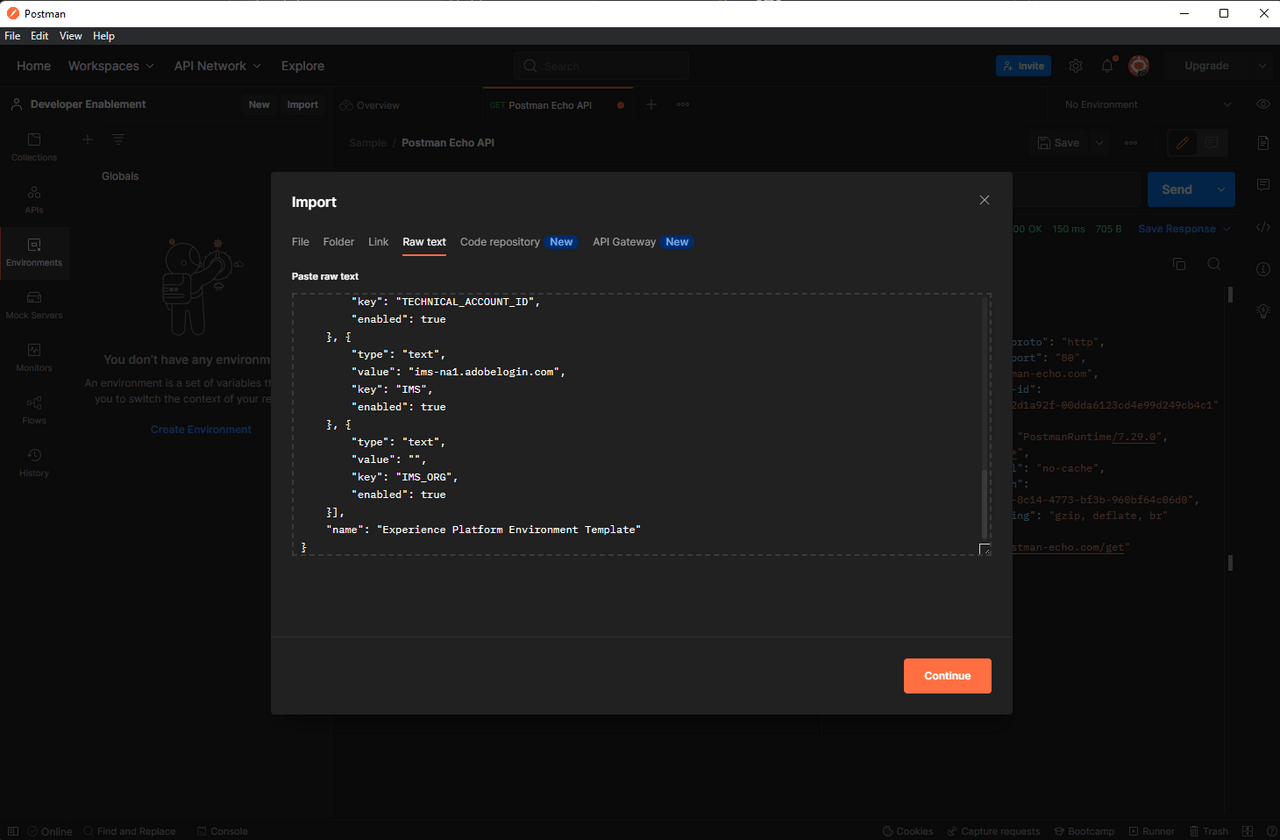
If you have your Developer Project environment file handy chose the File option and import the service.postman_environment.json file
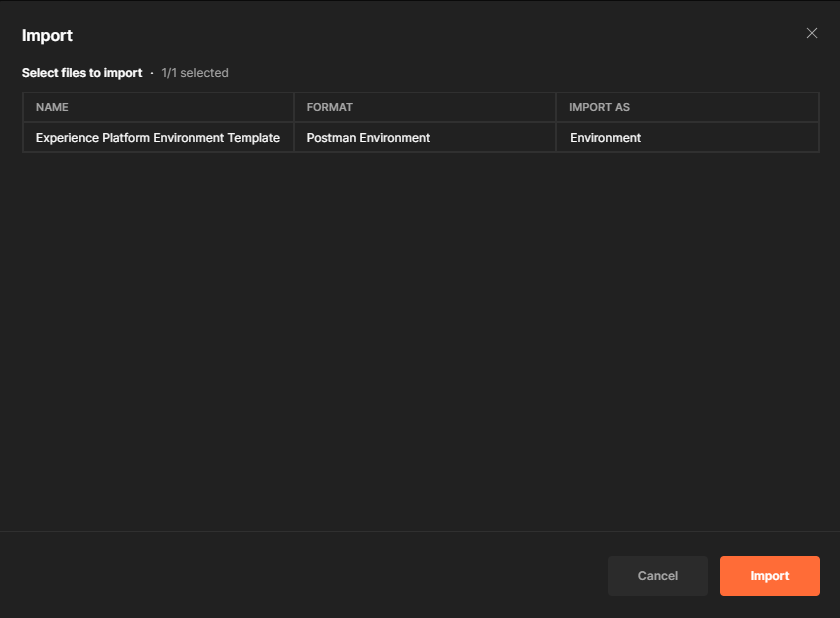
- On the next screen you will be presented with the details about the Environment. You'll change the name in the next step so go ahead and click
Import
Rename your Environment
In your Postman app click on
Environmentsin the sidebar and then click on the environment name you just imported. You should now see the screen below.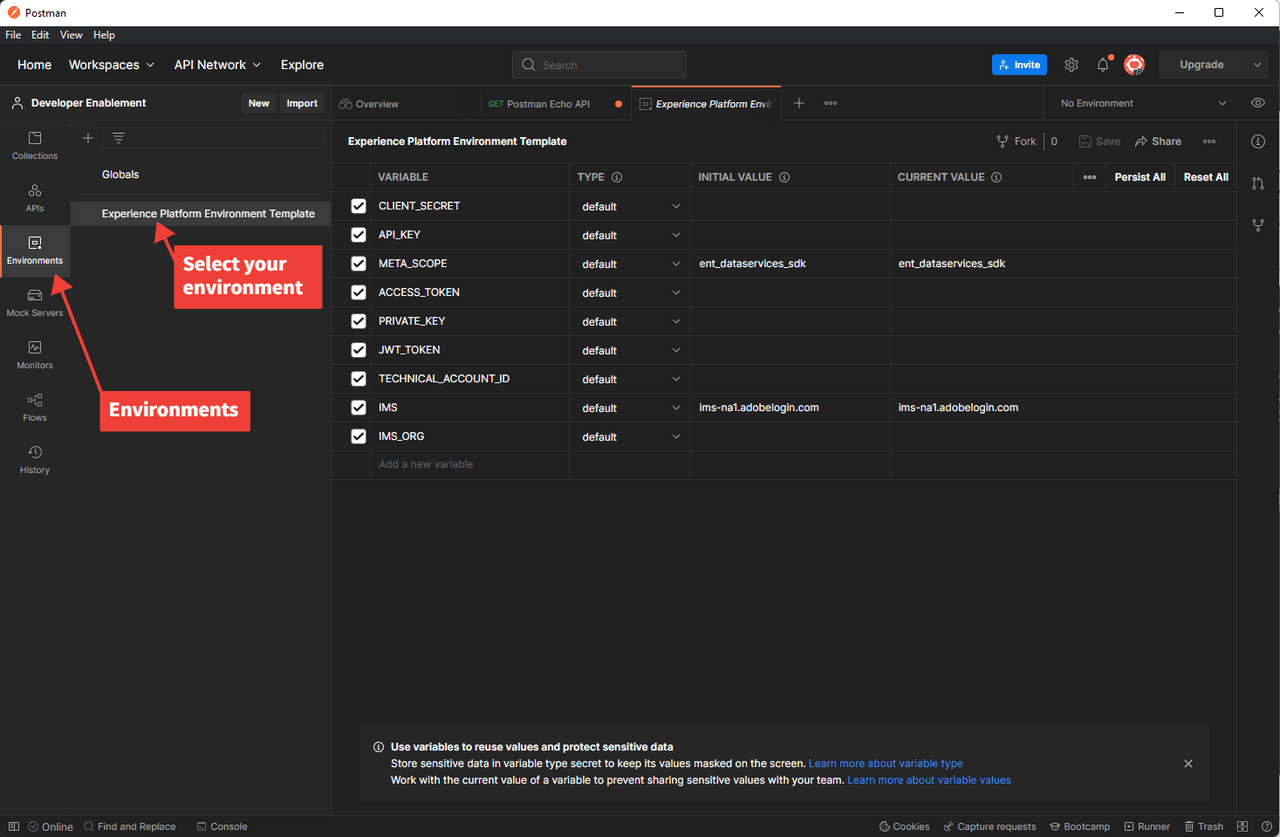
In the work area of the Postman app click on the
pencilicon that will display as you move your mouse over the environment name. Give your environment a friendly name as you will reference this environment later when you start working with the Experience Platform APIs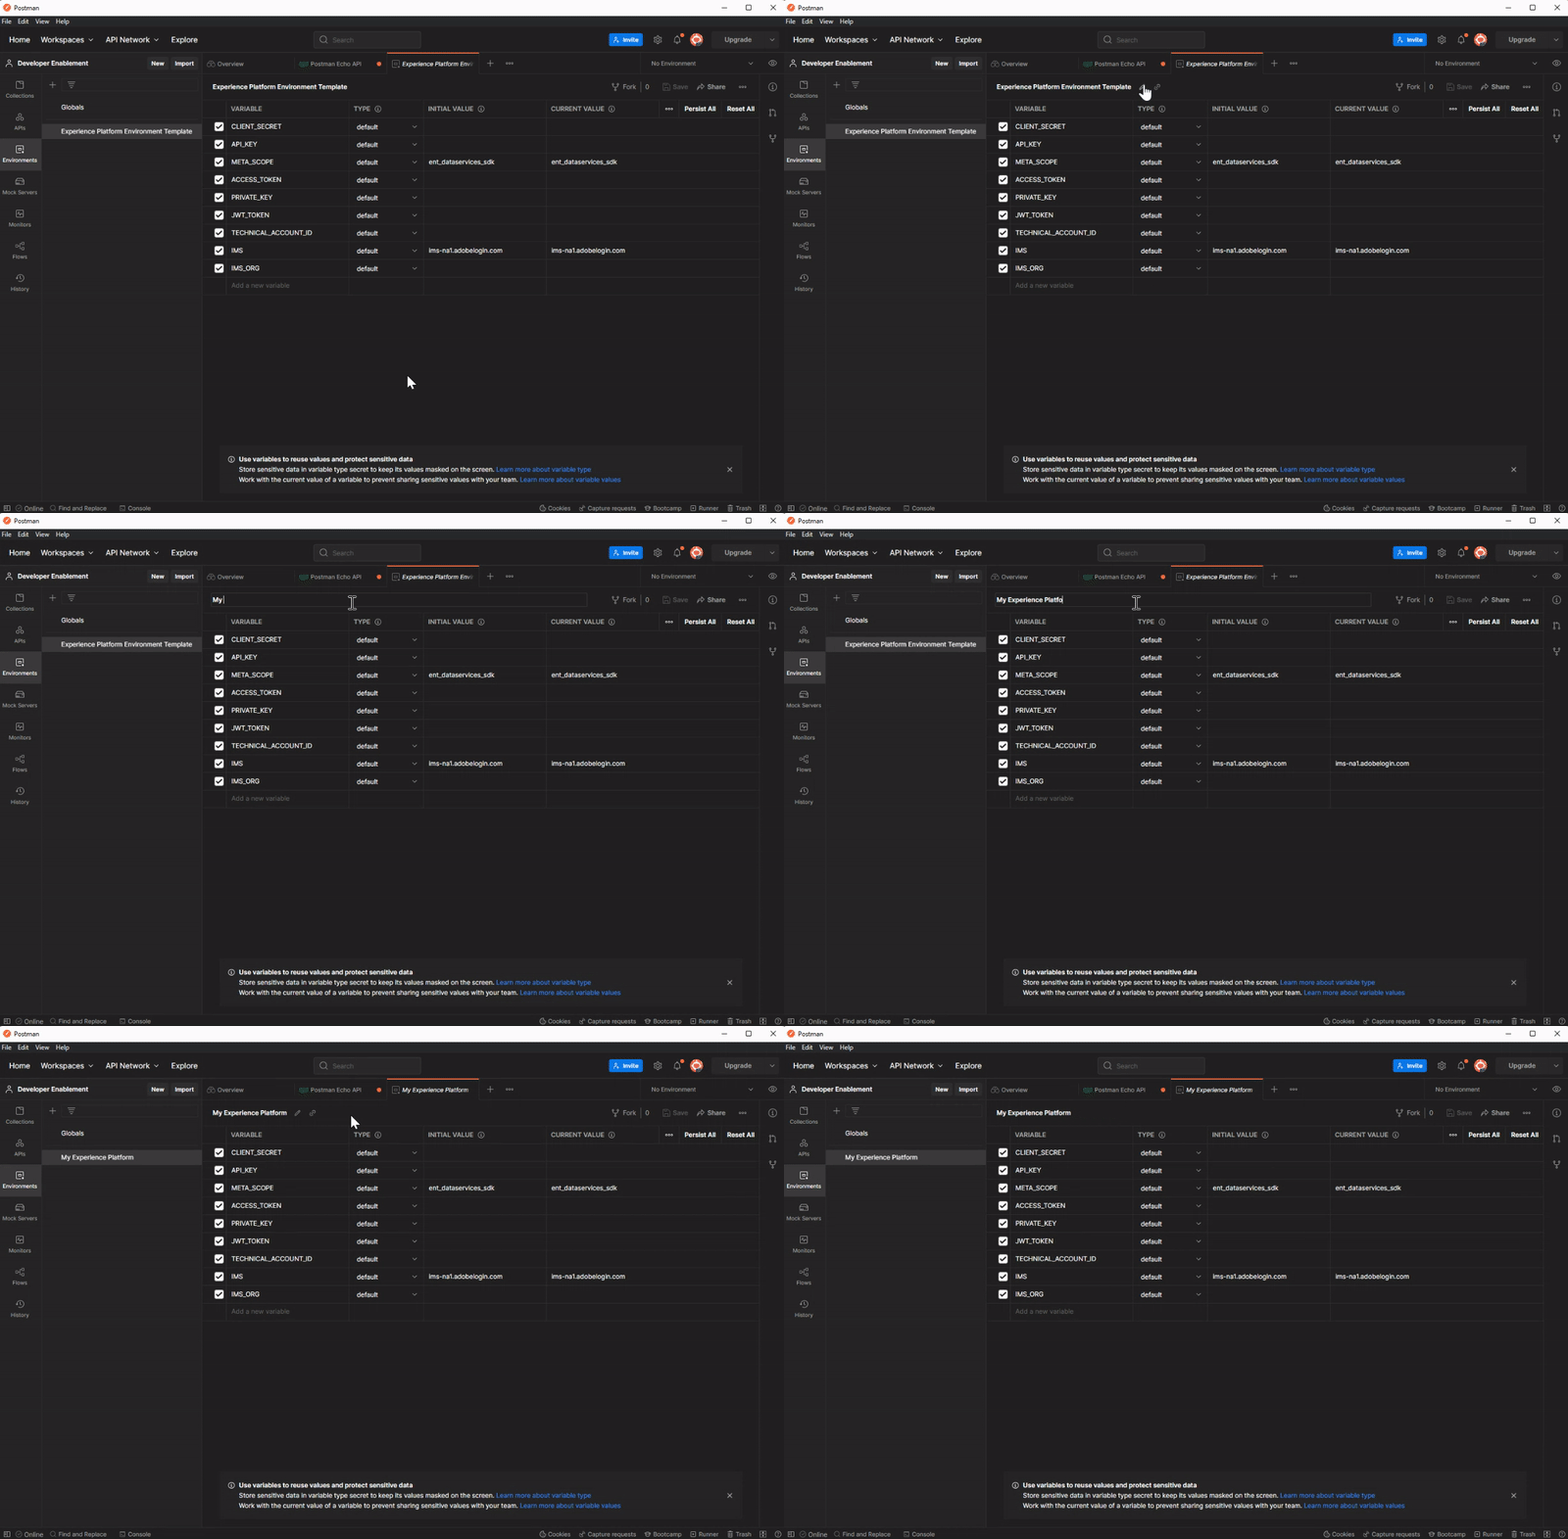
Populate the Environment Variables
In order to utilize the environment you have imported we need to populate a few of the variable values you see in the work area. These values will come from the Adobe Developer project under the Service Account (JWT) which you may have created in the previous Developer Console guide or have been supplied to you by your administrator. Below is quick sample mapping set of how to map the values from the Developer Project to the environment in Postman.
| Developer Project Credentials | Postman Environment Values * | |
|---|---|---|
CLIENT SECRET | --> | CLIENT_SECRET |
CLIENT ID | --> | API_KEY |
TECHNICAL ACCOUNT ID | --> | TECHNICAL_ACCOUNT_ID |
ORGANIZATION ID | --> | IMS_ORG |
* Ensure you populate the values of Initial and Current value in your environment's work area
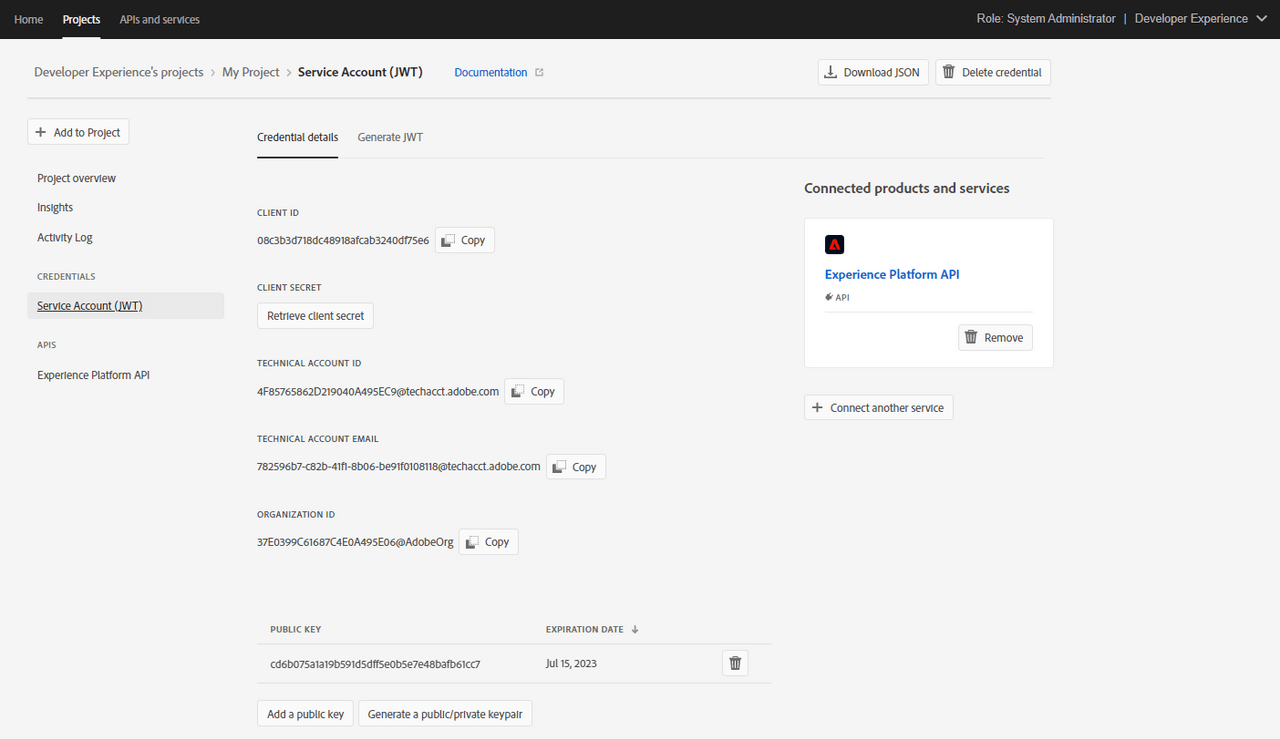
If you do not have these available please contact your administrator or ones that have been supplied to you be your administrator.
Mapping your Private Key
You also need to ensure you load your private key into the environment. This would have been provided as well if you came from the Developer Console guide or may have been supplied to you by your administrator. Copy/paste the private key value into both the Initial and Current values in the environment work area.
Your Final Environment
When you are done your environment should look like below (both ACCESS_TOKEN and JWT_TOKEN values should be null). If everything looks good, click the Save icon in the upper right of the work area. Time to test things!
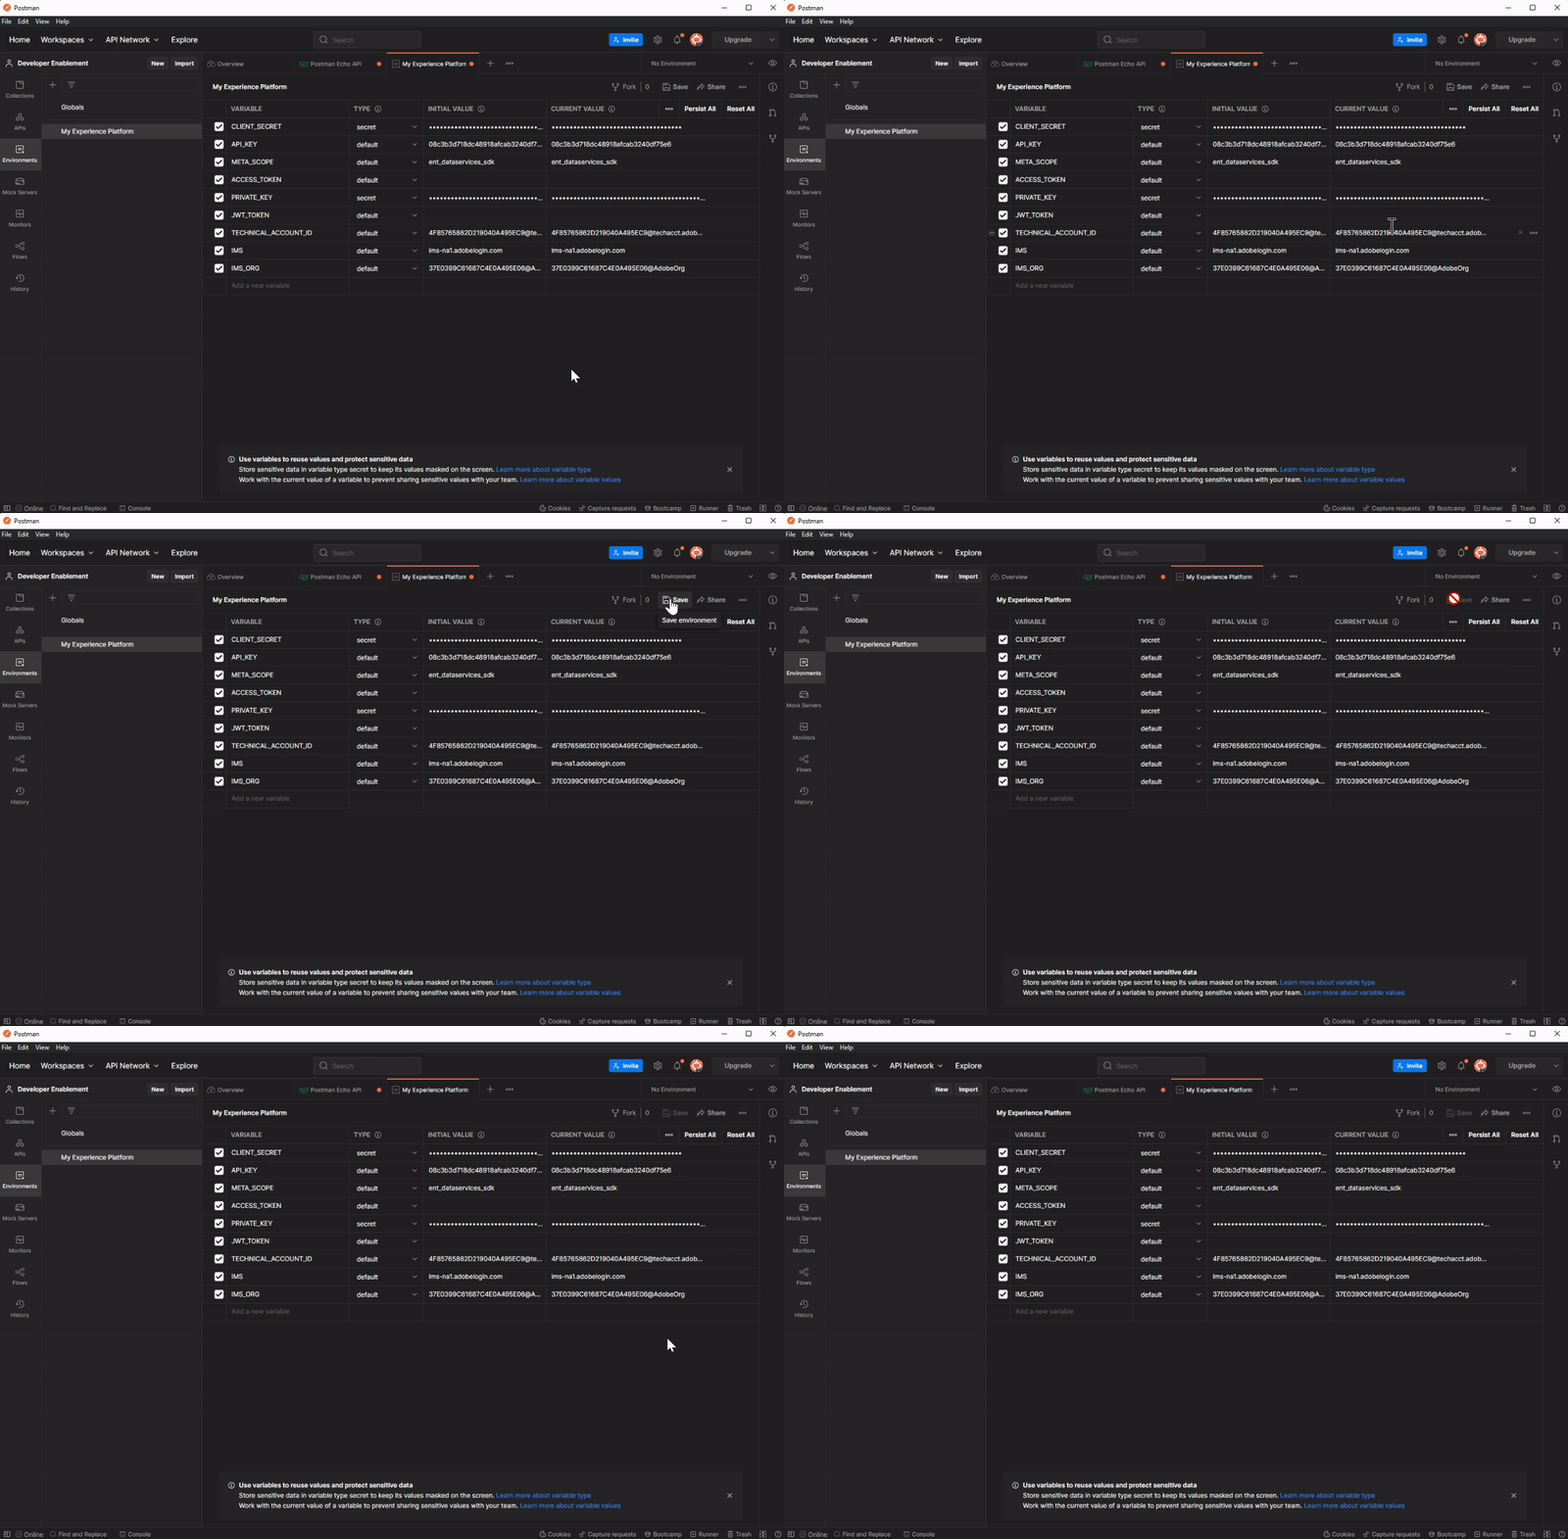
As a best practice its always recommended that you change the TYPE value in Postman from default to secret for sensitive fields such as the CLIENT_SECRET and PRIVATE_KEY
A common error that is often encountered when making the call is due to a poorly copied PRIVATE_KEY. Be sure that when you copy/paste your private key into the Postman environment variable values that you include the full text of the private key including the header (-----BEGIN RSA PRIVATE KEY------) and footer.
