Publish a Connector as an internal listing
An internal listing publishes your connector to users in your Adobe enterprise organization. The connector appears as an option in the Translate service dropdown inside Adobe Express for users signed in to the same enterprise organization as the publisher. Use an internal listing when you want enterprise-only distribution without exposing the connector publicly. For other distribution paths, see Submit your Connector.
Internal listing requirements
See Before you submit for the account, role, and testing requirements that apply to every submission path. Internal listings add the following:
- Enterprise account required: Personal Adobe accounts don't belong to an organization, so the Internal listing card isn't offered when you sign in with one. Confirm you're signed in with the account whose organization should receive the connector. The publishing organization is locked to the account that publishes the listing.
- Where it publishes: Internal listings appear as an option in the Translate service dropdown inside Adobe Express for users signed in to the same enterprise organization as the publisher.
- What's validated: Adobe does not review the connector itself for internal listings. Adobe validates your publisher profile, your manifest's schema and unique identifiers, and runs an operational check against your connector's endpoint.
- Prepare your assets and metadata: Internal listings collect the full Listing field reference except the Support email address, End User License Agreement (EULA), AI usage details, and monetization details. Gather your icon, manifest, screenshots, listing copy, and publisher and trader details before you open the submission form.
- Secure API Key credential: If your connector uses Secure API Key authentication, add your key as a credential from your connector's Settings tab. It's required regardless of listing type. See Register your Secure API Key with Adobe.
data-slots=heading, text
data-variant=warning
Submission steps
data-slots=heading, text
data-variant=info
Access Your integrations first
Follow Access your integrations to open the Add-ons panel, enable Add-on development, create or select your connector integration in the Your integrations view, and note your Connector URL. Sign in with your enterprise Adobe account so the Internal listing card appears. Then return here for the internal-listing steps below.
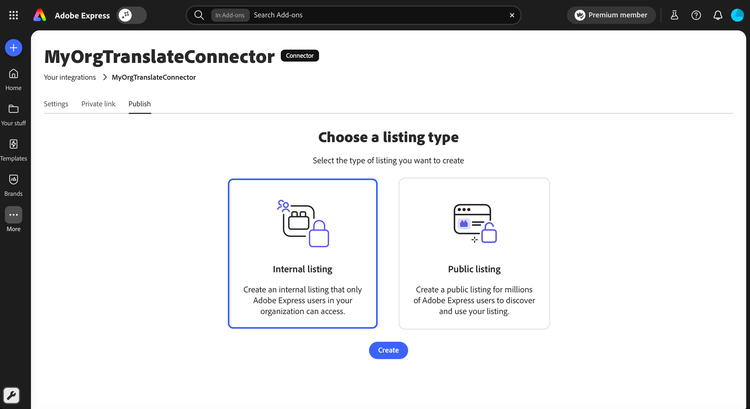
Step 1: Choose Internal listing
- Open the Publish tab.
- Select the Internal listing card.
- Click Create.
data-slots=heading, text
data-variant=warning
Step 2: Complete Listing details
The Create an internal connector listing form opens. Use the Jump to dropdown to navigate between sections; the progress bar fills as you complete required fields.
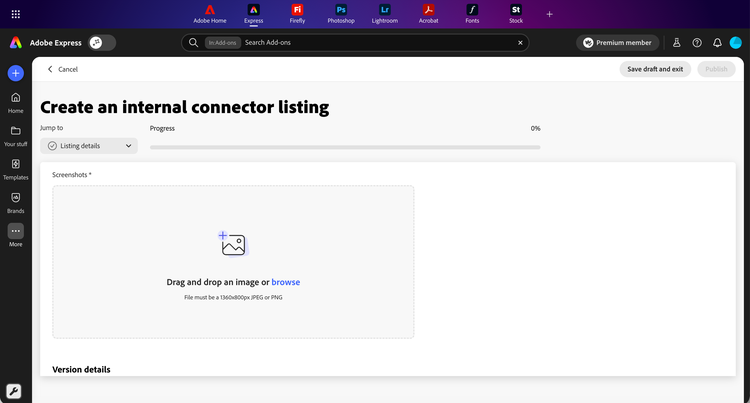
Fill in the Listing details fields, including 1 to 5 screenshots. See Listing details for field requirements.
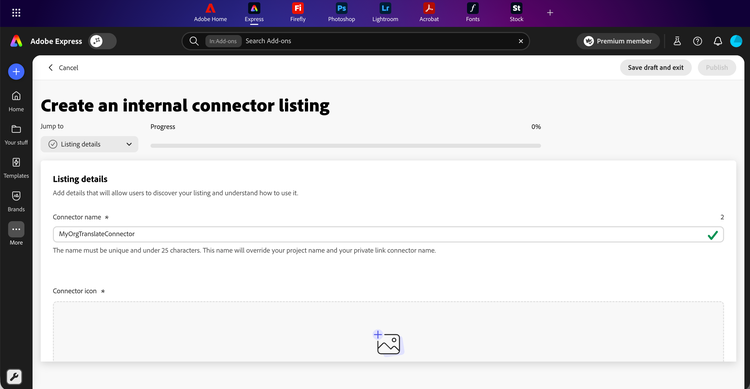
For screenshots, the first one appears as the hero image on the connector's listing detail page, so put your strongest screen first.
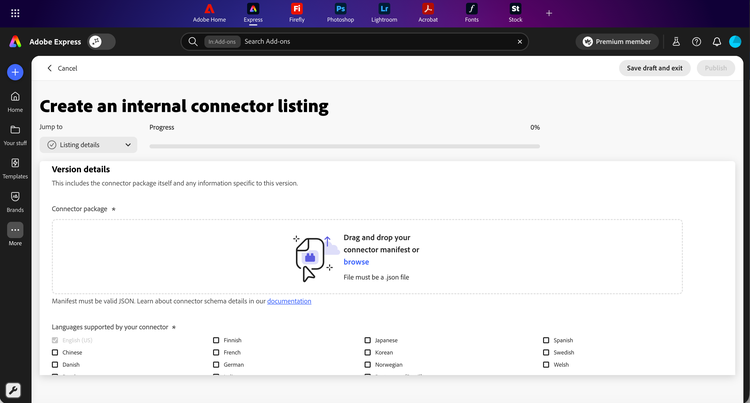
Step 3: Complete Version details
Upload your connector manifest as a .json file, select every language your connector's UI supports, and add Release notes for this version. English (US) is included by default and cannot be removed. See Version details for field requirements.
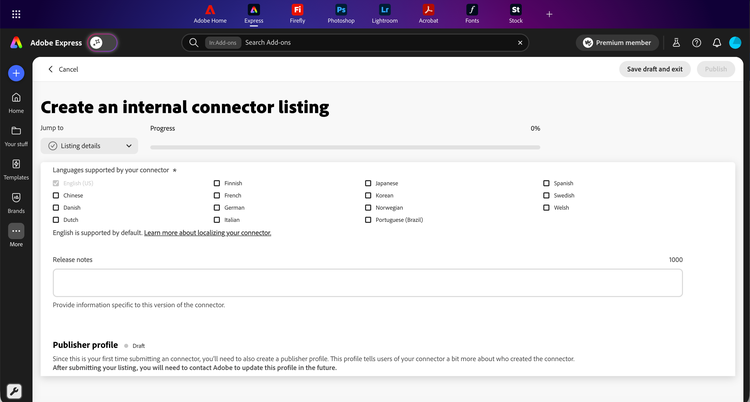
If your connector uses Secure API Key authentication, you still need to add your credential from the connector's Settings tab. This is required regardless of listing type. See Register your Secure API Key with Adobe.
Step 4: Confirm your Publisher profile and Trader details
If this is your first submission, complete your Publisher profile. Adobe validates this profile before publishing the connector. See the Publisher profile field reference for every field.
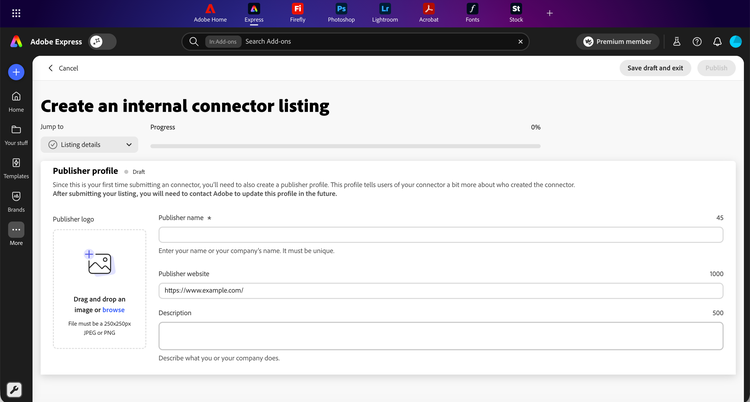
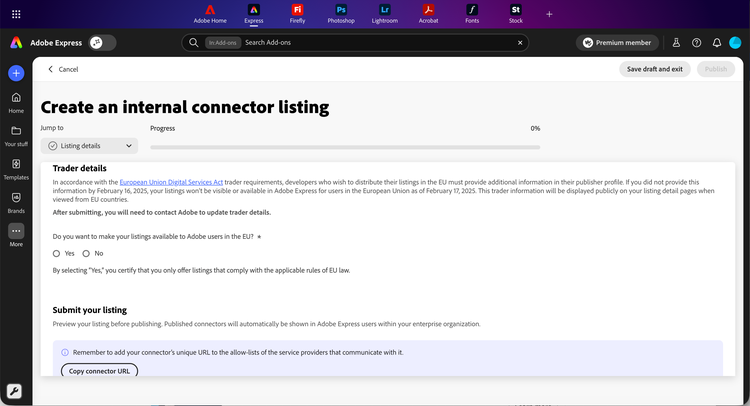
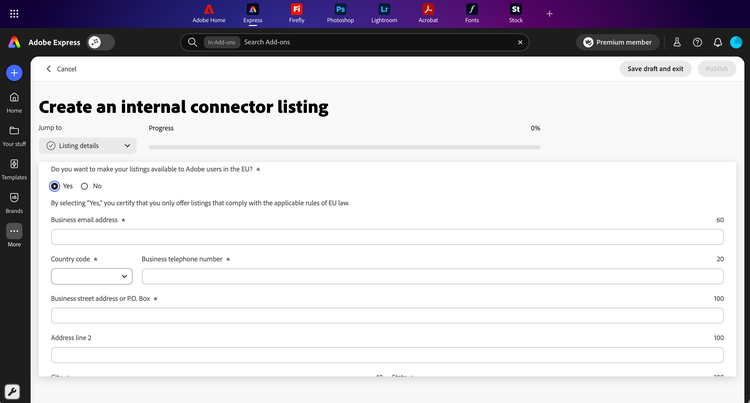
Then decide whether to make your listing available to Adobe Express users in the European Union under Trader details. See the Trader details field reference for every field.
- Select Yes to provide your business contact information. Adobe displays this information on your listing detail page when viewed from EU countries.
- Select No to keep the listing hidden from EU users. You can update this later by contacting Adobe.
data-slots=text
data-variant=info
Step 5: Submit your listing
- Review your entries. The Jump to dropdown shows checkmarks beside complete sections and the progress bar should read 100%.
- In the Submit your listing section, click Copy connector URL and confirm the URL is on the allow-list of any service providers your connector communicates with (see Step 4: Note your Connector URL).
- Click Publish, or Save draft and exit to finish later.
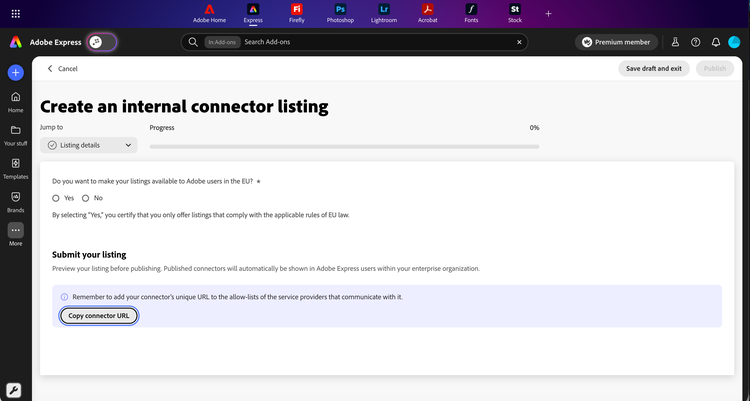
The Publish button is enabled only when all required fields are valid and the progress bar reaches 100%.
What Adobe validates at submit
The platform runs the following checks before your connector is published:
If a check fails, the form displays an inline error describing what to fix. Drafts you saved earlier remain intact while you correct and resubmit.
After you publish
- Your connector becomes available as an option in the Translate service dropdown inside Adobe Express for users signed in to the same enterprise organization as the publisher.
- Your publisher profile and trader details are locked. To update them, contact the Adobe Express Translate Connectors team at express-connectors-support@adobe.com.
- To ship a new version of the connector, open the listing under Your integrations, upload the new
manifest.jsonfile, and update the release notes.
Troubleshoot common issues
For internal-listing issues (card not offered, name conflicts, manifest and endpoint checks, EU visibility), see the consolidated Troubleshoot common issues table, which flags which issues apply to internal listings.