Create a private share link for a Connector
A private share link is a unique URL you can send to anyone to use or test your connector in Adobe Express. The connector isn't published broadly and Adobe does not review private share links. Use a private share link for beta testing, stakeholder review, or limited rollouts. For other distribution paths, see Submit your Connector.
Before you begin
- Account required: Sign in with an enterprise Adobe account with the Administrator or Developer role in the Adobe Admin Console, or a personal Adobe account approved through the Connector interest form. Enterprise accounts without this role are blocked from all submission paths before reaching the submission UI.
- Test first: Configure and validate your connector in the Connector Playground before sharing the link.
- Treat the link like a credential: Anyone with the URL can install the connector, provided they're signed in with an enterprise Adobe account, or a personal Adobe account approved through the Connector interest form. Adobe Express does not require sign-in scoped to your organization for private share link installs.
- Getting ready for a public listing? Create a private share link first when you want to test with specific people yourself, or ship updates outside of a listing review cycle, then later you can come back and create a public listing. See Get your connector ready for review for what's needed when you're ready to create a public listing.
- Secure API Key credential: If your connector uses Secure API Key authentication, add your key as a credential from your connector's Settings tab. It's required regardless of which listing type you use. See Register your Secure API Key with Adobe.
data-slots=heading, text1, text2
data-variant=warning
Submission steps
Access Your integrations first
Follow Access your integrations to open Your integrations, enable Add-on development, and create or select your connector integration. Then return here to create the private link.
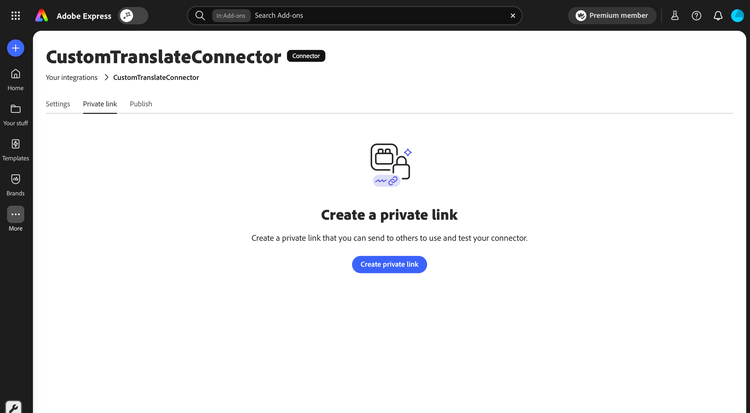
Step 1: Open the Private link tab
Open the Private link tab on your connector's listing settings page, then click Create private link.
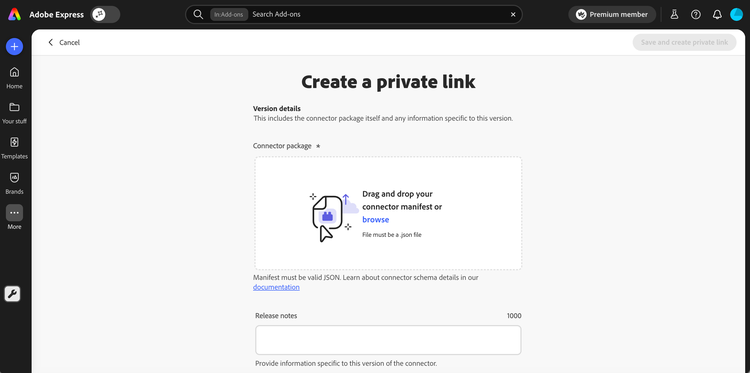
Step 2: Upload your connector manifest
Drag and drop your connector manifest.json file into the dropzone shown below, or click browse to choose a file from your computer.
data-slots=text
data-variant=info
.json file. The file is verified on upload.Step 3: Add release notes
After your connector manifest.json has been verified, you can add Release notes (recommended, up to 1000 characters) so testers know what changed in this version.
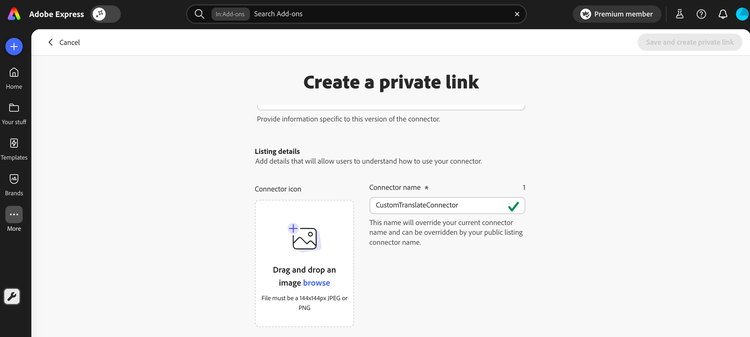
Step 4: Complete Listing details
Add an icon and name for the connector as it will appear to users who install through the link. A private share link collects only the connector icon, name, manifest, and release notes. See the Listing field reference for full field requirements.
- Upload a 144x144 px JPEG or PNG icon.
- Enter a Connector name (25 characters or less). The name must be unique and at least 3 characters long with no special characters. This name overrides your current connector project name and can later be overridden by a public listing connector name if you promote the listing.
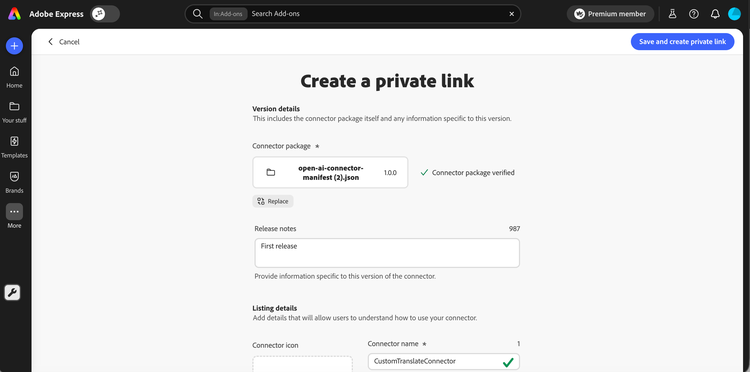
Step 5: Create the private link
When all required fields are valid, the Save and create private link button enables in the top-right corner.
After saving, a confirmation dialog appears with a Copy link and close button.
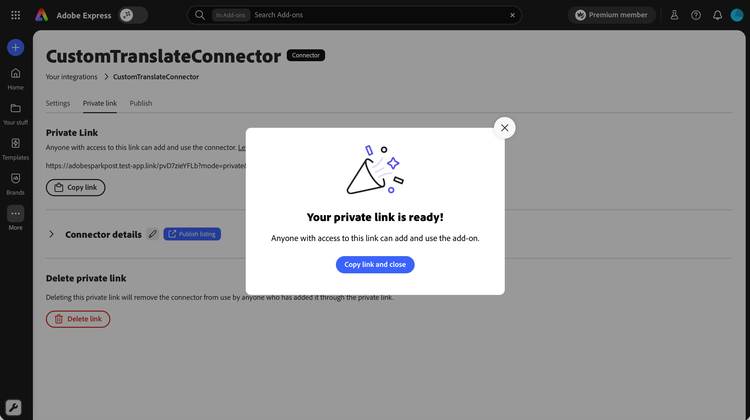
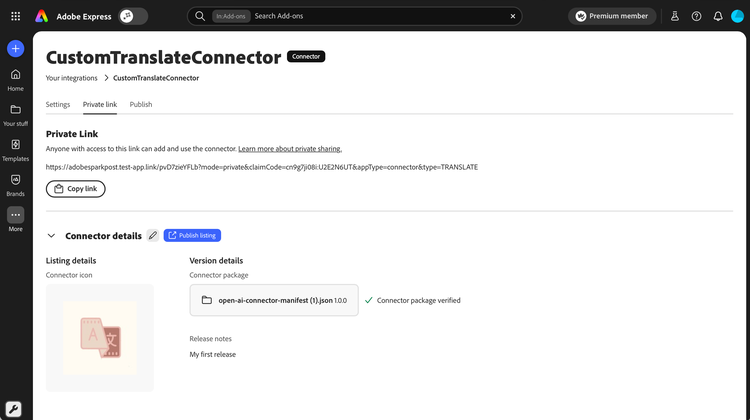
The Private link tab displays your generated link URL. Click Copy link to copy the URL to your clipboard. Save it for sharing and future reference. Anyone with the link can install the connector.
Share, update, and manage the private share link
Open the Private link tab on your connector's listing settings page to manage the link.
Copy the private share link
After your private share link has been created, you can copy it again at any time in this tab using the Copy link button.
Update the connector version
To ship a new version to testers, open the listing's Private link tab, click the Update private link action, and upload a new manifest. Users with the link automatically get the latest version the next time they invoke the connector.
data-slots=text
data-variant=info
Promote a private share link to a public listing
When you're ready to publish your connector publicly, you can promote a private share link into a public listing without recreating the connector.
- Open the listing's Private link tab.
- Click Publish listing.
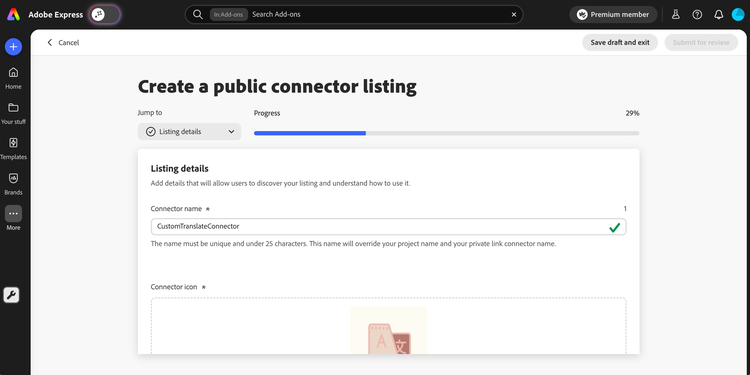
- The public listing form opens. Fill in the additional fields the public listing requires (summary, full description, screenshots, AI usage disclosure, monetization details, publisher profile, trader details).
- Click Submit for review.
The public listing form opens prefilled with the icon, name, and manifest from the private share link so you don't have to re-enter everything, but you can review and edit as needed.
For details on each public listing field, see Publish a Connector as a Public Listing.
Delete the private share link
To revoke access for everyone who installed through the link:
- Open the listing's Private link tab.
- Click Delete private link.
- Confirm in the dialog. Users who installed through the link lose access immediately.
Deleting the private share link does not delete the connector project or any associated public or internal listings.
After you share the link
- Send the link only to people you trust. Adobe Express does not restrict who can install the connector from the link.
- Testers install the connector by opening the link in Adobe Express. The connector appears in their Adobe Express session like any installed integration.
Troubleshoot common issues
Private-link-specific issues are listed below. For shared issues (account access, manifest schema and file-type errors, name conflicts), see the consolidated Troubleshoot common issues table.