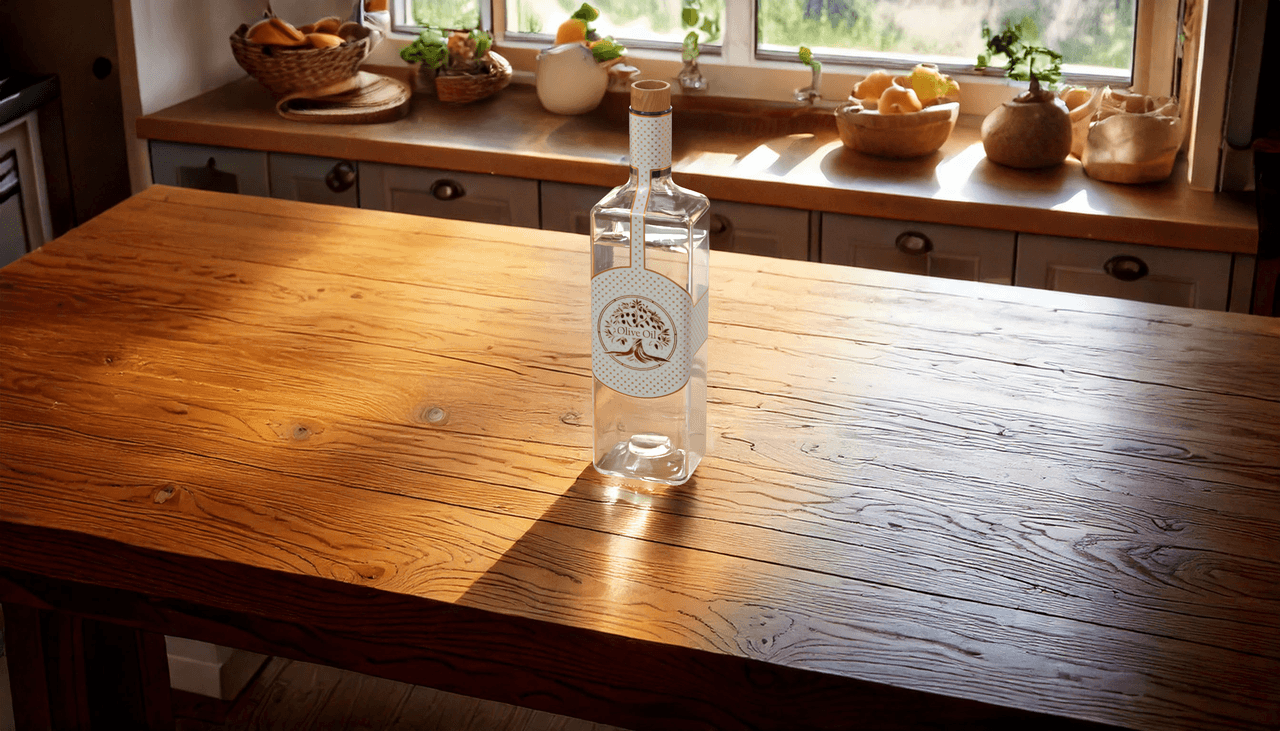
Generate 3D Object Composite
Combine 3D objects with AI-generated content using the Generate 3D Object Composite API.
Overview
Learn how to create compelling images by combining 3D models with AI-generated content using the Generate 3D Object Composite API. This guide walks you through the process of uploading assets, configuring compositing parameters, and generating final images.

Prerequisites
- You'll need a Substance 3D API Client ID and Access Token. learn how to retrieve them in the Authentication Guide.
- A command line tool to transfer data, such as cURL.
Step 1 - Upload source assets
Download the sample assets:
To upload the 3D scene file to a new digital storage Space, use the
/spacesendpoint and define the asset as a--formparameter in the request. Run the following command to create the new Space:
Copied to your clipboardcurl --url https://s3d.adobe.io/v1/spaces \--header 'Authorization: Bearer $S3D_FF_SERVICES_ACCESS_TOKEN' \--form '.=@compositing_table_bottle.glb'
The result is a JSON response that contains the id of the new Space.
This ID is the assets' source in the job definition.
Sample Response
Copied to your clipboard{"id": "{GENERATED_SPACE_ID}","files": [...],...}
Step 2 - Define assets sources
Create a payload.json file and reference the Space ID (<generated_space_id>) in the sources array:
Copied to your clipboard{"sources": [{"space": {"id": "<generated_space_id>"}}]}
Step 3 - Set the compositing parameters
To perform a compositing job, define:
- The hero asset name (the asset that should be rendered) from your scene file.
bottlein this example. - The camera name from your scene file.
main_camerain this example. - A prompt that describes the content of the AI-generated environment that will be composited with your 3D asset.
If your 3D scene contains multiple models, only the one marked as the hero asset is rendered. Additional models are used as structural reference templates to influence the composition of the AI-generated environment.
In this example, the 3D scene contains two models:
- a
bottlemodel (hero asset) to be rendered. - a
tablemodel, used to match the 3D scene layout in the generated background image.
With this information, append the following parameters to your payload.json file:
Copied to your clipboard{"sources": [{"space": {"id": "<generated_space_id>"}}],"heroAsset": "bottle","cameraName": "main_camera","prompt": "french style kitchen with empty wooden table window on the left focal length 50mm"}
Step 4 - Execute the API request
It's time to execute the compositing API request, using the job definition from your payload.json file.
Send a request to the Compose API:
Copied to your clipboardcurl -vX POST https://s3d.adobe.io/v1/composites/compose \-d @payload.json \--header "Content-Type: application/json" \--header 'Authorization: Bearer $S3D_FF_SERVICES_ACCESS_TOKEN'
The response will be similar to this:
Copied to your clipboard{"$schema": "https://s3d.adobe.io/schemas/ComposeSceneResponse.json",// The URL to poll the job's status and result"url": "https://s3d.adobe.io/v1/jobs/1727790895129-0",// A unique identifier for the job"id": "1727790895129-0","status": "running"}
Step 5 - Download the rendered images
After sending the API request, you'll obtain a response containing an URL that can be used to fetch the job's progress and result.
Since jobs are asynchronous, their result isn't available immediately.
The job URL must be polled until the status indicates either succeeded or failed.
Copied to your clipboardcurl --url {JOB_URL} \--header 'Accept: application/json' \--header 'Authorization: Bearer $S3D_FF_SERVICES_ACCESS_TOKEN'
If the job succeeds, the response will contain an additional result property with information about the generated resources.
Copied to your clipboard{"$schema": "https://s3d.adobe.io/schemas/ComposeSceneResponse.json","url": "https://s3d.adobe.io/v1/jobs/1727790895129-0","id": "1727790895129-0","status": "succeeded","result": {"outputs:": [{"image": {"seed": 63000,"url": "https://s3d.adobe.io/v1/spaces/s-b93fa62b-6ba8-4ca6-842d-898057bf5dbc/files/render0000.png?x-s3d-presigned-token=<auto_generated_token>"},...}],"promptHasDeniedWords": false,"promptHasBlockedArtists": false,"outputSpace": {"url": "https://s3d.adobe.io/v1/spaces/s-b93fa62b-6ba8-4ca6-842d-898057bf5dbc","id": "s-b93fa62b-6ba8-4ca6-842d-898057bf5dbc","archiveUrl": "https://s3d.adobe.io/v1/presigned-spaces/s-b93fa62b-6ba8-4ca6-842d-898057bf5dbc/zip?x-s3d-presigned-token=<auto_generated_token>","files": [{"name": "render0000.png","size": 3894406,"url": "https://s3d.adobe.io/v1/spaces/s-b93fa62b-6ba8-4ca6-842d-898057bf5dbc/files/render0000.png?x-s3d-presigned-token=<auto_generated_token>"},...]}}}
Copied to your clipboard{"$schema": "https://s3d.adobe.io/schemas/ComposeSceneResponse.json","url": "https://s3d.adobe.io/v1/jobs/1727790895129-0","id": "1727790895129-0","status": "failed","error": "error message"}
To download the rendered images, you can use the pre-signed URLs included in the response (result.outputs[].image.url), or find the rendered images URL from the list of files in the response (result.outputSpace.files[].url).
Copied to your clipboardcurl -O --url https://s3d.adobe.io/v1/spaces/s-b93fa62b-6ba8-4ca6-842d-898057bf5dbc/files/render0000.png?x-s3d-presigned-token=<auto_generated_token>
Deepen your understanding
Now that you completed this tutorial, visit its API Reference to explore more advanced use cases of 2D/3D compositing.

