Create a New UI Extension
The document provides high level overview for developers what to expect when creating UI Extension. For detailed instructions please refer to step-by-step guides for AEM Content Fragments Console or AEM Assets View.
Get access
To start writing UI Extensions you will need the:
- Access to service that we are about to extend, e.g. Content Fragment Console available as part of Adobe Experience Manager (AEM) as a Cloud Service.
- Access to App Builder, which we will use to create an extension.
- Assign developer roles to these IMS organization members who will create UI Extensions.
- Ensure that users who should be able to publish UI Extensions have a
system adminrole.
For more details, please refer to How to Get Access.
Create a new project in Adobe Developer Console
UI Extensions, as with any App Builder application, are represented as projects in Adobe Developer Console.
Adobe Developer Console gives you access to APIs, SDKs and developer tools to integrate, and extend Adobe products.
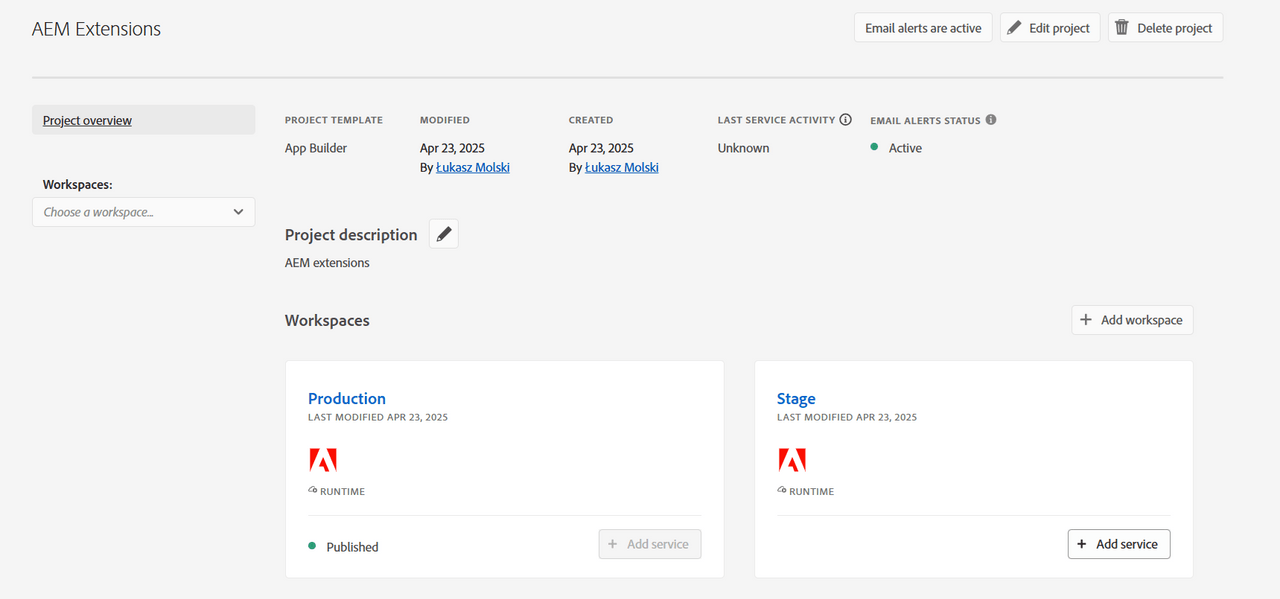
Each App Builder project has two default workspaces: Production and Stage which you may use during different life cycles of your project. You can add more workspaces for feature development as needed.
The Production workspace is special, as it is used for the submission and distribution flow.
Initialize our application using the CLI for local development
Once your project is set up in Adobe Developer Console, we need to initialize our app in a local environment. There are several ways how to do it.
We will initialize the UI Extension Project using AIO CLI. You may find detailed guide for AEM Content Fragments Console or AEM Assets View.
If necessary, you can find other options in Bootstrapping new App using the CLI.
Once you complete, you should see the build process with necessary npm dependencies are getting installed.
Also, base project structure will be generated.
Copied to your clipboardSample code files have been generated.Next steps:1) Populate your local environment variables in the ".env" file2) You can use `aio app run` or `aio app deploy` to see the sample code files in action✔ Finished running template @adobe/aem-cf-admin-ui-ext-tpl✔ Installed template @adobe/aem-cf-admin-ui-ext-tplProject initialized for Workspace Stage, you can run 'aio app use -w <workspace>' to switch workspace.✔ App initialization finished!> Tip: you can add more actions, web-assets and events to your project via the 'aio app add' commands
During project initialization, you will be able to select a specific template for UI Extension that will generate boilerplate code for you so you will be ready to start business logic implementation right away.
Implement logic of application
As the next step, we need to implement a logic which will use existing Extension Points exposed by one of the Adobe
Services listed under Extensible Services in this documentation and provide necessary functionality.
UI Extensions has default structure and preselected technology stack such as React Spectrum but developers are free to choose tools that they prefer to. The only requirements to make a proper UI Extension:
- Supply configuration file that will declare application as an extension.
- Use
@adobe/uix-guestlibrary for proper UI Extension initialization and interaction with Adobe service.
Verify your application
After development is done you may check yor application locally (aio app run) or at Stage or any other workspace at Adobe I/O (aio app deploy).
Once you've started or deployed application AIO CLI will return you an extension endpoint URL that you may use to embed UI Extension into production Adobe Service. As it is not always suitable to test extensions with production data, extensible service as well provide configuration parameters that allows to change data source. For example, AEM Content Fragments Console allows to target development environment.
Deploy on Production
After the application has been completed, tested locally or on Stage, we are ready to deploy it to Production.
The process is the same as for deploying to Stage, but first you need to switch the workgroup to Production.
Please type command in our project folder:
Copied to your clipboard$ aio app use -w ProductionYou are currently in:1. Org: Sites Internal2. Project: 562TurquoiseShrimp3. Workspace: Stage? The file aem-headless-ui-ext-example/.env already exists: Merge? The file aem-headless-ui-ext-examples/.aio already exists: Overwrite✔ Successfully imported configuration for:1. Org: Sites Internal2. Project: 562TurquoiseShrimp3. Workspace: Production.
Note:
We chose the Merge option for the .env file so that we don't lose our environment variables.
After workgroup switching, we can make building and deploying with the command:
Copied to your clipboard$ aio app deploy√ Built 3 action(s) for 'aem/cf-console-admin/1'√ Building web assets for 'aem/cf-console-admin/1'√ Deployed 3 action(s) for 'aem/cf-console-admin/1'√ Deploying web assets for 'aem/cf-console-admin/1'Your deployed actions:web actions:-> https://245265-562turquoiseshrimp.adobeio-static.net/api/v1/web/aem-headless-ui-ext-examples/get-language-copies-> https://245265-562turquoiseshrimp.adobeio-static.net/api/v1/web/aem-headless-ui-ext-examples/quick-publish-language-copies-> https://245265-562turquoiseshrimp.adobeio-static.net/api/v1/web/aem-headless-ui-ext-examples/unpublish-language-copiesTo view your deployed application:-> https://245265-562turquoiseshrimp.adobeio-static.net/index.htmlTo view your deployed application in the Experience Cloud shell:-> https://experience.adobe.com/?devMode=true#/custom-apps/?localDevUrl=https://245265-562turquoiseshrimp.adobeio-static.net/index.htmlNew Extension Point(s) in Workspace 'Production': 'aem/cf-console-admin/1'Successful deployment 🏄
Create approval request
When you’re ready to publish your app, you will submit it for an approval from the Production workspace.

After the approval, your app will be available at Adobe Experience Cloud.
Also, data about your extension will be added to Adobe App Registry and will be reachable for Adobe Products.
This means, that the new functionality will be available, for example, in the AEM admin panel for your organization.

These steps are described in more detail in UI Extensions Management.
Remove the extension
To remove an extension, you need to follow those steps:
- Log in to Adobe Exchange.
- Navigate to Manage > App Builder Apps.
- Click revoke button, next to extension you would like to remove.
- Click revoke on the popup to confirm.

After revoking extension, it is still visible with revoked status in Extention Manager. To remove it completely you needs to remove the project.
The button to remove project is on top right:

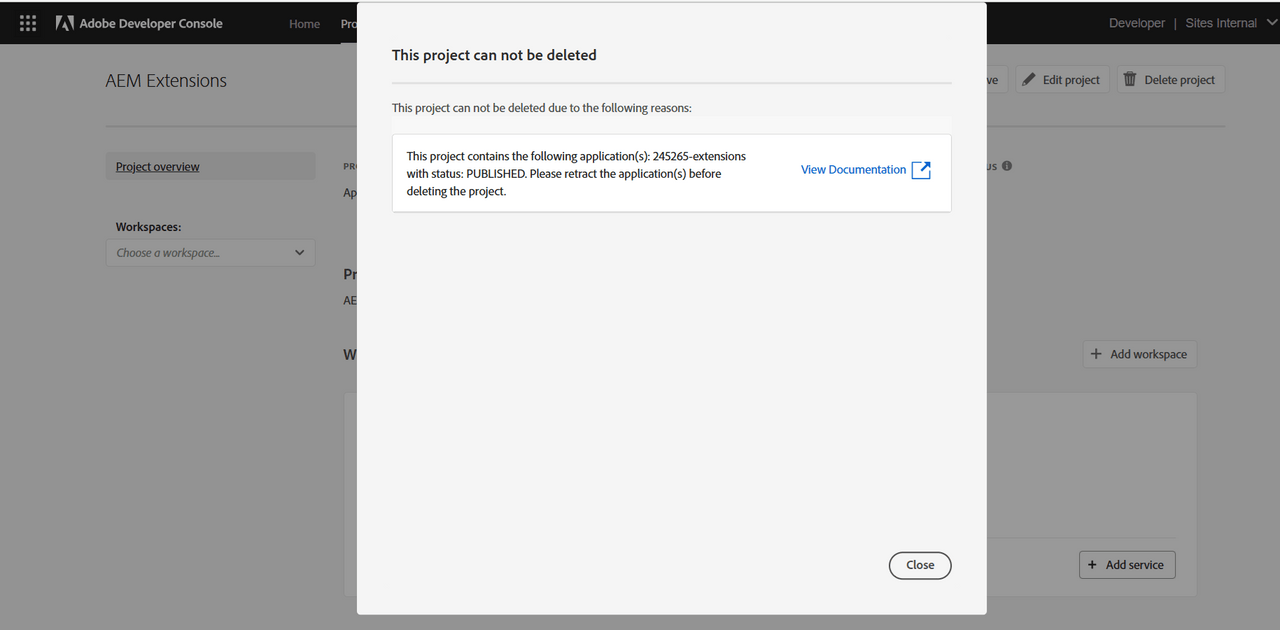
Until the extension is not revoked it will not be possible to delete the project:

When extension is revoked then the project can be removed:

After removing the project, the extension is not visible anymore in Extension Manager.
Additional resources
- Step-by-step Extension Development Guide in AEM Content Fragments Console
- Step-by-step Extension Development Guide in AEM Assets View
- UI Extensibility Overview
- FAQ


