Code Generation for AEM Content Fragments Editor Extension
The AEM Content Fragment Editor Extension Template help developers to bootstrap their App Builder apps when using the AIO CLI and generates basic extension structure and all required code.
Template is optional to use, but we highly recommend it in order to save time and has less knowledge regarding internal UI Extensions structure.
The extension template generation tool allows you to generate stubs for all existing extension points, ensuring that all the necessary files are included.
Additionally, you can generate a demo project to observe and understand extensibility functionality in general.
Check Requirements
Before starting, ensure that you have followed all the necessary requirements:
- Ensure that you have access to the Adobe Developer Console. If not, refer to the How to Get Access guide for instructions.
- Verify that you have already created an App Builder Project within your IMS Organization. If not, follow the steps outlined in the Creating a Project in the Adobe Developer Console guide.
- Make sure your local environment is properly set up and up to date. For instructions on setting up your local environment, refer to the Local Environment Setup.
Launch code generation
You need to have latest AIO CLI version to use the all available templates. Please refer to Local Environment Set Up.
1. Initialize a project
Create a project directory and execute the following commands from it.
Copied to your clipboarddemo-extension-project % aio app init
During the first run, a browser window will open, prompting you to log in to your organization. Once you have successfully logged in, you will see the desired result in the browser. You can then switch back to the command-line interface (CLI).
2. Select the appropriate organization and project
Copied to your clipboarddemo-extension-project % aio app init? Select Org: (Use arrow keys or type to search)❯ Alpha OrgBeta Org
You can either select the project by scrolling or you can filter the list of projects by beginning to type the name of the project.
Please make sure that the project is created within the selected organization, as mentioned in the requirements list at the beginning.
Copied to your clipboard% aio app init? Select Org: Alpha Org? Select a Project, or press + to create new: (Use arrow keys or type to search)❯ AEM CF Editor demo projectAEM CF Admin demo rojectAEM Headless APIs and Events
3. Select the template
Select one of the search options to specify the templates that you are interested in (we recommend to use All Extension Points).
Copied to your clipboardaio app init? Select Org: Alpha Org? Select a Project, or press + to create new: AEM CF Editor demo project? What templates do you want to search for?All Templates❯ All Extension PointsOnly Templates Supported By My Org
Using the <Up and Down> keys, please navigate and select the template named @adobe/aem-cf-admin-ui-ext-tpl (Extensibility template for AEM Content Fragment Editor) by pressing the <Space> key.
Copied to your clipboardaio app init? Select Org: Alpha Org? Select a Project, or press + to create new: AEM CF Editor demo project? What templates do you want to search for? All Extension Points✔ Downloaded the list of templates? Choose the template(s) to install: (Press <space> to select, <Up and Down> to move rows)┌──────┬──────────────────────────────────────────────────────────────┬──────────────────────────────────────────────────────────────┬────────────────────────────────────────┬────────────────────────────────────────┐│ │ Template │ Description │ Extension Point │ Categories │├──────┼──────────────────────────────────────────────────────────────┼──────────────────────────────────────────────────────────────┼────────────────────────────────────────┼────────────────────────────────────────┤? Choose the template(s) to install: (Press <space> to select, <Up and Down> to move rows)┌──────┬──────────────────────────────────────────────────────────────┬──────────────────────────────────────────────────────────────┬────────────────────────────────────────┬────────────────────────────────────────┐│ │ Template │ Description │ Extension Point │ Categories │├──────┼──────────────────────────────────────────────────────────────┼──────────────────────────────────────────────────────────────┼────────────────────────────────────────┼────────────────────────────────────────┤? Choose the template(s) to install: (Press <space> to select, <Up and Down> to move rows)┌──────┬──────────────────────────────────────────────────────────────┬──────────────────────────────────────────────────────────────┬────────────────────────────────────────┬────────────────────────────────────────┐│ │ Template │ Description │ Extension Point │ Categories │├──────┼──────────────────────────────────────────────────────────────┼──────────────────────────────────────────────────────────────┼────────────────────────────────────────┼────────────────────────────────────────┤│ ❯◉ │ @adobe/aem-cf-editor-ui-ext-tpl * │ Extensibility template for AEM Content Fragment Editor │ aem/cf-editor/1 │ action, ui │├──────┼──────────────────────────────────────────────────────────────┼──────────────────────────────────────────────────────────────┼────────────────────────────────────────┼────────────────────────────────────────┤│ ◯ │ @adobe/aem-cf-admin-ui-ext-tpl * │ Extensibility template for AEM Content Fragment Admin │ aem/cf-console-admin/1 │ action, ui ││ │ │ Console │ │ │├──────┼──────────────────────────────────────────────────────────────┼──────────────────────────────────────────────────────────────┼────────────────────────────────────────┼────────────────────────────────────────┤│ ◯ │ @adobe/generator-app-excshell * │ Extensibility template for generator-aio-app │ dx/excshell/1 │ action, ui │├──────┼──────────────────────────────────────────────────────────────┼──────────────────────────────────────────────────────────────┼────────────────────────────────────────┼────────────────────────────────────────┤│ - │ @adobe/generator-app-asset-compute * │ Extensibility template for generator-aio-app │ dx/asset-compute/worker/1 │ action │└──────┴──────────────────────────────────────────────────────────────┴──────────────────────────────────────────────────────────────┴────────────────────────────────────────┴────────────────────────────────────────┘* = recommended by Adobe; to learn more about the templates, go to https://adobe.ly/templates
After choosing the template using the <Up> and <Down> keys, please remember to press the <Space> key to select it.
4. Fill in the extension name, description, and version
Please provide the necessary information for the extension metadata, including the human-readable name, description, and version. This data will be utilized during the generation process.
Copied to your clipboard...✔ Installed npm package @adobe/aem-cf-editor-ui-ext-tplℹ Running template @adobe/aem-cf-editor-ui-ext-tplAEM Content Fragment Editor Template Overview:* You have the option to generate boilerplate code for your extension.* You can get help regarding documentation at any time from the menu.* You can check out a sample demo project.* An App Builder project will be created with Node.js packages pre-configured.? What do you want to name your extension? myorg-cf-editor-test-extension? Please provide a short description of your extension: A test extension for experimenting with functionalities? What version would you like to start with? 0.0.1? What would you like to do next? (Use arrow keys)──────────────❯ Add a custom button to Header MenuAdd Rich Text Editor (RTE) Toolbar ButtonAdd Rich Text Editor (RTE) Toolbar WidgetAdd Rich Text Editor (RTE) Toolbar Badge──────────────I'm doneI don't know──────────────(Move up and down to reveal more choices)
Available generation options
You can generate code stubs for any combination of the following functionalities. Detailed information about each extension point can be found in the related section.
- Add a custom button to Header Menu
- Add Rich Text Editor (RTE) Toolbar Button
- Add Rich Text Editor (RTE) Toolbar Widget
- Add Rich Text Editor (RTE) Toolbar Badge
After generation, all necessary files for utilizing the chosen extension points will be created, and placeholders will be added in the generated texts to indicate where you can add your custom logic.
Example: Header Menu Button and RTE Toolbar Widget generation
1. Add a custom button to Header Menu
In the previous CLI dialog, please select Add a custom button to Header Menu and provide the desired button label. Additionally, you have the option to specify that a UI Modal should appear when the button is clicked. The UI Modal can contain custom UI elements.
In our example, we specified that the UI Modal functionality is required and should be included in the generated code. However, if you do not need any UI visualization during the button's onClick processing, you can skip this option.
Copied to your clipboard? What do you want to name your extension? myorg-cf-editor-test-extension? Please provide a short description of your extension: A test extension for experimenting with functionalities? What version would you like to start with? 0.0.1? What would you like to do next? Add a custom button to Header Menu? Please provide label name for the button: Export data? Do you need to show a modal for the button? y
2. Add Rich Text Editor (RTE) Toolbar Widget
Afterwards, choose the Add Rich Text Editor (RTE) Toolbar Widget option and provide the desired label for the button.
As a final result, you will see the output in the CLI:
Copied to your clipboard...? What do you want to name your extension? myorg-cf-editor-test-extension? Please provide a short description of your extension: A test extension for experimenting with functionalities? What version would you like to start with? 0.0.1? What would you like to do next? Add a custom button to Header Menu? Please provide label name for the button: Export data? Do you need to show a modal for the button? y? What would you like to do next? Add Rich Text Editor (RTE) Toolbar Widget? Please provide label name for the widget: RTE Widget Custom Functionallity? What would you like to do next?Add Rich Text Editor (RTE) Toolbar WidgetAdd Rich Text Editor (RTE) Toolbar Badge──────────────❯ I'm doneI don't know──────────────
3. Generate final result
Now, you can select I'm done to initiate the generation process, which will include code generation and installation of project dependencies.
Copied to your clipboardSample code files have been generated.Next Steps:-----------1) Populate your local environment variables in the ".env" file.2) You can use `aio app run` or `aio app deploy` to see the sample code files in action.✔ Finished running template @adobe/aem-cf-editor-ui-ext-tpl✔ Installed template @adobe/aem-cf-editor-ui-ext-tplProject initialized for Workspace Stage, you can run 'aio app use -w <workspace>' to switch workspace.✔ App initialization finished!> Tip: you can add more actions, web-assets and events to your project via the 'aio app add' commands
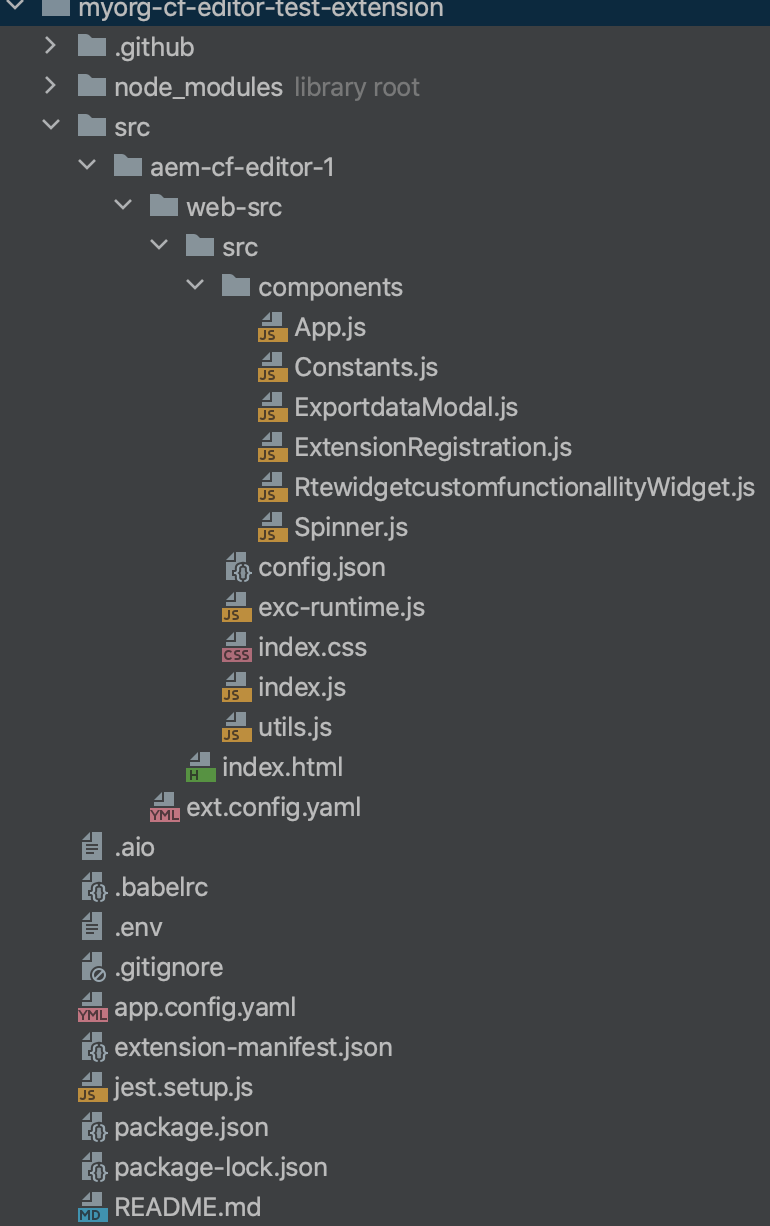
The extension-manifest.json file is a system file that stores all of your choices made during the iteration prompts in the CLI. It allows you to generate new code without losing any previously generated code or configurations. In other words, you can run the generation process whenever you need it, and the extension-manifest.json file ensures that your previous choices are retained.
You can find the next steps, such as running the project locally and performing testing, in the "How to Run Locally" section.
Demo project
If you are just starting to explore UI Extensibility and are unsure about certain options, don't hesitate to choose I don't know. option.
Copied to your clipboard...AEM Content Fragment Editor Template Overview:* You have the option to generate boilerplate code for your extension.* You can get help regarding documentation at any time from the menu.* You can check out a sample demo project.* An App Builder project will be created with Node.js packages pre-configured.? What do you want to name your extension? myorg-cf-editor-test-extension? Please provide a short description of your extension: A test extension for experimenting with functionalities? What version would you like to start with? 0.0.1? What would you like to do next?Add Rich Text Editor (RTE) Toolbar Badge──────────────I'm done❯ I don't know──────────────
A couple of options will be proposed to you:
Copied to your clipboard...? What do you want to name your extension? myorg-cf-editor-test-extension? Please provide a short description of your extension: A test extension for experimenting with functionalities? What version would you like to start with? 0.0.1? What would you like to do next? I don't know? What about this then? (Use arrow keys)──────────────❯ Try a demo project based on React (ChatGPT support for Rich Text Editor)Find some help──────────────Go back
Try demo projectgenerates ready-to-use a sample extension that adds ChatGPT (an advanced language model developed by OpenAI) support to Rich Text Editor in Content Fragments Editor.Find some helpdisplays list of useful links.
Please select the first option. It will generate a sample extension that adds a few custom buttons to the Rich Text Editor. Interacting with these buttons allows you to iterate with ChatGPT and make improvements to your text.
If you are using the same folder as in the previous example and want to retain the existing generated code, please keep the extension-manifest.json file. This file stores all of your choices made during the iteration prompts in the CLI. If you want to generate a new project without the previous examples, please remove the extension-manifest.json file before starting the demo project generation process.
CLI result of generations:
Copied to your clipboard✔ Finished running template @adobe/aem-cf-editor-ui-ext-tpl✔ Installed template @adobe/aem-cf-editor-ui-ext-tplProject initialized for Workspace Stage, you can run 'aio app use -w <workspace>' to switch workspace.✔ App initialization finished!> Tip: you can add more actions, web-assets and events to your project via the 'aio app add' commands
Populate local environment variables
The example project utilizes the OpenAI platform to facilitate interaction with ChatGPT, an advanced language model developed by OpenAI. It requires you to provide the necessary API keys for authentication. These API keys enable the project to communicate with the OpenAI services and access the functionalities provided by the platform.
You can obtain the OpenAI API keys by following these steps:
- Go to the OpenAI website and log in to your account.
- For the
OPENAI_API_KEY, navigate to the API Keys page: https://platform.openai.com/account/api-keys. - For the
OPENAI_ORG, go to the Organization Settings page: https://platform.openai.com/account/org-settings. - Once you have obtained the
OPENAI_API_KEYandOPENAI_ORG, add them to the end of your.envfile located in the project's root folder.
Copied to your clipboard# project-folder/.env...OPENAI_API_KEY=[YOUR_OPENAI_API_KEY]OPENAI_ORG=[YOUR_OPENAI_ORG]
Remember to keep your API key secure and avoid sharing it publicly. This file should not be committed to Git or other version control systems.
Running UI Extension locally
Whether it's an extension with generated implementation of extension points or a demo extension, you can run the extension locally and verify the generated result.
From the extension project directory, begin by running the following command:
Copied to your clipboardaio app run
This will deploy the actions to Adobe I/O Runtime while running the UI part on the local machine.
Copied to your clipboard➜ demo-extension-project % aio app runcreate .vscode/launch.jsonNo change to package.json was detected. No package manager install will be executed.To view your local application:-> https://localhost:9080To view your deployed application in the Experience Cloud shell:-> https://experience.adobe.com/?devMode=true#/custom-apps/?localDevUrl=https://localhost:9080press CTRL+C to terminate dev environment
Accepting the certificate (First time users)
If you are using this application for the first time, you will see a message similar to
Copied to your clipboardsuccess: generated certificateA self signed development certificate has been generated, you will need to accept it in your browser in order to use it.Waiting for the certificate to be accepted.... timed out
This message pops up because we use a development SSL certificate for secure communication. Learn more about the purpose of this certificate here.
If you see this message, please navigate to https://localhost:9080, you should see a screen similar to this.
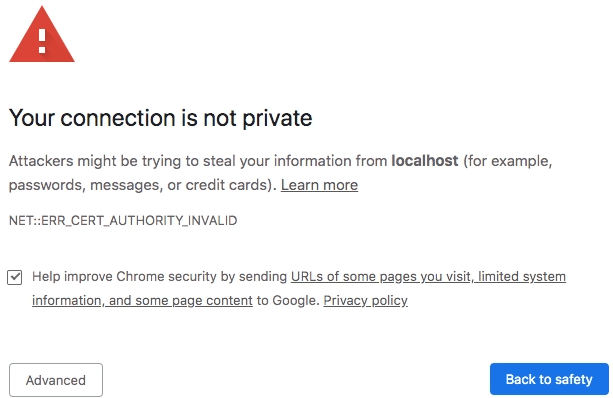
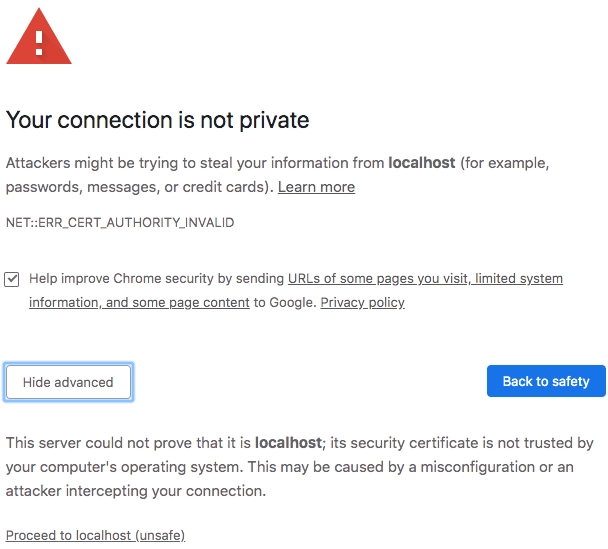
Click on Advanced, the nex screen may vary from browser to browser, but you should see a screen like this, where you can click on Proceed to localhost (unsafe) to accept the certificate.
Previewing UI Extension with additional parameters in URL
As mentioned before, you should have access to an AEM instance. For example, your URL should be structured like this:
Copied to your clipboardhttps://experience.adobe.com/?repo=<CURTOMER_AEM_HOST>#/@<CUSTOMER_IMS_ORG>/aem/cf/admin/
- repo (host name of AEM instance):
repo=<CURTOMER_AEM_HOST>
For previewing and testing, you don't need to publish the extension. Instead, you can add extra parameters in the URL:
- ext (extension):
ext=https://localhost:9080 - devMode (development mode):
devMode=true(required to allow access to resources onproductionenv from localhost)
The final URL for local preview will look like:
Copied to your clipboardhttps://experience.adobe.com/?ext=https://localhost:9080&repo=<CURTOMER_AEM_HOST>#/@<CUSTOMER_IMS_ORG>/aem/cf/editor/editor/<PATH_TO_CONTENT_FRAGMENT>
The system will process these parameters, making it work as if the extension was published.
Please note that for testing purposes, we will be operating with an already created Content Fragment located at PATH_TO_CONTENT_FRAGMENT, which in this case is /content/dam/dev-test-fragment.
The result of the UI Extension's work:

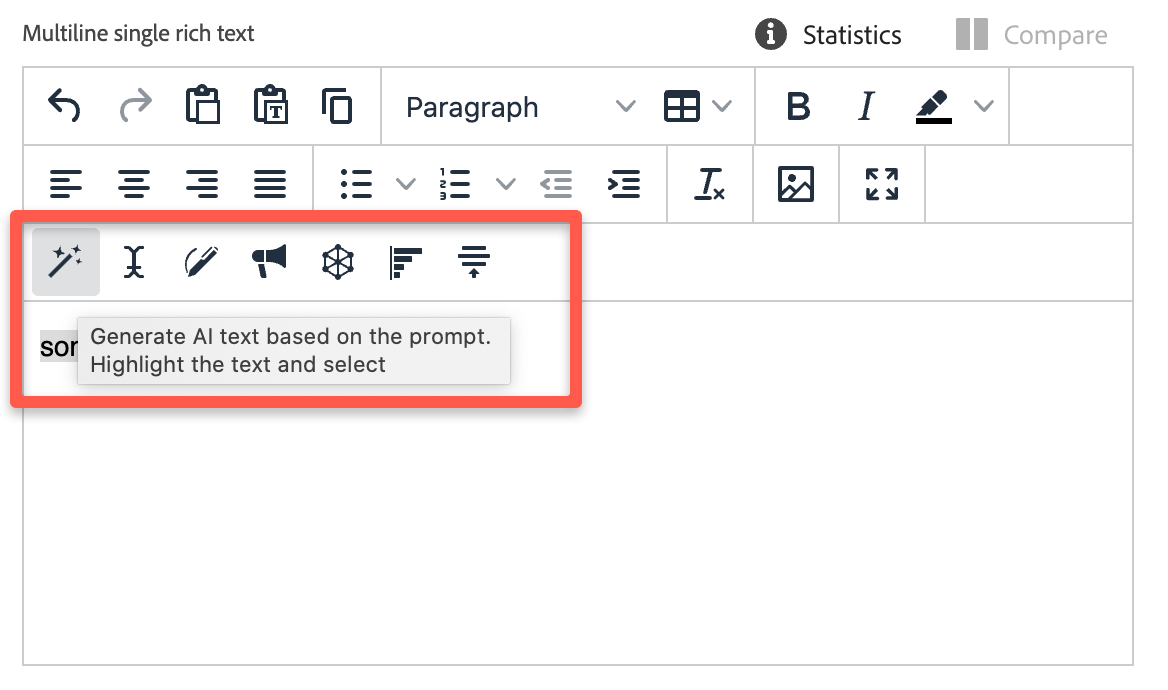
Short overview of generated components
Routing
The component src/aem-cf-editor-1/web-src/src/components/App.js contains the routing of our application. We always have this generated file.
Our extension is responsible for rendering several things:
- The logic of registering our extension (it's the second required part of the extension).
- Any partial UI components that may render inside the host app, for example as the content of a pop-up when a button is clicked (optional).
If you need additional functionality, you can add new entry points and specify them in the routing after a generation.
Extension registration
The component src/aem-cf-editor-1/web-src/src/components/ExtensionRegistration.js registers our extension with the host AEM instance as soon as it loads, so they can share data and communicate with each other.
Also, it contains the declaration of "what exactly and how we want" to customize the AEM Content Fragment Editor service. You can add your own custom customization declaration here.
Pop-up content
src/aem-cf-editor-1/web-src/src/components/*Modal.jssrc/aem-cf-editor-1/web-src/src/components/*Widget.js- These components are optional and will be generated if you chose "adding UI" during project generation. They contain logic related to the UI and interaction with the user when certain buttons are clicked.
For further information regarding the common concepts in creating extensions, you can refer to the Common Concepts in Creating Extensions.
Known limitations
The current behavior is that if you generate extension point implementations and later add custom code, then run the generation process again to add new functionality, the custom code will be overwritten, while the data added during the generation CLI dialog (including previous and the latest) will be retained.
In future versions, a more intelligent mechanism will be introduced to merge the generated functionality with manually added code, allowing for a smoother integration of customizations.
Related resources
Read about AEM Content Fragments Editor Extensibility
Common Concepts in Creating Extensions
Learn about common concepts, extension registration, and methods that can be used in any extension
UI Extensions Development Flow
Learn how to implement, test and deploy your own UI Extensions with Adobe App Builder


