Using the Firefly Fill Image API
Learn how to use the Fill Image API in your code workflows.
Introduction
Generative Fill is a powerful Firefly feature that lets designers modify an existing image using AI to replace a portion of an image with generated content. The content replaced might be a small portion of an image, or an entire background behind a central object. In this guide, you will see how this can be done using the Firefly Fill API.
Prerequisites
- Firefly API credentials. If you don't have them yet, first visit the Firefly Services Getting Started guide to obtain a
client_idandclient_secret. - Node.js installed on your machine and basic familiarity with
JavaScript. Note: The code for this guide will make use of the Firefly REST APIs via Node.js, but could be written in any language, or with the SDK.
Fill Image API Overview
Before getting into the code, let's consider how the Fill Image API works at a high level.
- You begin with a source image, which can either be uploaded to Firefly Services, or used with one of the supported cloud storage providers. For this guide, you'll use a local image uploaded via the Firefly Upload API.
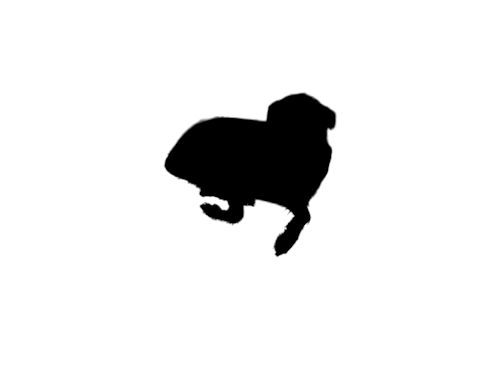
- You then provide a masked version of the image. That mask will be where Firefly adds it's generated content.
- You can optionally specify a
promptto help Firefly create the filled region. If not specified, Firefly only uses the source image itself as a guide.
Source and Mask Images
The source and mask images are below, and will be uploaded using Firefly's Upload API.
Source image

Mask image

Note: Use the Photoshop API's Create Mask endpoint to automate the creation of a mask.
Calling the Fill Image API
A simple example of the request body required to use the Fill Image API is below:
Copied to your clipboard{"numVariations": 1,"size": {"width": 2048,"height": 2048},"image": {"source": {"uploadId": "string"},"mask": {"uploadId": "string"}}}
More options are available and may be found in the API Reference. Please note that you could also use cloud storage URLs (in the form of presigned URLs) instead of uploaded assets as desired.
Below is a sample JavaScript function that could be used to call the Fill Image API.
Copied to your clipboardasync function genFill(maskId, sourceId, width, height, prompt, id, token) {let body = {numVariations:1,size:{width,height},prompt,image: {mask: {uploadId: maskId},source: {uploadId: sourceId}}}let req = await fetch('https://firefly-api.adobe.io/v3/images/fill', {method:'POST',headers: {'X-Api-Key':id,'Authorization':`Bearer ${token}`,'Content-Type':'application/json'},body: JSON.stringify(body)});return await req.json();}
This next step requires you to use some utility functions to 1) authenticate and obtain your access token (via getAccessToken()), and 2) upload your source and mask images with a Firefly Upload API wrapper function (ie: uploadImage()). The latter ensures you will have the uploadId needed for both the source and mask images when you are ready to make the call to genFill(). These utility methods are provided in the complete source code section for you.
We recommend you refer to the Create your First Firefly Application guide for a step-by-step walkthrough on the utility methods used in the how-to guides for authenticating (via getAccessToken()), uploading images for use in the calls (uploadImage()), and for downloading the generated results (downloadFile()).
Below is an example snippet of using the aforementioned utility functions with the necessary parameters:
Copied to your clipboardlet token = await getAccessToken(CLIENT_ID, CLIENT_SECRET);let upload = await uploadImage('./gen-fill-mask.webp', 'image/webp', CLIENT_ID, token);let maskedImage = upload.images[0].id;upload = await uploadImage('./gen-fill-source.webp', 'image/webp', CLIENT_ID, token);let sourceImage = upload.images[0].id;
Now that you have everything needed for the call parameters, make a call to the genFill() function with the prompt: "a beach at sunset", and save the result using the downloadFile() utility function (also provided in the complete source code section).
Copied to your clipboardlet result = await genFill(maskedImage, sourceImage, 2048, 2048, "a beach at sunset", CLIENT_ID, token);let fileName = `./gen-fill.jpg`;await downloadFile(result.outputs[0].image.url, fileName);
Generated result

Note: A more detailed prompt would provide better results, and remember that the masked region could be smaller as well, rather than the complete background.
Complete Source Code
The complete source code containing utilities for authentication, uploading, and downloading is provided below.
The Node.js code uses imports and top-level await, so you must either use the .mjs extension on your script file, or ensure you have a package.json with type: "module".
Copied to your clipboardimport fs from 'fs';import { Readable } from 'stream';import { finished } from 'stream/promises';/*Set the credentials based on environment variables.*/const CLIENT_ID = process.env.CLIENT_ID;const CLIENT_SECRET = process.env.CLIENT_SECRET;async function getAccessToken(id, secret) {const params = new URLSearchParams();params.append('grant_type', 'client_credentials');params.append('client_id', id);params.append('client_secret', secret);params.append('scope', 'openid,AdobeID,firefly_enterprise,firefly_api,ff_apis');let resp = await fetch('https://ims-na1.adobelogin.com/ims/token/v3',{method: 'POST',body: params});let data = await resp.json();return data.access_token;}async function uploadImage(filePath, fileType, id, token) {let stream = fs.createReadStream(filePath);let stats = fs.statSync(filePath);let fileSizeInBytes = stats.size;let upload = await fetch('https://firefly-api.adobe.io/v2/storage/image', {method:'POST',headers: {'Authorization':`Bearer ${token}`,'X-API-Key':id,'Content-Type':fileType,'Content-Length':fileSizeInBytes},duplex:'half',body:stream});return await upload.json();}async function downloadFile(url, filePath) {let res = await fetch(url);const body = Readable.fromWeb(res.body);const download_write_stream = fs.createWriteStream(filePath);return await finished(body.pipe(download_write_stream));}async function genFill(maskId, sourceId, width, height, prompt, id, token) {let body = {numVariations:1,size:{width,height},prompt,image: {mask: {uploadId: maskId},source: {uploadId: sourceId}}}let req = await fetch('https://firefly-api.adobe.io/v3/images/fill', {method:'POST',headers: {'X-Api-Key':id,'Authorization':`Bearer ${token}`,'Content-Type':'application/json'},body: JSON.stringify(body)});return await req.json();}let token = await getAccessToken(CLIENT_ID, CLIENT_SECRET);let upload = await uploadImage('./gen-fill-mask.webp', 'image/webp', CLIENT_ID, token);let maskedImage = upload.images[0].id;upload = await uploadImage('./gen-fill-source.webp', 'image/webp', CLIENT_ID, token);let sourceImage = upload.images[0].id;let result = await genFill(maskedImage, sourceImage, 2048, 2048, "a beach at sunset", CLIENT_ID, token);let fileName = `./gen-fill.jpg`;await downloadFile(result.outputs[0].image.url, fileName);
Next Steps
For more examples of what's possible with Firefly APIs, check out the other guides in this how-tos section and the API Reference for more details.


