Code Generation for AEM Content Fragments Console Extension
The AEM Content Fragment Console Extension Template help developers to bootstrap their App Builder apps when using the AIO CLI and generates basic extension structure and all required code.
Template is optional to use, but we highly recommend it in order to save time and has less knowledge regarding internal UI Extensions structure.
Template provides code generation capabilities targeted to 3 main developers group:
- Novices, developers who just starting explore UI Extensibility will benefit from direct links to documentation and ability to generate working demo project.
- Seasoned developers may generate skeleton code for their features and jump directly into business logic implementation.
- Experts may generate bare bone project and write all the code from scratch
Launch code generation during project initialization
You need to have AIO CLI version >= 9.1.0 to use the available templates. Please refer to Local Environment Set Up.
You may access code generation functionality during project initialization.
Create a directory and run the following commands from that directory:
Select the appropriate organization.
Copied to your clipboard➜ demo-extension-project % aio app init? Select Org:❯ Alpha OrgBeta OrgDelta OrgThen, select your project from within that organization.
You can either select the project by scrolling or you can filter the list of projects by beginning to type the name of the project.
Copied to your clipboard➜ demo-extension-project % aio app init? Select Org: Alpha Org? Select a Project, or press + to create new:great-project❯ useful-projectawesome-projectSelect one of the search options to specify the templates that you are interested in (we recommend to use
All Extension Points).Copied to your clipboard➜ demo-extension-project % aio app init? Select Org: Alpha Org? Select a Project, or press + to create new: useful-project? What templates do you want to search for?All Templates❯ All Extension PointsOnly Templates Supported By My OrgUse the spacebar to select the template named @adobe/aem-cf-admin-ui-ext-tpl (Extensibility template for AEM Content Fragment Admin Console).
Copied to your clipboard➜ demo-extension-project % aio app init? Select Org: Alpha Org? Select a Project, or press + to create new: useful-project? What templates do you want to search for? All Templates✔ Downloaded the list of templates? Choose the template(s) to install:| | Template | Description | Extension Point | Categories ||----|--------------------------------------|------------------------------------------------------------|---------------------------|----------------------|| ❯◉ | @adobe/aem-cf-admin-ui-ext-tpl * | Extensibility Template for AEM Content Fragment Console | aem/cf-console-admin/1 | action, ui || ◯ | @adobe/generator-app-api-mesh * | Extensibility template for Adobe API Mesh, for App Builder | N/A | action, graphql-mesh || ◯ | @adobe/generator-app-excshell * | Extensibility template for generator-aio-app | dx/excshell/1 | action, ui || - | @adobe/generator-app-asset-compute * | Extensibility template for generator-aio-app | dx/asset-compute/worker/1 | action |* = recommended by Adobe; to learn more about the templates, go to https://adobe.ly/templatesBootstrapping code in: projectcreate package.jsoncreate README.mdcreate jest.setup.jscreate .envcreate .gitignoreChanges to package.json were detected.Skipping package manager install.create .github/workflows/deploy_prod.ymlcreate .github/workflows/deploy_stage.ymlcreate .github/workflows/pr_test.ymlℹ Installing template @adobe/aem-cf-admin-ui-ext-tplℹ Installing npm package @adobe/aem-cf-admin-ui-ext-tplfound 0 vulnerabilities✔ Installed npm package @adobe/aem-cf-admin-ui-ext-tplℹ Running template @adobe/aem-cf-admin-ui-ext-tplAEM Content Fragment Admin UI Template Overview:* You have the option to generate boilerplate code for your extensible buttons.* You can get help regarding documentation at any time from the menu.* You can check out a sample demo project.* An App Builder project will be created with Node.js packages pre-configured.
If you are experienced user you may also simplify process of template selection by running the command
Copied to your clipboardaio app init --template=@adobe/aem-cf-admin-ui-ext-tpl
At this point AEM Content Fragment Console Extensions Template is added to your project and ready to use.
Provide basic information about extension
Answer the prompts related to extension metadata such as human readable name, description and version.
Copied to your clipboard? What do you want to name your extension? CF Console Demo UI Extension? Please provide a short description of your extension: Demo UI Extension for AEM Content Fragments Console? What version would you like to start with? 0.0.1
Choose code generation strategy
The next prompt is implemented as a menu system and is designed to help you generate boilerplate code for your specific needs. When you are ready to complete the project creation, please select
I'm done.Copied to your clipboard? What would you like to do next? (Use arrow keys)──────────────Add a custom button to Action BarAdd a custom button to Header MenuAdd server-side handler──────────────❯ I'm doneI don't know
Novice, explore what is possible
6.1. If you only starting with exploring UI Extensibility feel no hesitation to choose
I don't know.
Copied to your clipboard? What would you like to do next? I don't know? What about this then? (Use arrow keys)──────────────❯ Try a demo projectFind some help──────────────Go back
Try demo projectgenerates ready-to-use UI Extension with Import/Export functionality and integration with Slack.
Find some helpdisplays list of useful links.
Seasoned developer, choose what you need
6.2. If you already know what you want to do, start add features to you extensions by selecting items from the main part of the menu. Each part correspond to single Extension Point in AEM Content Fragments Console.
Copied to your clipboard? What would you like to do next? Add a custom button to Action Bar? Please provide label name for the button: Export? Do you need to show a modal for the button? Yes
For each extension. For example, for
Action BarandHeader Menuyou may specify title and if button suppose to open modal dialog with UI provided by extension or it will run background script.
In addition, if your extension requires server-to-server communication add as many server-side handlers as you need.
Copied to your clipboard? What would you like to do next? Add server-side handler? Adobe I/O Runtime lets you invoke serverless code on demand. How would you like to name this action? export-to-remote-service
Experts, have full control
6.3. If you know what you are doing and want to tweak implementation on low level hit
I'm doneas first answer and you will get bare bone project structure.
Add business logic
After you choose
I'm donetemplate starts installation of project's package dependencies and generates code.Copied to your clipboard? What would you like to do next? I'm doneExtension Manifest for Code Pre-generation------------------------------------------{"name": "CF Console Demo UI Extension","id": "useful-project","description": "Demo UI Extension for AEM Content Fragment Console","version": "0.0.1"}force package.jsoncreate app.config.yamlcreate src/aem-cf-console-admin-1/ext.config.yamlcreate src/aem-cf-console-admin-1/web-src/index.htmlcreate src/aem-cf-console-admin-1/web-src/src/config.jsoncreate src/aem-cf-console-admin-1/web-src/src/exc-runtime.jscreate src/aem-cf-console-admin-1/web-src/src/index.csscreate src/aem-cf-console-admin-1/web-src/src/index.jscreate src/aem-cf-console-admin-1/web-src/src/utils.jscreate src/aem-cf-console-admin-1/web-src/src/components/Constants.jscreate src/aem-cf-console-admin-1/web-src/src/components/Spinner.jscreate src/aem-cf-console-admin-1/web-src/src/components/App.jscreate src/aem-cf-console-admin-1/web-src/src/components/ExtensionRegistration.jscreate .babelrc...found 0 vulnerabilitiesSample code files have been generated.Next steps:1) Populate your local environment variables in the ".env" file2) You can use `aio app run` or `aio app deploy` to see the sample code files in action✔ Finished running template @adobe/aem-cf-admin-ui-ext-tpl✔ Installed template @adobe/aem-cf-admin-ui-ext-tplProject initialized for Workspace Stage, you can run 'aio app use -w <workspace>' to switch workspace.✔ App initialization finished!> Tip: you can add more actions, web-assets and events to your project via the 'aio app add' commands
At this point you already have fully functional UI Extension and it's time to add functionality that you business needs. The best place to start is navigating directly to
src/aem-cf-console-admin-1/web-src/src/components/ExtensionRegistration.jswhich contains code that defines capabilities of the extension and provides information to the AEM Content Fragments Console when and how extension should be invoked.
Configure demo application
If you opted to generate a demo application you will get a fully functional application with the ability to import/export the Content Fragment(s) between the Content Fragments Console and your selected Slack channel and demonstrate:
- How to use the Action Bar extension point to implement handling of selected Content Fragments (export).
- How to use the Header Menu extension point to implement actions not related to existing content fragments (import).
- How to use server-side handlers and deployment parameters for secure communication with remote service.
Creating and Configuring a Slack App
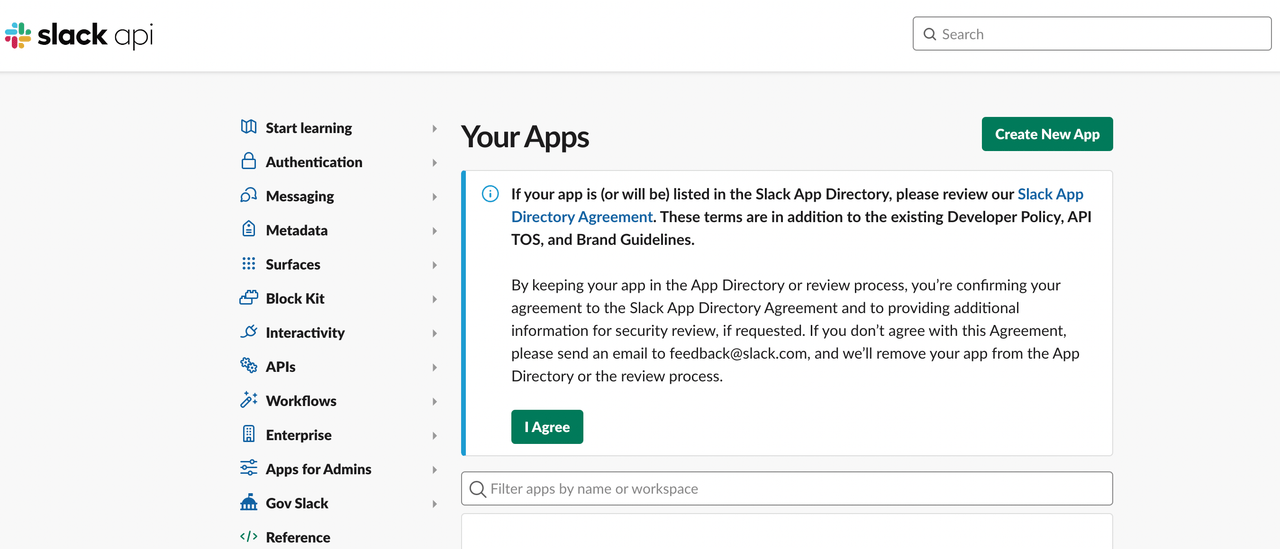
First, you will need to sign in to your Slack account at https://api.slack.com/apps.
- Once signed in, create a new Slack app by clicking
Create New App.
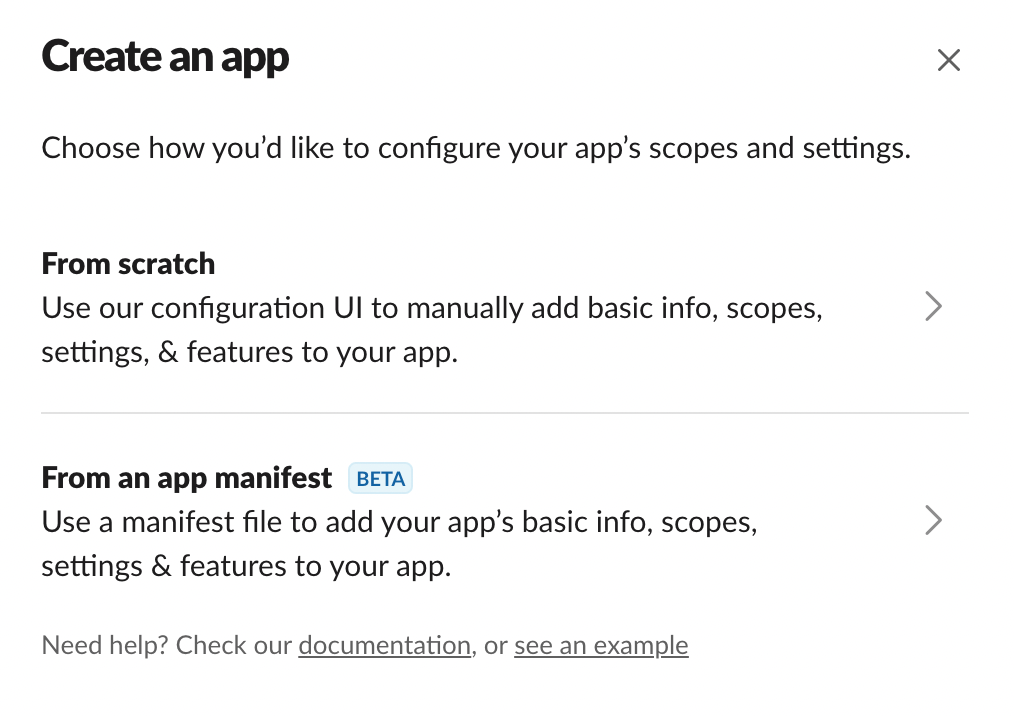
- You will see a setup wizard modal dialog like the one below.
Choose how you would like to configure your app's scopes and settings. To make things simple, choose
From an app manifest.
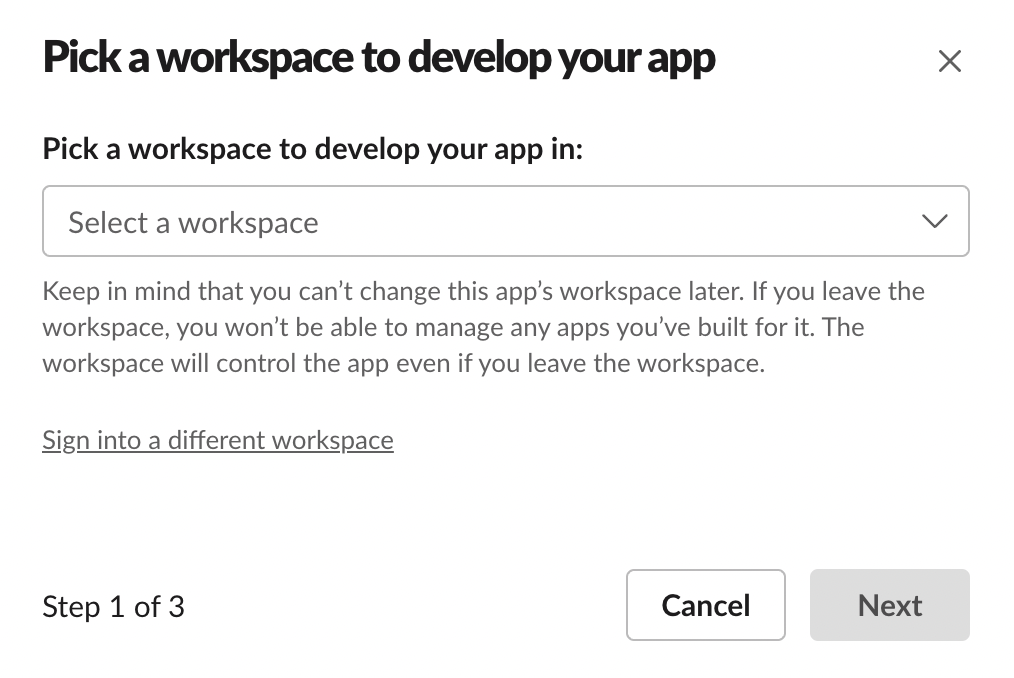
- Next, you are prompted to pick a workspace to develop your app in. Select the one that you are interested in.
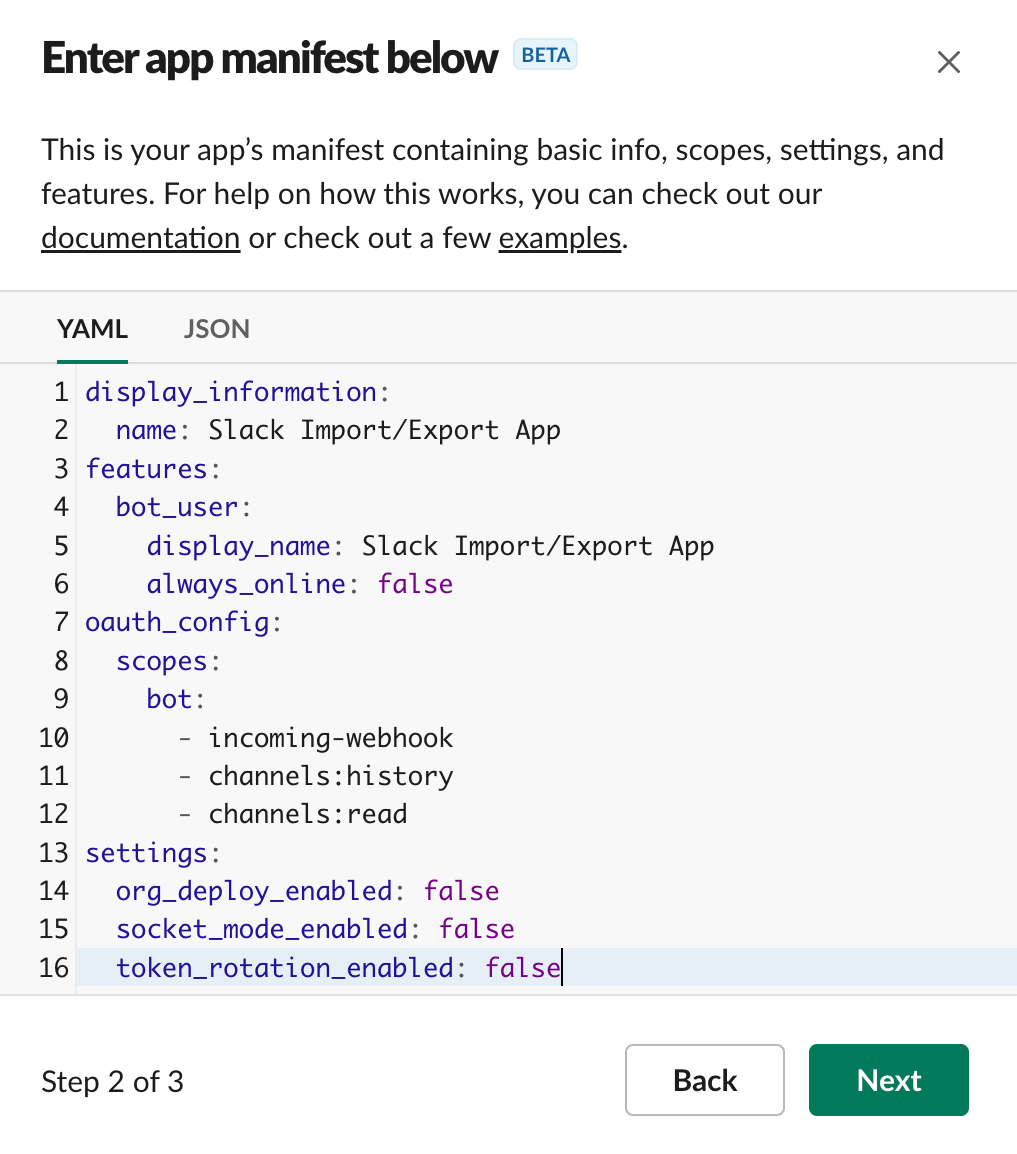
- Next, you need to enter an app manifest either in YAML or JSON. The app's manifest contains basic info, scopes, settings, and features. Simply copy and paste the YAML below:Copied to your clipboarddisplay_information:name: Slack Import/Export Appfeatures:bot_user:display_name: Slack Import/Export Appalways_online: falseoauth_config:scopes:bot:- incoming-webhook- channels:history- channels:readsettings:org_deploy_enabled: falsesocket_mode_enabled: falsetoken_rotation_enabled: false
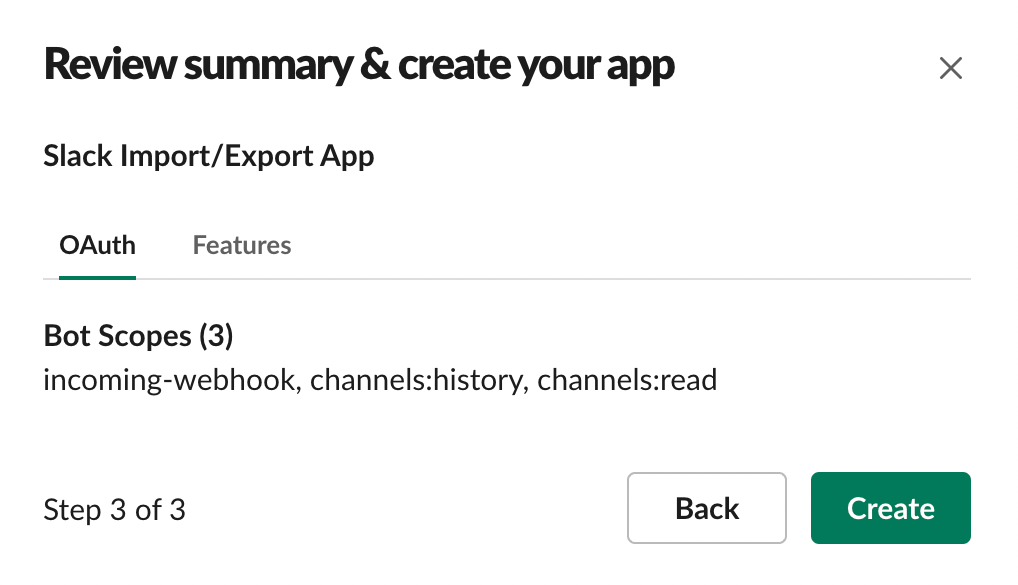
- Review the configuration of your Slack app and click
Create.
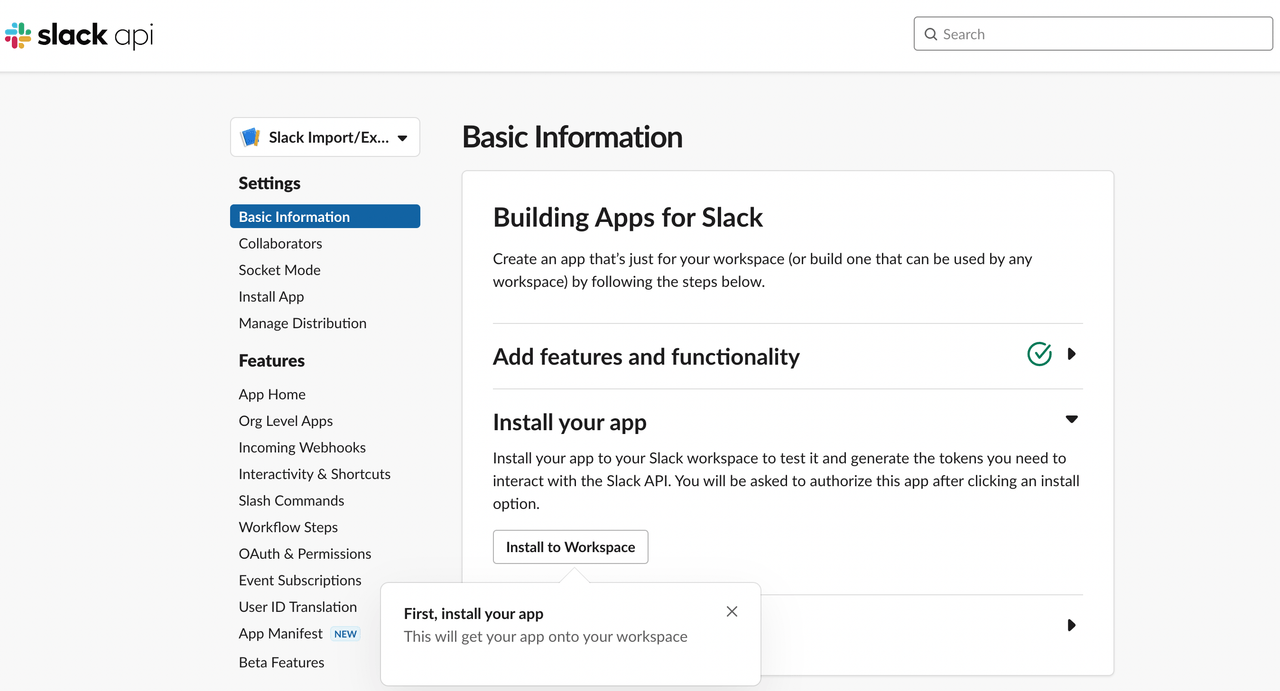
- Next, you need to install the newly created Slack app to your selected workspace by clicking the
Install to Workspacebutton. This will also generate the tokens you need to interact with the Slack APIs.
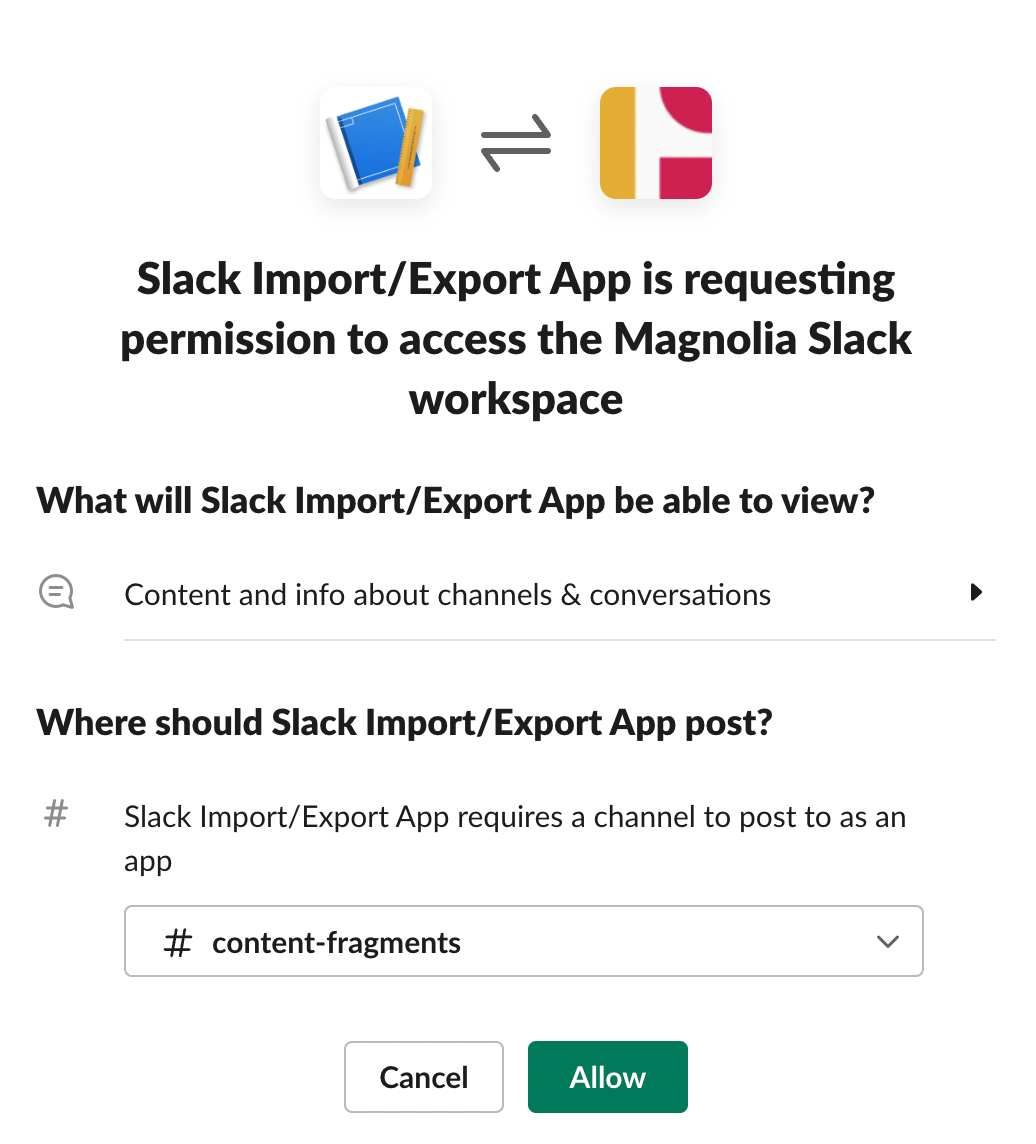
- Next, your Slack app needs permission to access the selected workspace. Choose the channel where you would like the Slack app to post and click
Allow.
Finding the Slack Configuration
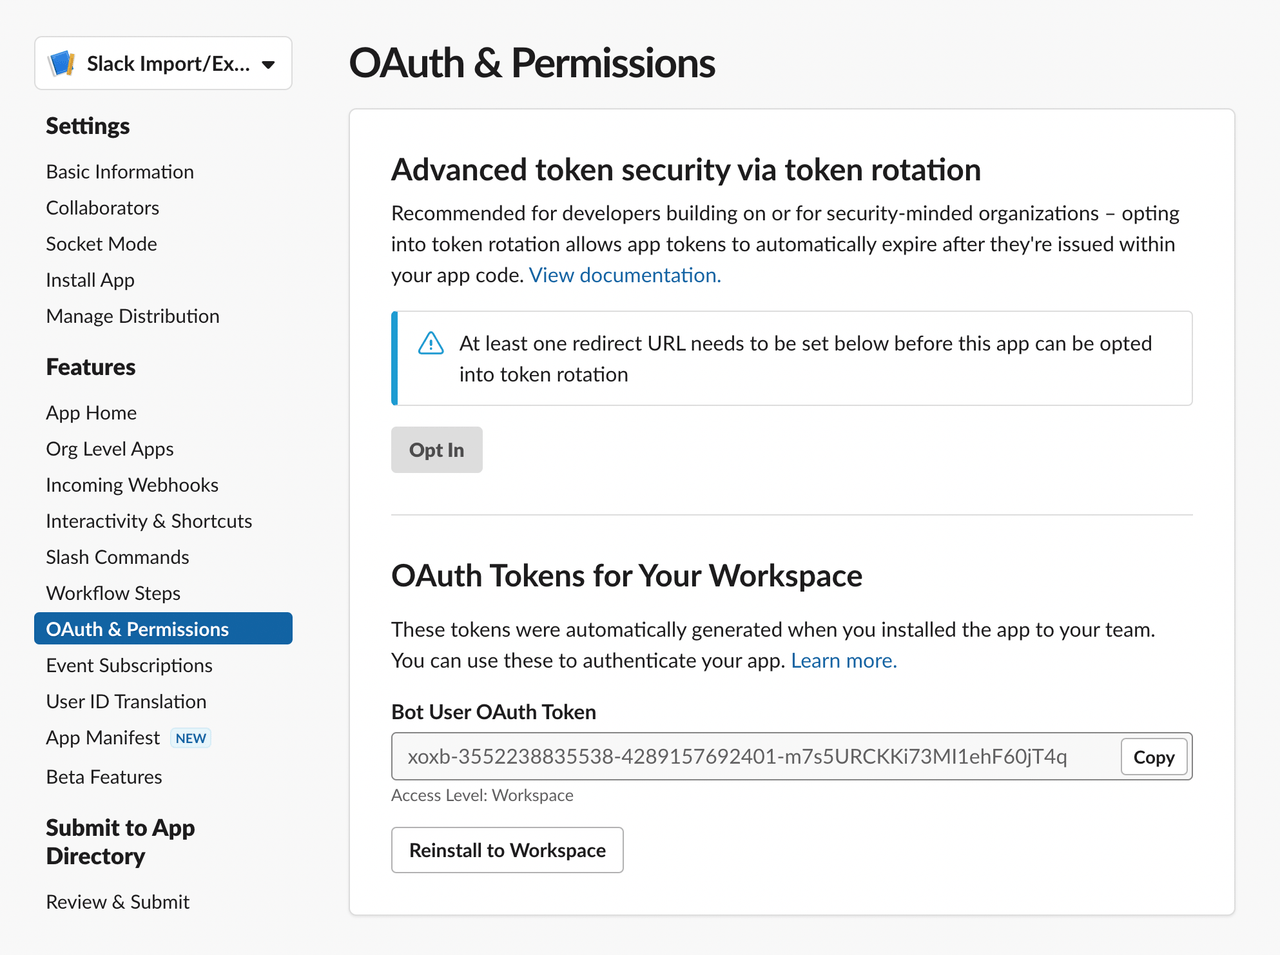
Your Slack app should now be set up with the correct permissions and requested scopes. The incoming webhook URL and OAuth token should also be generated.
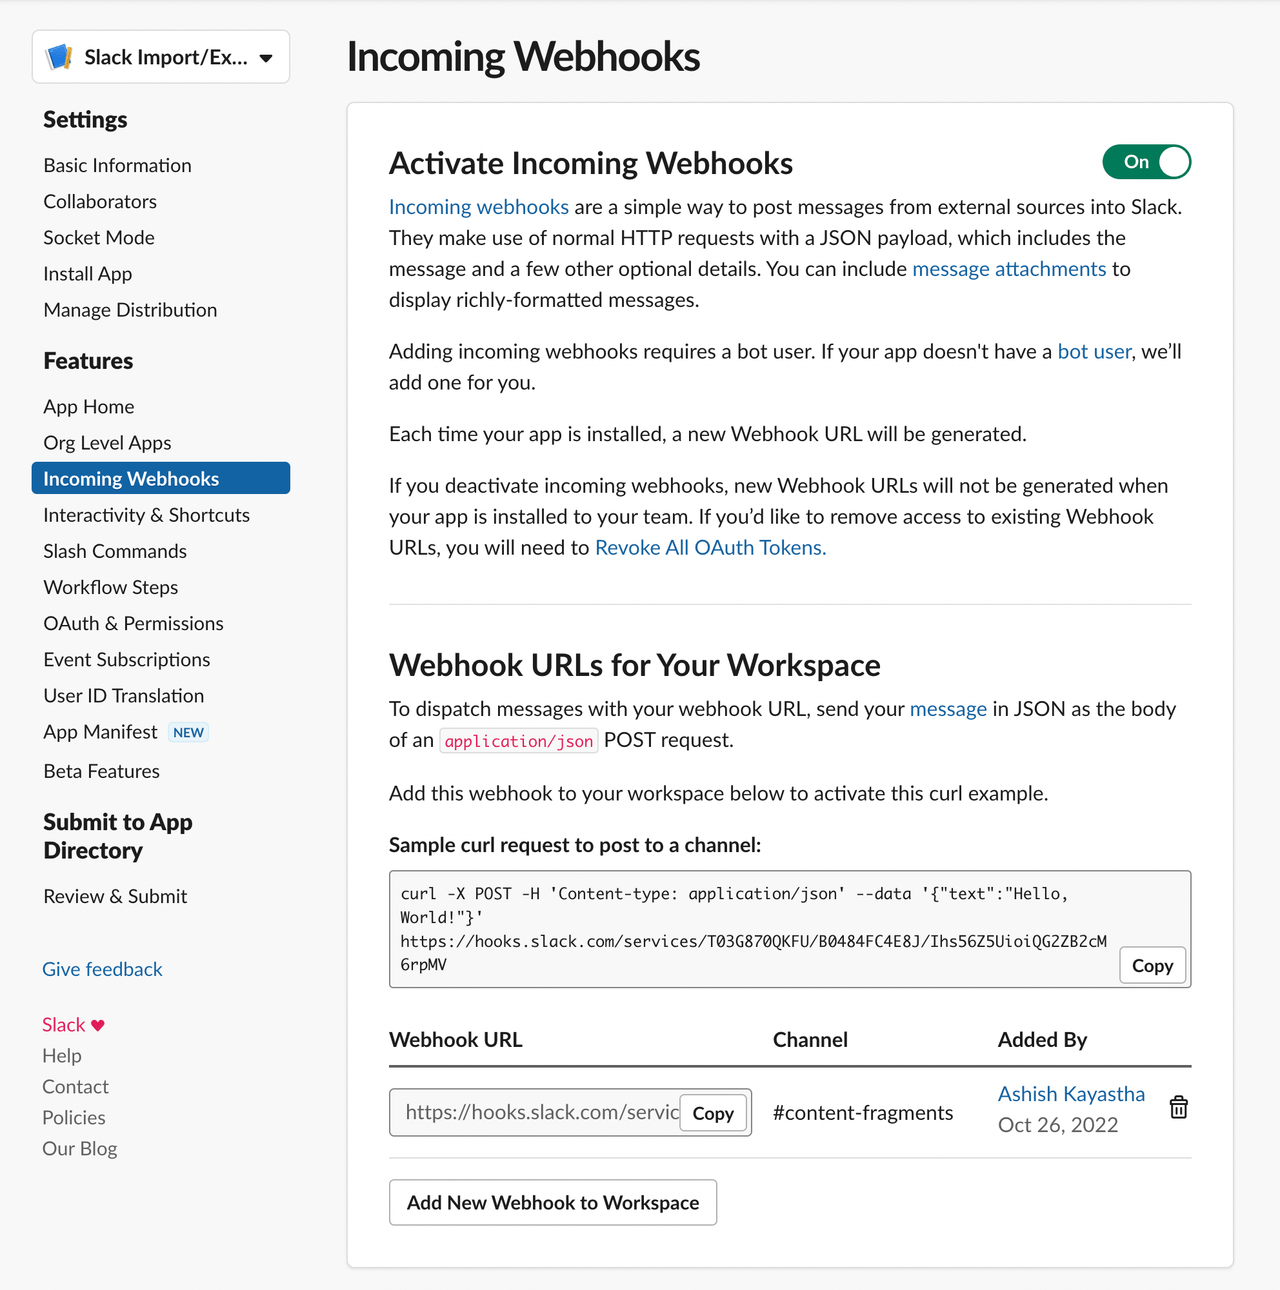
- You can find your Slack webhook URL by clicking
Incoming Webhookssubsection under theFeaturessection. You need to copy the shown URL and configure it in your App Builder extension project's.envfile.
- Similarly, you can find your Slack app's OAuth token by clicking
OAuth & Permissionssubsection under theFeaturessection. Copy the token string calledBot User OAuth Tokenand configure it in your App Builder extension projects's.envfile.
Adding the Slack App to a Channel
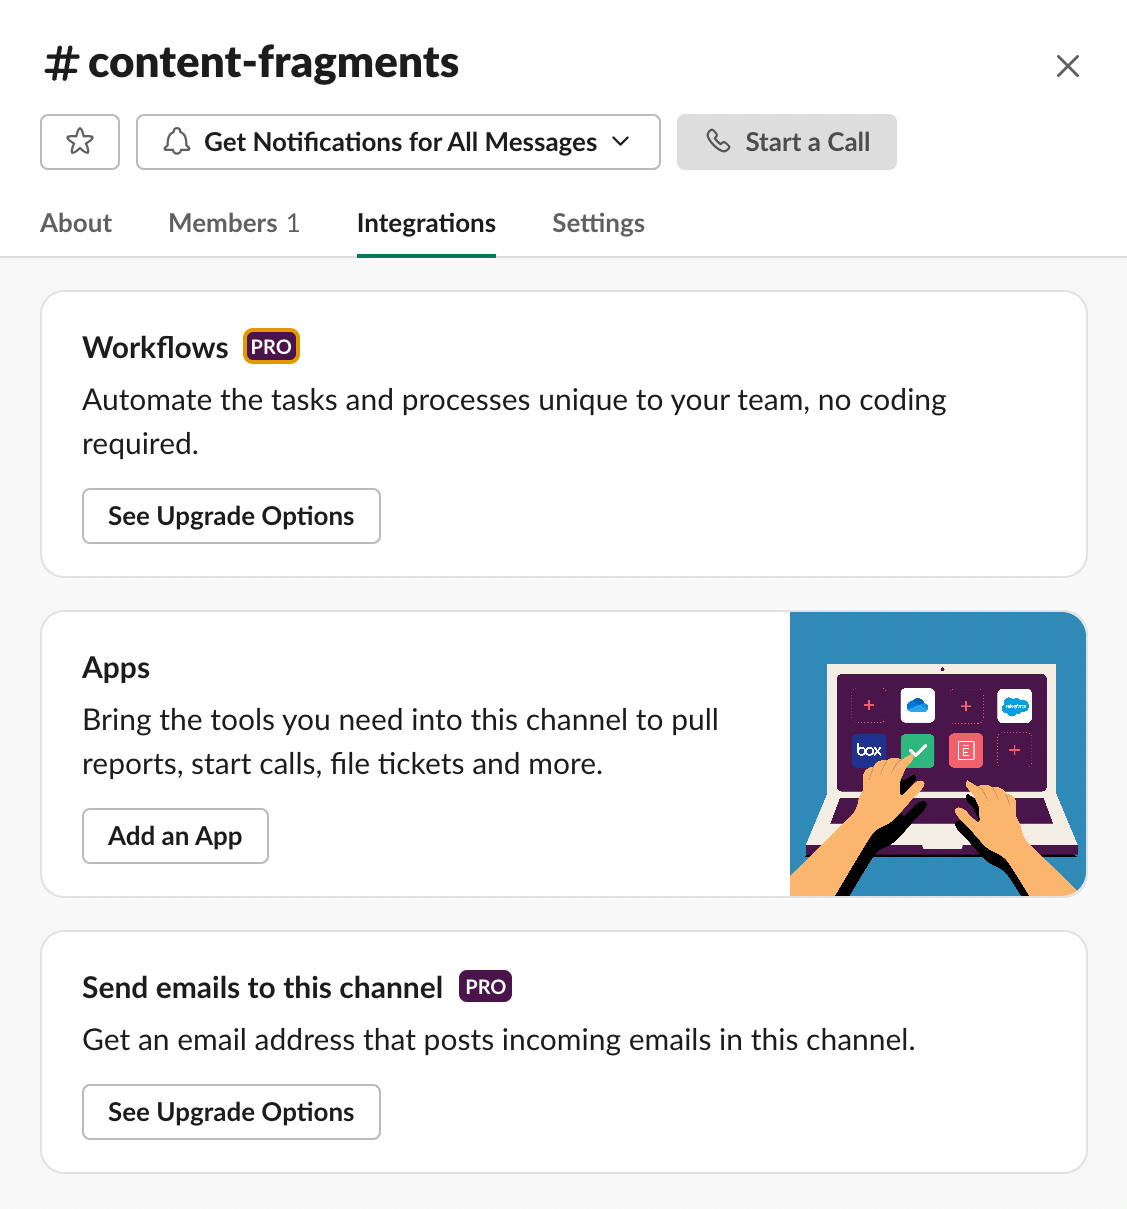
Finally, you need to add the Slack app to your desired channel where you would like to post and read from. Open channel details by either right clicking on your desired channel (Side Bar) or click on the header of the channel. You can find the Add an App button in Apps section under the Integrations tab. Add your Slack app by clicking on that button.
You are now all set to deploy the Slack Import/Export demo extension to Adobe I/O and use it in the AEM Content Fragments Console.
