Building your first UXP plugin
This tutorial will walk you through building your very first UXP plugin. You will learn to scaffold one from an existing template, customize it, and run it in Premiere.
Prerequisites
Before you start, make sure you have the following software installed on your machine:
- Premiere (v25.6) or later.
- UXP Developer Tool (v2.2) or later.
- A Code Editor of your choice—for example, Visual Studio Code or Cursor.
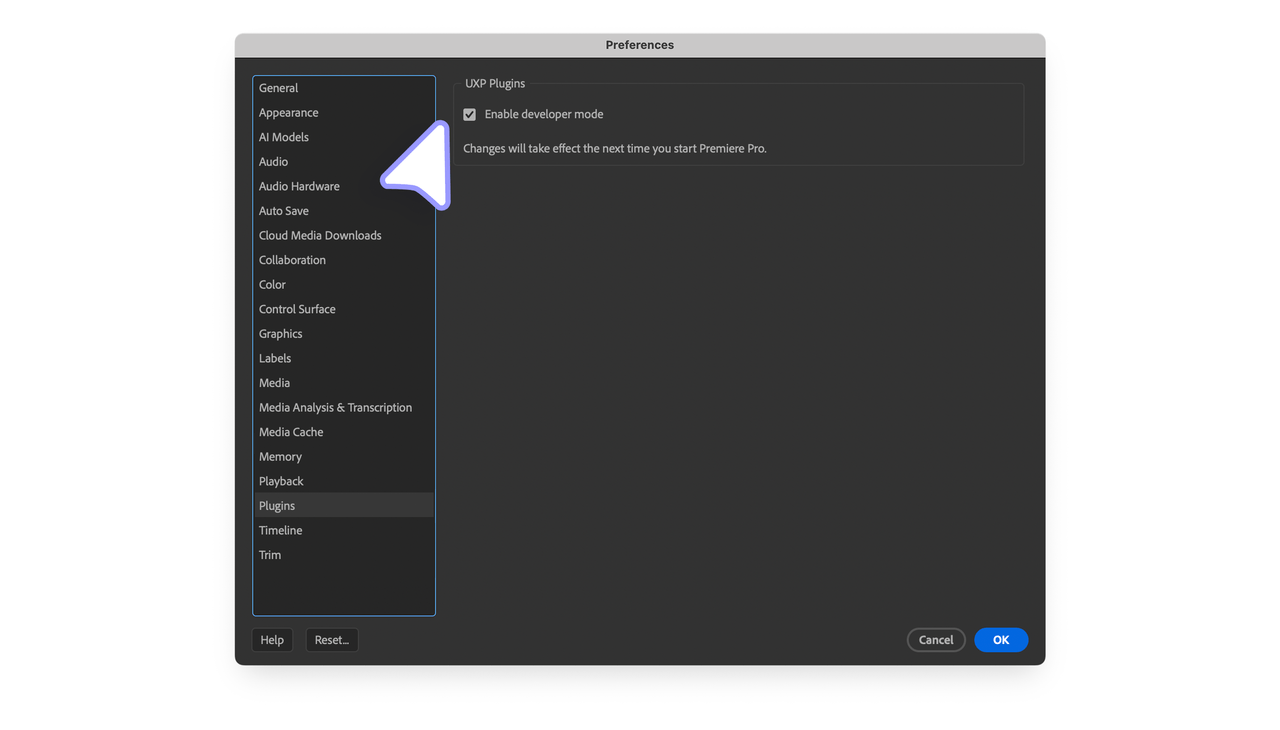
Premiere's Developer Mode should be enabled. Open the Settings menu, select the Plugins tab and select the Enable developer mode checkbox. You will need to restart Premiere for the changes to take effect.
Development Workflow
1. Scaffold your Plugin
The UXP Developer Tool (UDT) provides a quick way to scaffold your plugin project from a set of starter templates. Open the UDT and click Create Plugin.
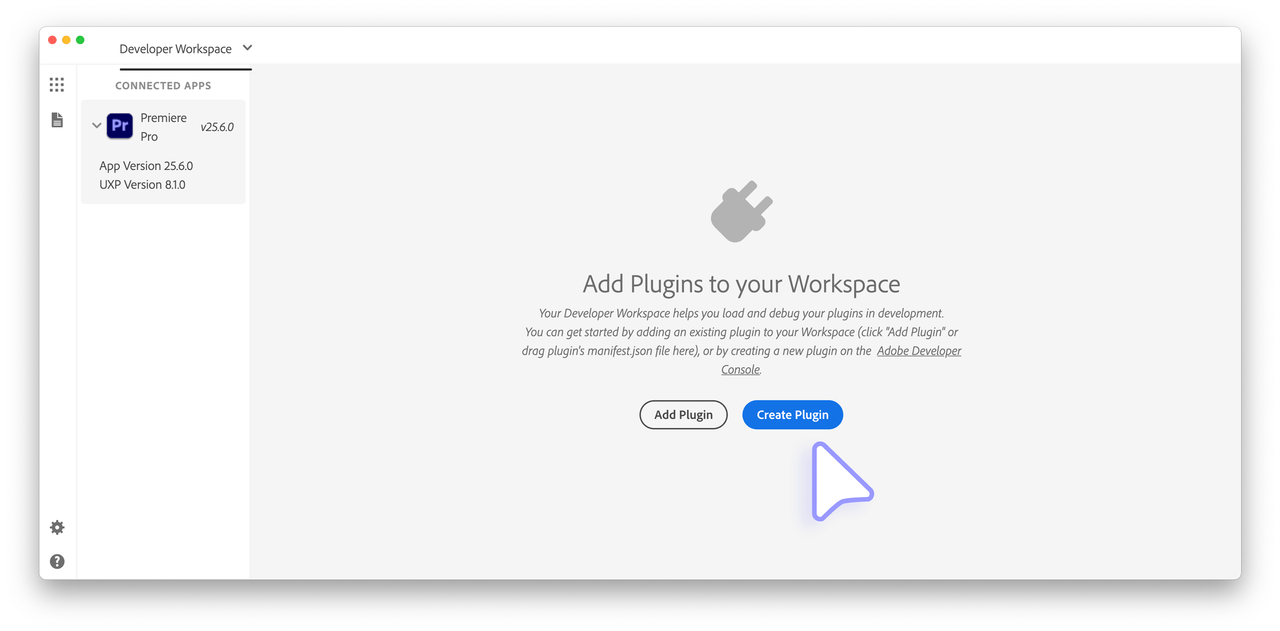
A dialog appears, allowing you to set the project details:
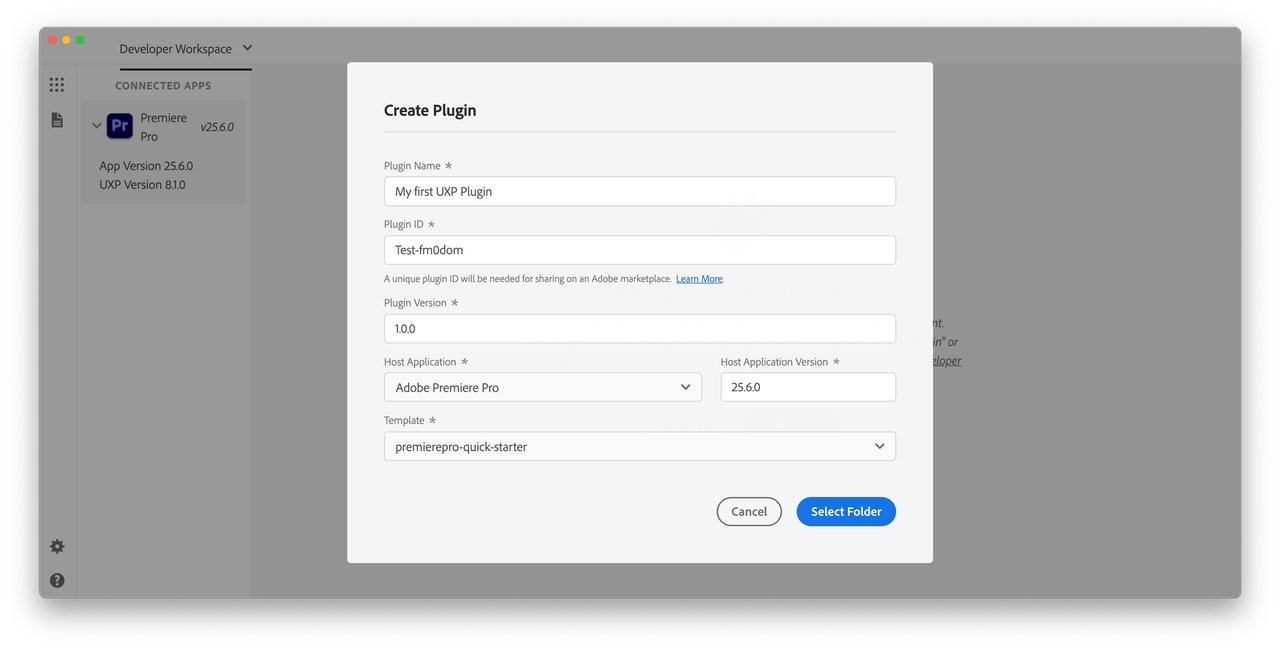
Please enter the following information:
| Field | Value |
|---|---|
Name | My first UXP Plugin |
Plugin ID | Leave it as is |
Host Application | Adobe Premiere |
Host Application Version | 25.6 |
Template | premierepro-quick-starter |
Then click Select Folder and choose a location on your computer where you want to scaffold the plugin. The UXP Developer Tool will create a new folder named after the Plugin ID in the desired location. The folder will contain the following files:
Copied to your clipboardTest-fm0dom├── manifest.json 🔧 Plugin configuration├── index.html 🌐 User Interface├── index.js 💻 Logic└── README.md 📝 Documentation
2. Test in Premiere
Now that you have scaffolded your plugin, you can load it in Premiere. Make sure the application is running and the UXP Developer Tool is connected to it; it should appear in the left pane.
In UDT, click Load & Watch in your plugin's row:
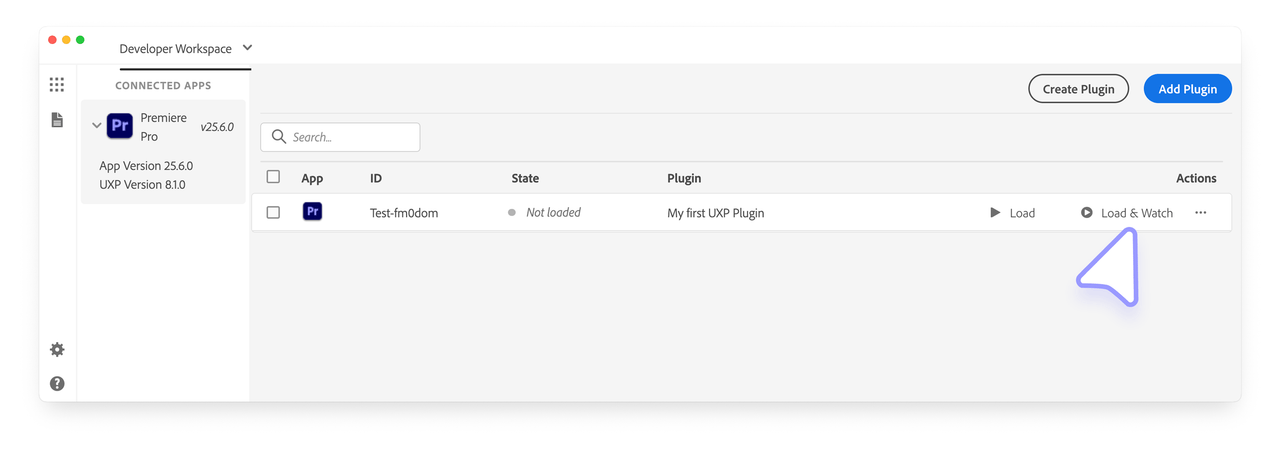
This shortcut is for the Load and Watch actions, which you can perform separately. The result will be the same; the plugin will be loaded in Premiere, and UDT will watch for changes in the plugin's source code and reload it automatically.
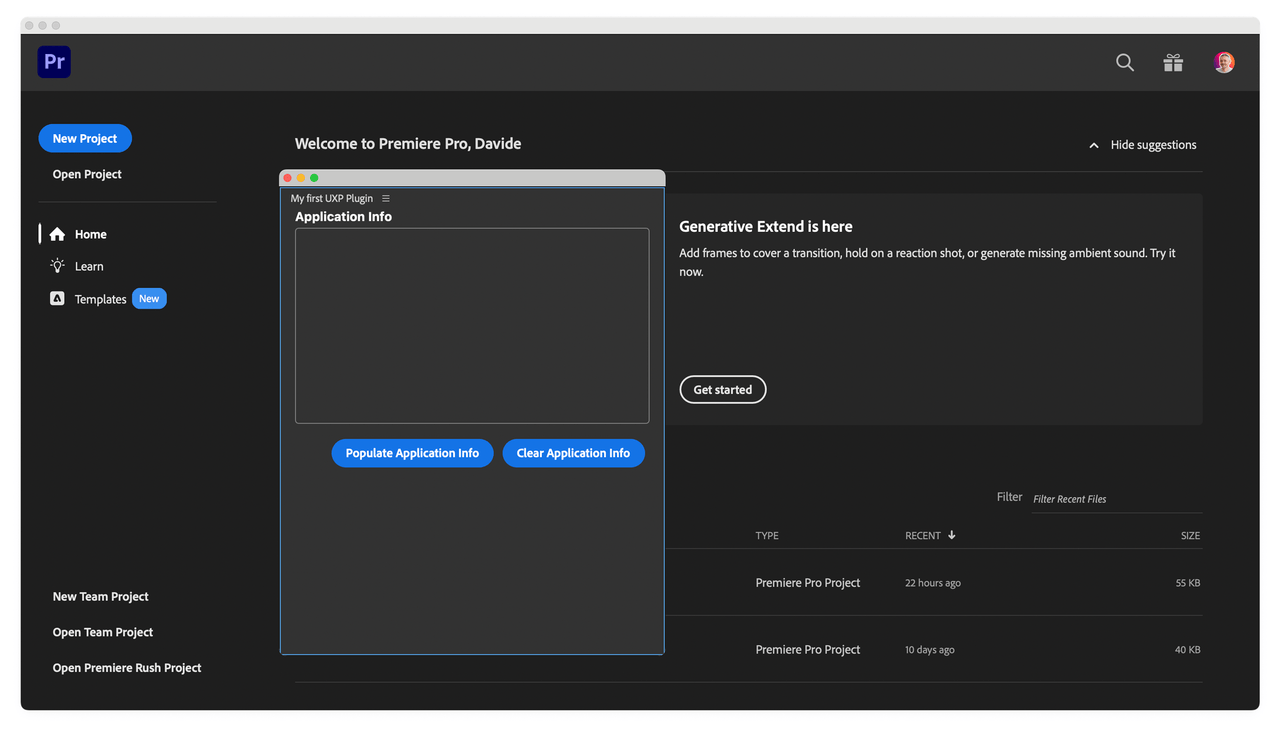
If you have closed the plugin, you can always show it again from Premiere's Window > UXP Plugins menu.
3. Edit the plugin's UI
Now that your plugin is running in Premiere, let's make it your own. Open the index.html file in your code editor. This file contains the HTML code that defines the visual content of your plugin's panel.
Copied to your clipboard<!DOCTYPE html><html><head><script src="main.js"></script><link rel="stylesheet" href="style.css" /></head><body><h4>Application Info</h4><div class="main-div"><sp-body id="plugin-body"> </sp-body></div><footer><sp-button id="btnPopulate">Populate Application Info</sp-button><sp-button id="clear-btn">Clear Application Info</sp-button></footer></body></html>
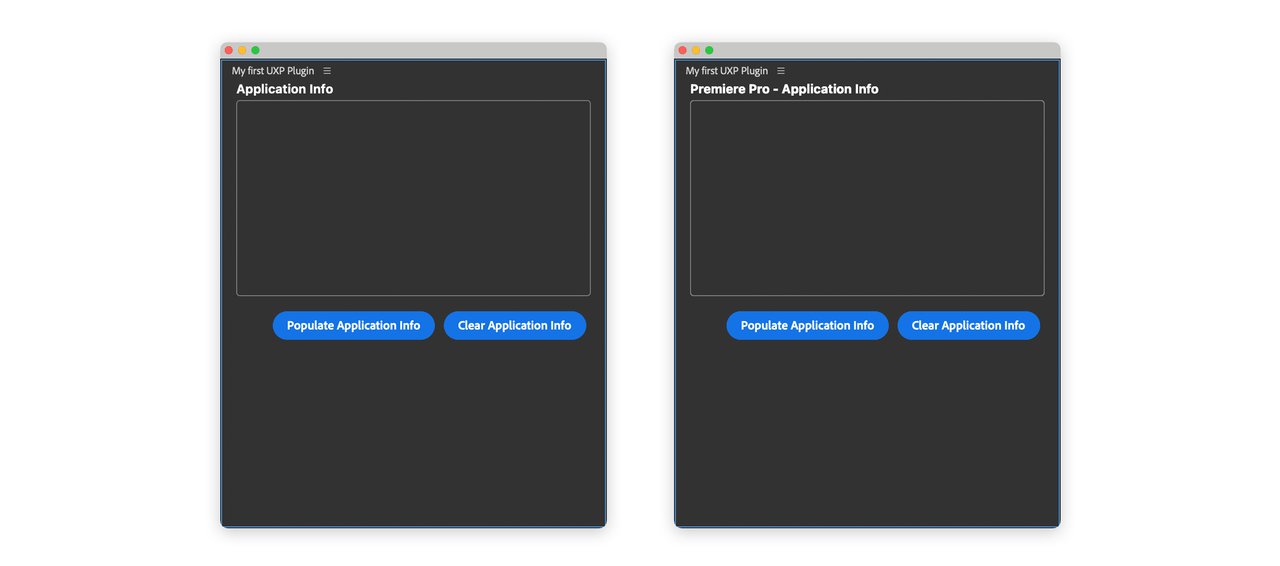
Let's change the heading to something slightly different:
Copied to your clipboard<body><h4>Premiere - Application Info</h4>
Thanks to the Watch & Reload feature, the changes will be automatically reflected in the host application—see the new heading in the plugin's panel below.
Manifest changes
If you make any changes to the manifest.json file, you must manually unload and reload the plugin. In the UXP Developer Tool, in the row for your plugin, click Unload and then Load & Watch once more.
4. Test the plugin's logic
Now let's check what this UXP plugin can do. Open a sample project in Premiere; if you don't have one, go to the Window > Learn menu and download a sample from the Tutorials section.
Now click the Populate Application Info button in the plugin's panel.
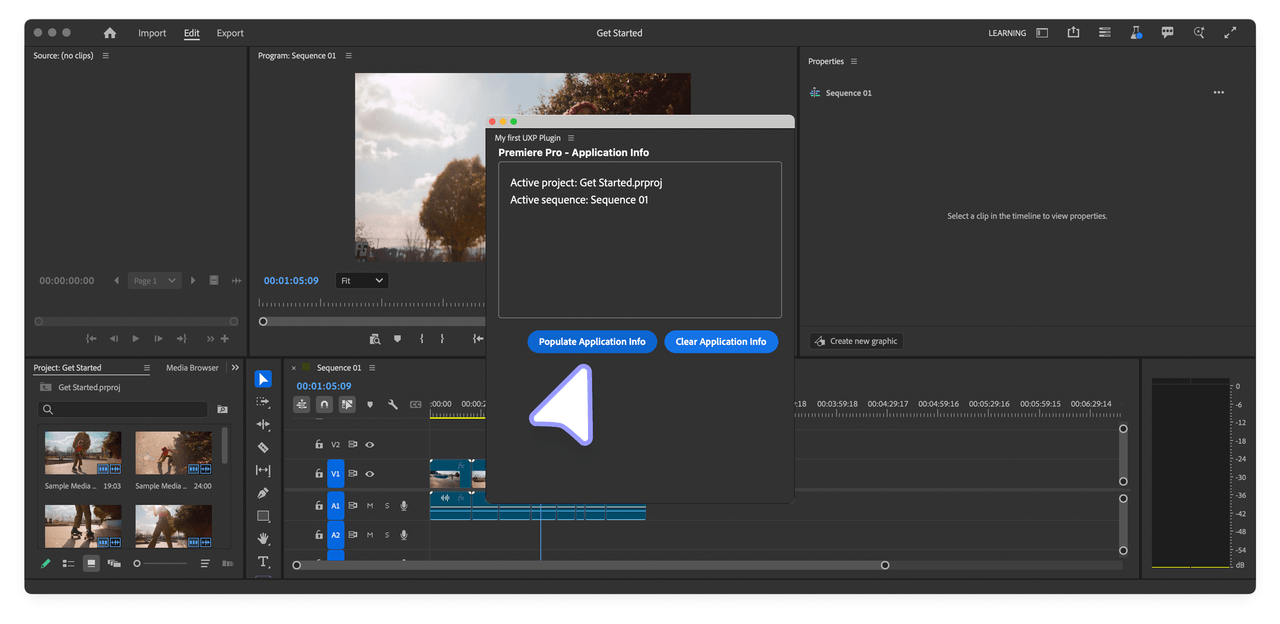
The plugin will fetch the active project and sequence information and display it in the panel. The implementation lives in the index.js file, and it uses the Premiere APIs to fetch the information. You can open the file and explore the code to see how it works.
Next steps
Congratulations! You have successfully created your first plugin. Next, we'll take a look at some of the concepts that are important for UXP plugin development.

