How to work with a SceneNodeList
This sample demonstrates how to work with a SceneNodeList in Adobe XD. The short version of this story is that a SceneNodeList is not an Array. Read on for details.
Prerequisites
- Basic knowledge of HTML, CSS, and JavaScript.
- Quick Start Tutorial
- Debugging Tutorial
Development Steps
Info Complete code for this plugin can be found on GitHub.
1. Prepare your plugin scaffold
First, edit the manifest file for the plugin you created in our Quick Start Tutorial.
Replace the uiEntryPoints field of the manifest with the following:
Copied to your clipboard"uiEntryPoints": [{"type": "menu","label": "Create Elements","commandId": "createElements"},{"type": "menu","label": "Filter and Color","commandId": "filterAndColor"}]
If you're curious about what each entry means, see the manifest documentation, where you can also learn about all manifest requirements for a plugin to be published in the XD Plugin Manager.
Then, update your main.js file, mapping both of the manifest's commandId to their respective handler functions.
Replace the content of your main.js file with the code below.
Copied to your clipboardfunction createElements(selection) {// The body of this function is added later}function filterAndColor(selection, documentRoot) {// The body of this function is added later}module.exports = {commands: {createElements,filterAndColor,},};
Note the different use of contextual arguments in each function: the first function only makes use of selection, which the second makes use of both selection and documentRoot. We'll look at why documentRoot is used in a later step.
The remaining steps in this tutorial describe additional edits to the main.js file.
2. Require in XD API dependencies
For this tutorial, we just need access to two XD scenegraph classes and one XD module.
Add the following lines to the top of your main.js file:
Copied to your clipboard// Add this to the top of your main.js fileconst { Artboard, Rectangle, Ellipse, Text, Color } = require("scenegraph");
Now the Artboard, Rectangle, Ellipse, Text, and Color classes are required in and ready to be used.
3. Create the handler function for createElements
This function will do what it says on the label: create elements in the XD document. It's just here for the purpose of generating elements that will help us learn about the SceneNodeList in the next section.
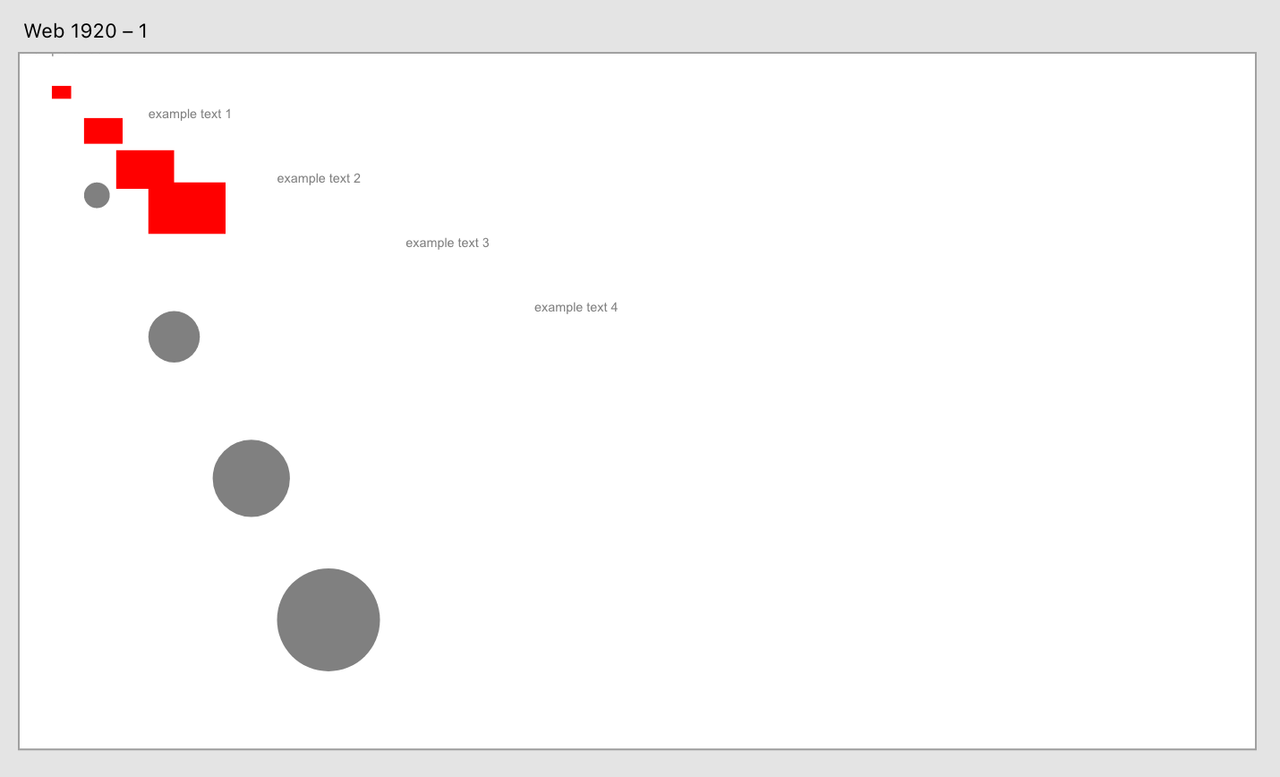
Because of that, we won't go into detail about the createElements function. In short, it will create a number of rectangles, ellipses, and text elements, and put them on your XD artboard.
Copied to your clipboardfunction createElements(selection) {for (let i = 0; i < 5; i++) {let rectangle = new Rectangle();rectangle.width = 30 * i;rectangle.height = 20 * i;rectangle.fill = new Color("gray");selection.insertionParent.addChild(rectangle);rectangle.moveInParentCoordinates(50 * i, 50 * i);let ellipse = new Ellipse();ellipse.radiusX = 20 * i;ellipse.radiusY = 20 * i;ellipse.fill = new Color("gray");selection.insertionParent.addChild(ellipse);ellipse.moveInParentCoordinates(100 * i, 200 * i);let text = new Text();text.text = `example text ${i}`;text.styleRanges = [{length: text.text.length,fill: new Color("gray"),fontSize: 20,},];selection.insertionParent.addChild(text);text.moveInParentCoordinates(200 * i, 100 * i);}}
We'll run the command for this function in a later step.
4. Create the handler function for filterAndColor
So let's take a look at working with a SceneNodeList!
The function we create in this step will filter all content on the artboard for rectangles, and then color only the rectangles red.
Recall that in the first step, we made a note of contextual arguments in command handlers, and particularly that this filterAndColor function makes use of the second documentRoot argument.
Like any SceneNode, documentRoot has a .children property that returns a SceneNodeList.
info A
SceneNodeListis not an Array. One notable difference is that, with aSceneNodeList, you access elements in the list using the#atmethod (for example,node.children.at(0)to get the first node in the list). You can learn more about theSceneNodeListclass here.
Let's fill out our handler function. Each of the numbered comments are explained below the code:
Copied to your clipboardfunction filterAndColor(selection, documentRoot) {documentRoot.children.forEach((node) => {// [1]if (node instanceof Artboard) {// [2]let artboard = node;let rectangles = artboard.children.filter((artboardChild) => {// [3]return artboardChild instanceof Rectangle;});rectangles.forEach((rectangle) => {// [4]rectangle.fill = new Color("red");});}});}
- Start from the
documentRootnode and traverse down the tree using the.childrenproperty. Since.childrenis aSceneNodeList, it has a#forEachmethod that will let us iterate through the list, node by node. - Since we started at the
documentRootlevel, the first thing we need to do is look for the artboards in the document. This line ensures that we only traverse down further if the current childnodeis an artboard. - Once we've found an artboard, we look at its
.childrenproperty, which is also aSceneNodeList. ThisSceneNodeList will contain all of the elements we created earlier. We use theSceneNodeList#filtermethod to filter the artboard's children down to arectangles` array. - Finally, we iteracte over the
rectanglesarray with#forEach, coloring each rectangle red as we go.
5. Run the plugin
After saving all your changes, reload the plugin in XD.
First, select an artboard and run the "Create Elements" command. You plugin will pull shapes on the artboard.
Then, run the "Filter and Color" command:

You've worked with a SceneNodeList to iterate through an artboard's contents and filter based on element type!


