Quick Start: Make your first XD plugin
Let’s walk through creating your first Adobe XD plugin together.
We'll keep things simple in this Quick Start tutorial. Once you're done, you'll have a solid grasp of the steps to take when starting to create your own XD plugin.
At the end of the tutorial, we'll suggest some next steps for going deeper with the XD plugin APIs.
Prerequisites
- Basic knowledge of HTML, CSS, and JavaScript
- A text editor to write your code in (like VSCode, Sublime Text, Brackets, Atom, etc)
Development Steps
Info Complete code for this plugin can be found on GitHub.
0. Get a plugin ID from the Adobe Developer Console
Before you start, you'll want to create a plugin project on the Adobe Developer Console.
- Go to the Adobe Developer Console and sign in or sign up
- Click "Create Empty Project"
- Create a plugin project by clicking "Add XD Plugin"
- Give it a project name. Note that this project name is not public; it is only visible to you and can be changed directly on the Console later.
- On the following page, get the 8-character unique plugin ID in the "Plugin Details" section.
- Optionally on the same page, download the starter project, which contains a functioning Hello, World sample plugin.
We'll use your plugin ID in one of the next steps.
1. Identify where your plugins are located
Adobe XD loads plugins that are in development from a develop folder in a specific location on your machine. To get to that folder, simply go to this menu item: Plugins > Development > Show Develop Folder.
This will open the develop folder, which we'll use in the next step.
2. Create your plugin scaffold
Next, you'll need to make a new folder within the develop folder to store the plugin files that you'll create below. Name your new plugin folder anything you like.
Now, let's create your plugin files. Open your favorite text editor and create two files inside of your new plugin folder with these exact names:
manifest.jsonThis file includes information about the plugin, such as its name, the menu item(s) it adds to XD, and so on.
main.jsThis file contains your JavaScript code that implements your plugin's functionality.
These two files go into your plugin's parent directory. When you have the right structure, it will look like this:
Copied to your clipboardmy-plugin-folder├── main.js└── manifest.json
It's possible to have more files if you want, but these files are the bare minimum requirement for your plugin to work, and are all we'll need for this Quick Start tutorial.
3. Create your plugin’s manifest
In the previous step, you created a file named manifest.json. Open that file and paste in this JSON object:
Copied to your clipboard{"id": "YOUR_ID_HERE","name": "Hello World sample plugin","version": "0.0.1","description": "Description of your plugin.","summary": "Summary of your plugin","languages": ["en"],"author": "Your Name","helpUrl": "https://mywebsite.com/help","host": {"app": "XD","minVersion": "13.0"},"uiEntryPoints": [{"type": "menu","label": "Create Rectangle","commandId": "createRectangle"}]}
Be sure to replace the id value with the unique plugin ID you got from the Adobe Developer Console in the first step:
Copied to your clipboard"id": "1234ABCD",
If you're curious about what each entry means, see the manifest documentation, where you can also learn about all manifest requirements for a plugin to be published in the XD Plugin Manager.
The value of the commandId property may be any string; in this case, it's createRectangle. In the next section, we will see how this string is associated with the code for our plugin.
4. Create your plugin’s code
Next, we need to create the JavaScript code for our plugin. The code lives in a file named main.js, which we created in step #2.
Paste this code into main.js:
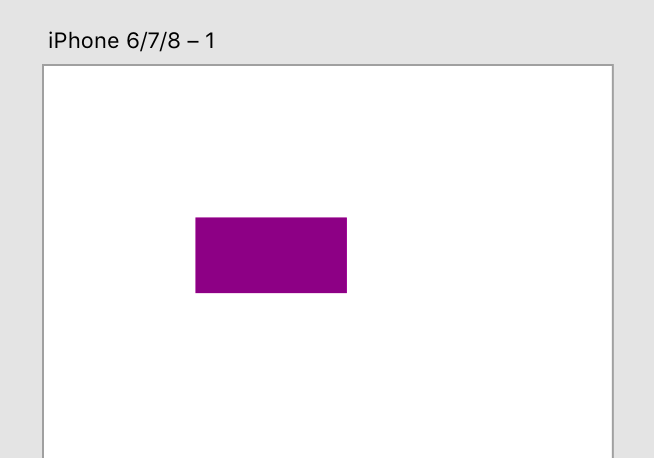
Copied to your clipboard// [1]const { Rectangle, Color } = require("scenegraph");// [2]function rectangleHandlerFunction(selection) {// [3]const newElement = new Rectangle();newElement.width = 100;newElement.height = 50;newElement.fill = new Color("Purple");// [4]selection.insertionParent.addChild(newElement);// [5]newElement.moveInParentCoordinates(100, 100);}// [6]module.exports = {commands: {createRectangle: rectangleHandlerFunction,},};
This code does the following:
- Gets references to the
RectangleandColorclasses from XD’sscenegraphmodule. There are several different API modules you can load usingrequire(). - Defines our handler function. The handler function will run when the user selects the Plugins > Create Rectangle menu item.
- Creates a new
Rectangleobject with width, height, and color properties. - Adds the
Rectangleobject to the scenegraph at the top-left (coordinates0, 0). - Puts the
Rectangleobject at coordinates100, 100within the parent element. - Exports an object, with a
commandsproperty. The value ofcommandsis an object which associates the JavaScript handler function (rectangleHandlerFunction) with your manifest'scommandIdproperty. The command ID property name (here,createRectangle) must match thecommandIdvalue declared in your manifest exactly.
5. Run your plugin
So you’ve written a plugin! How do we run it?
If you haven’t already done so, launch XD and open a new document. Then navigate to the Plugins > Create Rectangle menu item.
Alternatively, if XD was already open, select Plugins > Development > Reload Plugins.

Congratulations! You’ve built your first plugin for Adobe XD!


