Quickstart for Adobe PDF Electronic Seal API (Node.js)
To get started using Adobe PDF Electronic Seal API, let's walk through a simple scenario - Applying an electronic seal on an invoice PDF document. In this guide, we will walk you through the complete process for creating a program that will accomplish this task.
Prerequisites
To complete this guide, you will need:
- Node.js - Node.js version 18.0 or higher is required.
- An Adobe ID. If you do not have one, the credential setup will walk you through creating one.
- A way to edit code. No specific editor is required for this guide.
Step One: Getting credentials
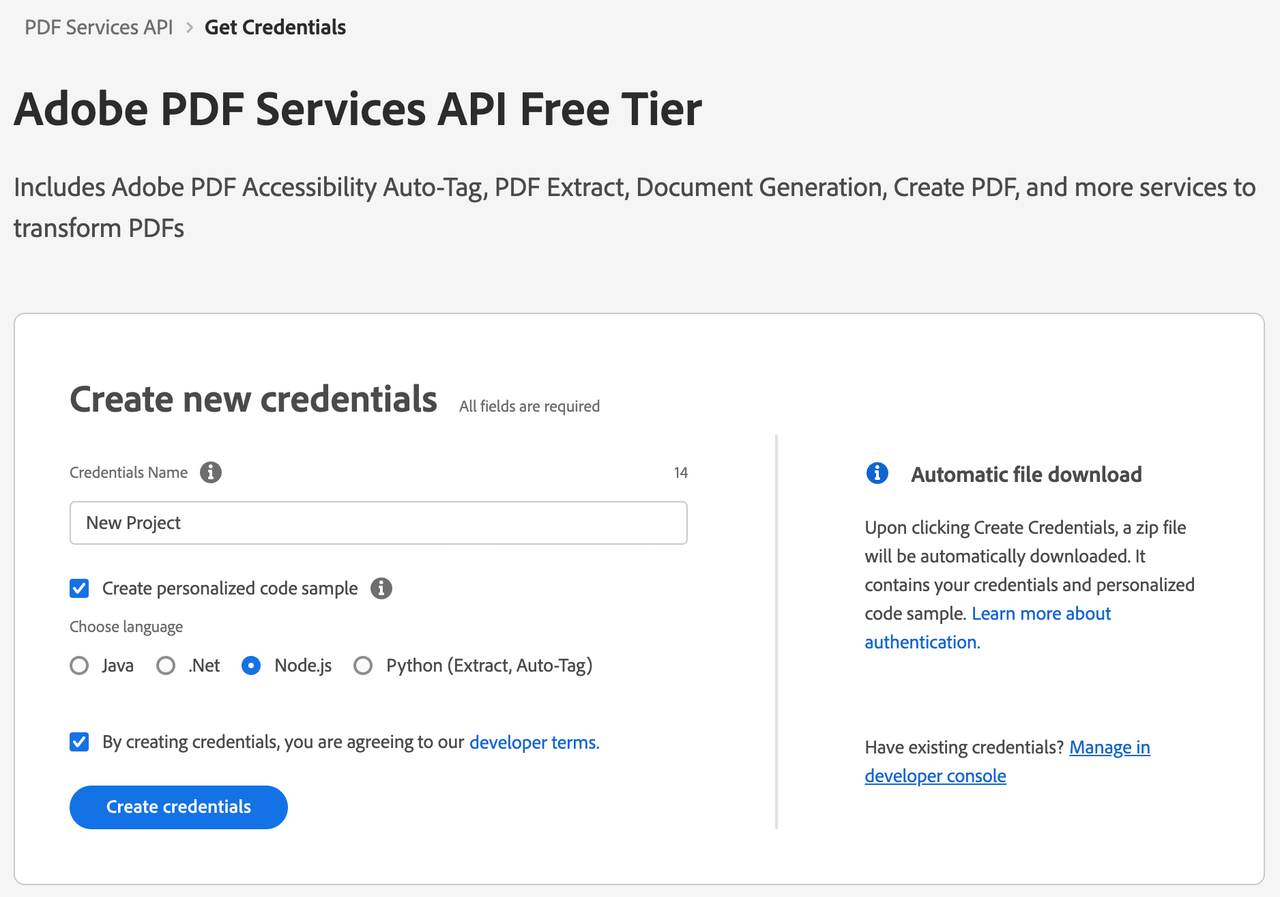
1) To begin, open your browser to https://acrobatservices.adobe.com/dc-integration-creation-app-cdn/main.html?api=pdf-services-api. If you are not already logged in to Adobe.com, you will need to sign in or create a new user. Using a personal email account is recommended and not a federated ID.

2) After registering or logging in, you will then be asked to name your new credentials. Use the name, "New Project".
3) Change the "Choose language" setting to "Node.js".
4) Also note the checkbox by, "Create personalized code sample." This will include a large set of samples along with your credentials. These can be helpful for learning more later.
5) Click the checkbox saying you agree to the developer terms and then click "Create credentials."

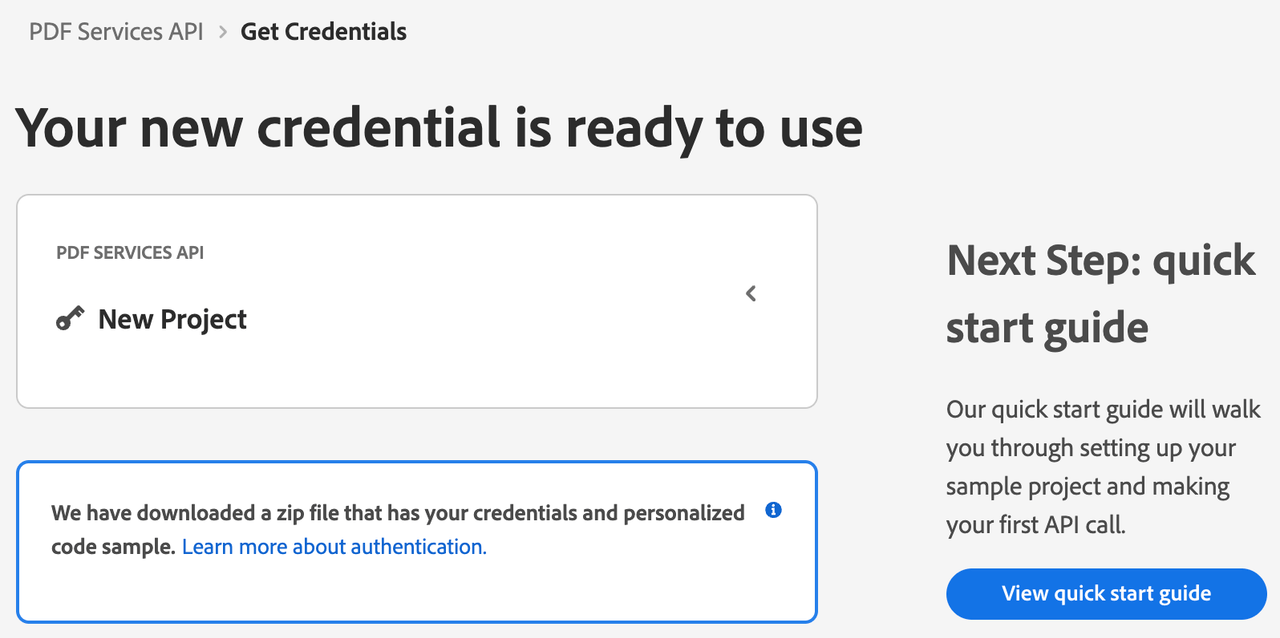
6) After your credentials are created, they are automatically downloaded:

Step Two: Setting up the project
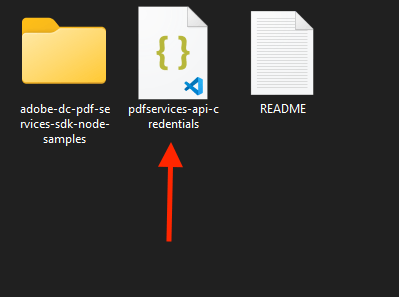
1) In your Downloads folder, find the ZIP file with your credentials: PDFServicesSDK-Node.jsSamples.zip. If you unzip that archive, you will find a folder of samples and the pdfservices-api-credentials.json file.

2) Take the pdfservices-api-credentials.json and place it in a new directory. Remember that these credential files are important and should be stored safely.
3) At the command line, change to the directory you created, and initialize a new Node.js project with npm init -y

4) Install the Adobe PDF Services Node.js SDK by typing npm install --save @adobe/pdfservices-node-sdk at the command line.
5) Install a package to help us work with ZIP files. Type npm install --save adm-zip.
At this point, we've installed the Node.js SDK for Adobe PDF Services API as a dependency for our project and have copied over our credentials files.
Our application will take an Invoice PDF document, sampleInvoice.pdf (downloadable from here), and will use the sealing options with default appearance options to apply electronic seal over the PDF document by invoking Acrobat Services API and generate an electronically sealed PDF.
6) In your editor, open the directory where you previously copied the credentials. Create a new file, electronic-seal.js.
Now you're ready to begin coding.
Step Three: Creating the application
1) We'll begin by including our required dependencies:
Copied to your clipboardconst {ServicePrincipalCredentials,PDFServices,MimeType,FieldLocation,FieldOptions,CSCAuthContext,CSCCredential,PDFElectronicSealParams,PDFElectronicSealJob,PDFElectronicSealResult,AppearanceOptions,AppearanceItem,SDKError,ServiceUsageError,ServiceApiError, DocumentLevelPermission} = require("@adobe/pdfservices-node-sdk");const fs = require("fs");
2) Set the environment variables PDF_SERVICES_CLIENT_ID and PDF_SERVICES_CLIENT_SECRET by running the following commands and replacing placeholders YOUR CLIENT ID and YOUR CLIENT SECRET with the credentials present in pdfservices-api-credentials.json file:
Windows:
set PDF_SERVICES_CLIENT_ID=<YOUR CLIENT ID>set PDF_SERVICES_CLIENT_SECRET=<YOUR CLIENT SECRET>
MacOS/Linux:
export PDF_SERVICES_CLIENT_ID=<YOUR CLIENT ID>export PDF_SERVICES_CLIENT_SECRET=<YOUR CLIENT SECRET>
3) Next, we setup the SDK to use our credentials.
Copied to your clipboard// Initial setup, create credentials instanceconst credentials = new ServicePrincipalCredentials({clientId: process.env.PDF_SERVICES_CLIENT_ID,clientSecret: process.env.PDF_SERVICES_CLIENT_SECRET});// Creates a PDF Services instanceconst pdfServices = new PDFServices({credentials});
4) Now, let's upload the assets:
Copied to your clipboardconst [sourceFileAsset, sealImageAsset] = await pdfServices.uploadAssets({streamAssets: [{readStream: sourceFileReadStream,mimeType: MimeType.PDF}, {readStream: sealImageReadStream,mimeType: MimeType.PNG}]});
5) Now, we will define the document level permission:
Copied to your clipboard// Set the document level permission to be applied for output documentconst documentLevelPermission = DocumentLevelPermission.FORM_FILLING;
6) Now, we will define seal field options:
Copied to your clipboard// Create AppearanceOptions and add the required signature appearance itemsconst sealAppearanceOptions = new AppearanceOptions({items: [AppearanceItem.DATE,AppearanceItem.SEAL_IMAGE,AppearanceItem.NAME,AppearanceItem.LABELS,AppearanceItem.DISTINGUISHED_NAME]});// Set the Seal Field Name to be created in input PDF documentconst sealFieldName = "Signature1";// Set the page number in input document for applying sealconst sealPageNumber = 1;// Set if seal should be visible or invisibleconst sealVisible = true;// Create FieldLocation instance and set the coordinates for applying signatureconst fieldLocation = new FieldLocation({left: 150,top: 250,right: 350,bottom: 200});// Create FieldOptions instance with required detailsconst sealFieldOptions = new FieldOptions({visible: sealVisible,location: fieldLocation,fieldName: sealFieldName,pageNumber: sealPageNumber,});
7) Next, we create a CSC Certificate Credentials instance:
Copied to your clipboard// Set the name of TSP Provider being usedconst providerName = "<PROVIDER_NAME>";// Set the access token to be used to access TSP provider hosted APIsconst accessToken = "<ACCESS_TOKEN>";// Set the credential IDconst credentialId = "<CREDENTIAL_ID>";// Set the PIN generated while creating credentialsconst pin = "<PIN>";// Create CSCAuthContext instance using access token and token typeconst authorizationContext = new CSCAuthContext({accessToken,tokenType: "Bearer"});// Create CertificateCredentials instance with required certificate detailsconst certificateCredentials = new CSCCredential({providerName,credentialId,pin,authorizationContext,});
8) Now, let's create the job with seal parameters using certificate credentials and field options and set the seal image asset:
Copied to your clipboard// Create parameters for the jobconst params = new PDFElectronicSealParams({documentLevelPermissioncertificateCredentials,sealFieldOptions,sealAppearanceOptions});// Creates a new job instanceconst job = new PDFElectronicSealJob({inputAsset: sourceFileAsset,sealImageAsset,params,});
This set of code defines what we're doing (an Electronic Seal operation), it defines parameters for the seal job and sets input seal image asset.
9) The next code block submits the job and gets the job result:
Copied to your clipboard// Submit the job and get the job resultconst pollingURL = await pdfServices.submit({job});const pdfServicesResponse = await pdfServices.getJobResult({pollingURL,resultType: PDFElectronicSealResult});// Get content from the resulting asset(s)const resultAsset = pdfServicesResponse.result.asset;const streamAsset = await pdfServices.getContent({asset: resultAsset});
10) The next code block saves the result at the specified location:
Copied to your clipboard// Creates a write stream and copy stream asset's content to itconst outputFilePath = "./sealedOutput.pdf";console.log(`Saving asset at ${outputFilePath}`);const writeStream = fs.createWriteStream(outputFilePath);streamAsset.readStream.pipe(writeStream);
Here's the complete application (electronic-seal.js):
Copied to your clipboardconst {ServicePrincipalCredentials,PDFServices,MimeType,FieldLocation,FieldOptions,CSCAuthContext,CSCCredential,PDFElectronicSealParams,PDFElectronicSealJob,PDFElectronicSealResult,AppearanceOptions,AppearanceItem,SDKError,ServiceUsageError,ServiceApiError, DocumentLevelPermission} = require("@adobe/pdfservices-node-sdk");const fs = require("fs");(async () => {let sourceFileReadStream;let sealImageReadStream;try {// Initial setup, create credentials instanceconst credentials = new ServicePrincipalCredentials({clientId: process.env.PDF_SERVICES_CLIENT_ID,clientSecret: process.env.PDF_SERVICES_CLIENT_SECRET});// Creates a PDF Services instanceconst pdfServices = new PDFServices({credentials});// Creates an asset(s) from source file(s) and uploadsourceFileReadStream = fs.createReadStream("./sampleInvoice.pdf")sealImageReadStream = fs.createReadStream("./sampleSealImage.png");const [sourceFileAsset, sealImageAsset] = await pdfServices.uploadAssets({streamAssets: [{readStream: sourceFileReadStream,mimeType: MimeType.PDF}, {readStream: sealImageReadStream,mimeType: MimeType.PNG}]});// Set the document level permission to be applied for output documentconst documentLevelPermission = DocumentLevelPermission.FORM_FILLING;// Create AppearanceOptions and add the required signature appearance itemsconst sealAppearanceOptions = new AppearanceOptions({items: [AppearanceItem.DATE,AppearanceItem.SEAL_IMAGE,AppearanceItem.NAME,AppearanceItem.LABELS,AppearanceItem.DISTINGUISHED_NAME]});// Set the Seal Field Name to be created in input PDF documentconst sealFieldName = "Signature1";// Set the page number in input document for applying sealconst sealPageNumber = 1;// Set if seal should be visible or invisibleconst sealVisible = true;// Create FieldLocation instance and set the coordinates for applying signatureconst fieldLocation = new FieldLocation({left: 150,top: 250,right: 350,bottom: 200});// Create FieldOptions instance with required detailsconst sealFieldOptions = new FieldOptions({visible: sealVisible,location: fieldLocation,fieldName: sealFieldName,pageNumber: sealPageNumber,});// Set the name of TSP Provider being usedconst providerName = "<PROVIDER_NAME>";// Set the access token to be used to access TSP provider hosted APIsconst accessToken = "<ACCESS_TOKEN>";// Set the credential IDconst credentialId = "<CREDENTIAL_ID>";// Set the PIN generated while creating credentialsconst pin = "<PIN>";// Create CSCAuthContext instance using access token and token typeconst authorizationContext = new CSCAuthContext({accessToken,tokenType: "Bearer"});// Create CertificateCredentials instance with required certificate detailsconst certificateCredentials = new CSCCredential({providerName,credentialId,pin,authorizationContext,});// Create parameters for the jobconst params = new PDFElectronicSealParams({documentLevelPermissioncertificateCredentials,sealFieldOptions,sealAppearanceOptions});// Creates a new job instanceconst job = new PDFElectronicSealJob({inputAsset: sourceFileAsset,sealImageAsset,params,});// Submit the job and get the job resultconst pollingURL = await pdfServices.submit({job});const pdfServicesResponse = await pdfServices.getJobResult({pollingURL,resultType: PDFElectronicSealResult});// Get content from the resulting asset(s)const resultAsset = pdfServicesResponse.result.asset;const streamAsset = await pdfServices.getContent({asset: resultAsset});// Creates a write stream and copy stream asset's content to itconst outputFilePath = "./sealedOutput.pdf";console.log(`Saving asset at ${outputFilePath}`);const writeStream = fs.createWriteStream(outputFilePath);streamAsset.readStream.pipe(writeStream);} catch (err) {if (err instanceof SDKError || err instanceof ServiceUsageError || err instanceof ServiceApiError) {console.log("Exception encountered while executing operation", err);} else {console.log("Exception encountered while executing operation", err);}} finally {sourceFileReadStream?.destroy();sealImageReadStream?.destroy();}})();
Next Steps
Now that you've successfully performed your first operation, review the documentation for many other examples and reach out on our forums with any questions. Also remember the samples you downloaded while creating your credentials also have many demos.
